Configuring Workflow Input elements
Workflow Input elements are used to provide data to a workflow. At least one such element is required in a workflow for supplying the data for analysis. Input elements can be connected to any input channel expecting data.
For information about configuring reference data inputs in workflows, see Reference data and workflows. The use of the "Workflow role" option, available in tool input channels and in Input elements where reference data is expected is described there. Information about launching workflows where workflow roles have been defined is described in Specifying reference data in the launch wizard.
Configuring Input element options
By default, Input elements are configured to allow data to be selected from CLC locations listed in the Navigation Area, or from elsewhere, in which case, the data will be imported using on-the-fly import. The workflow author can limit these options (figure 15.33), as well as configure import options with non-default values. Settings can be locked if they should not be configurable when launching the workflow (see Basic configuration of workflow elements).
On-the-fly import options that can be configured in Input elements are:
- Allow any compatible importer All compatible importers will be available when launching the workflow and all the options for each importer will be configurable.
- Allow selected importers Specify particular importers to be available when launching the workflow. Options for each selected importer can be configured by clicking on the Configure Parameters button.
Note: To specify CLC data not stored in a CLC location as input to a workflow, on-the-fly import must be allowed, and CLC Format must be one of the allowed importers. See also Launching workflows individually and in batches.
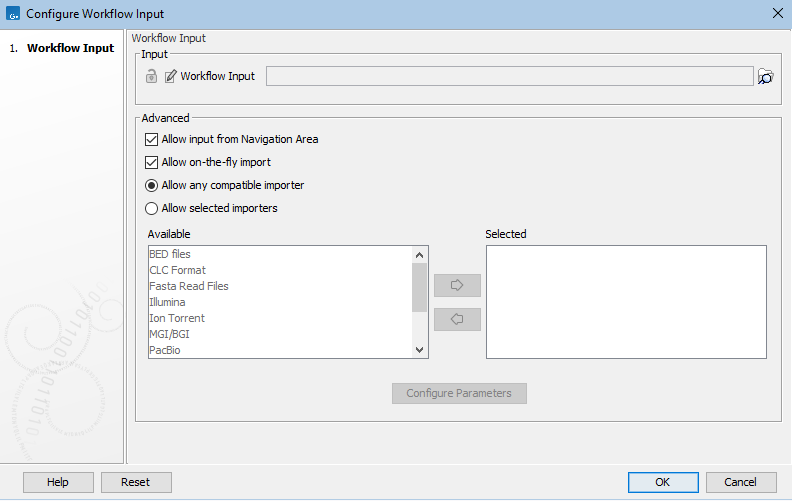
Figure 15.33: The allowed data sources are configured in Input elements. By default, both checkboxes in the Advanced section are enabled, allowing data to be selected from a CLC location (input from the Navigation Area), or from another location (on-the-fly import). For on-the-fly import, any available importer can be used by default. When only specific importers are allowed, those importers can be configured by selecting each in turn and clicking on the "Configure Parameters" button. In this case, only the data types supported by the specified importers, can be selected as input for on-the-fly import when launching the workflow.
On-the-fly import versus using workflow elements for specific importers
For importing data as the first step of a workflow, on-the-fly importer, as described above, is the most flexible and commonly used option. However, workflow input elements for specific NGS importers are also available.
Examples using each of these options are shown in figure 15.34. How these translate when launching the workflow is shown in figures 15.35 and 15.36. The relative merits of each option are outlined in table 15.1.
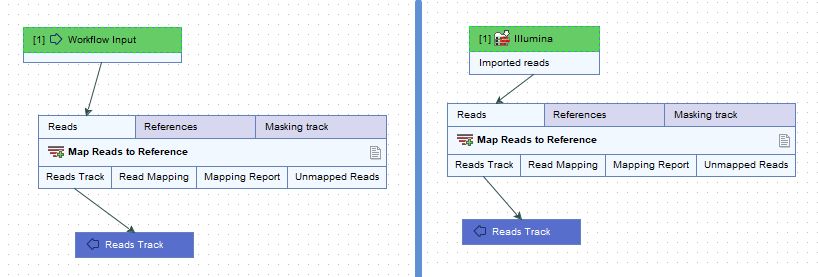
Figure 15.34: Raw data can imported as part of a workflow run in 2 ways. Left: Include an Input element. and use on-the-fly import. Right: Use a specific Import element. Here, the Illumina import element was included.
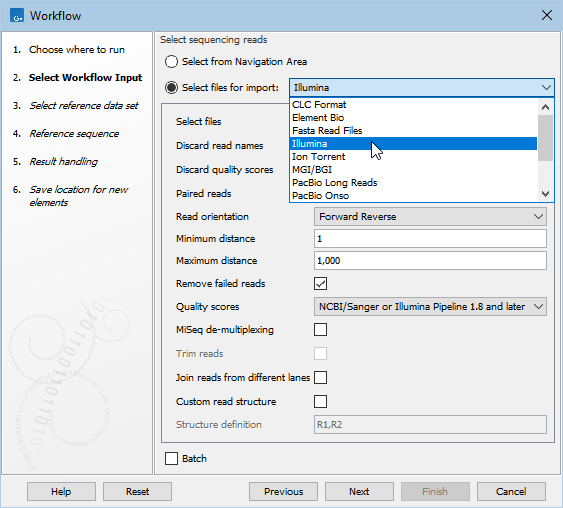
Figure 15.35: Launching a workflow with an Input element and choosing to select files to import on-the-fly.
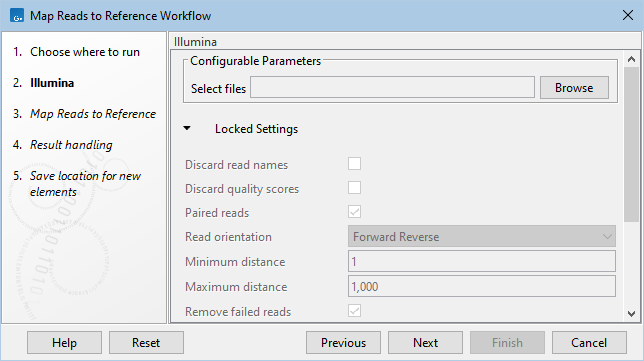
Figure 15.36: Launching a workfow with a dedicated import element, in this case, an Illumina import element.
Notes:
- The use of Iterate elements to run all or part of a workflow in batches is described in Running part of a workflow multiple times.
- Configuration options for NGS importers are described in Import high-throughput sequencing data.
Saving data imported on-the-fly
To save data elements created using on-the-fly import, connect a Save On-the-Fly Imports (![]() ) element to the relevant Input element and connect an Output element to it (figure 15.37).
) element to the relevant Input element and connect an Output element to it (figure 15.37).
The Save On-the-Fly Imports element only acts on data imported using on-the-fly import. If input data is selected from a CLC File Location, this element has no effect.
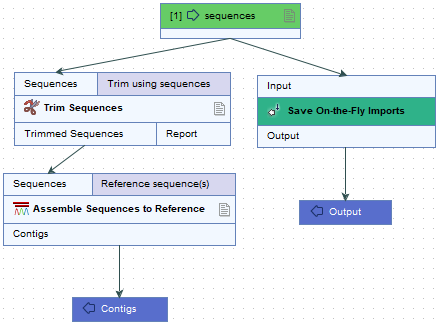
Figure 15.37: Using this workflow, data imported on-the-fly would be saved as an output from the Save On-the-Fly Imports element.
A Save On-the-Fly Imports element is not needed when an Iterate element is connected to the Input element being used for on-the-fly import. In this situation, an Output element can be connected directly to the Iterate element (figure 15.38).
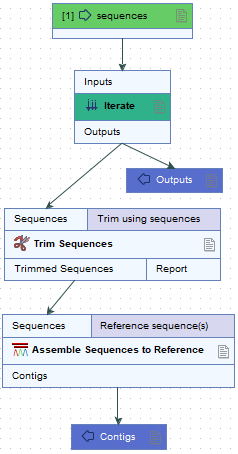
Figure 15.38: When an Iterate element is connected to an Input element, data imported on-the-fly can be saved by connecting an Output element to the Iterate element.
Ordering inputs
By default, the order that input data is prompted for in the launch wizard for a workflow reflects the order that Input elements are added to the workflow design. This order can be adjusted, so that launching the workflow successfully can be as intuitive as possible.
To change the order that inputs are prompted for, click the More... button at the bottom of the workflow editor and click Review and Modify Inputs....
In the Review and Modify Inputs dialog, inputs can be moved up and down in the list. In addition, the same functionality available when configuring an Input element directly can be carried out in this dialog (assigning workflow roles, default data elements, and setting the lock status).
A number in the Input element, to the left of its name, indicates its position in the order.
Note: These same numbers can be used in Output element naming patterns (see Configuring Workflow Output and Export elements). If output names using such patterns have already been configured, they may need to be updated.
For information on updating the processing order for tools that accept multiple incoming connections to their main input channel such as Combine Reports and Create Track List, see Connecting workflow elements.
Subsections