Add sequences to an existing contig
This section describes how to assemble sequences to an existing contig. This feature can be used for example to provide a steady work-flow when a number of exons from the same gene are sequenced one at a time and assembled to a reference sequence.
Note that the new sequences will be added to the existing contig, which will not be extended. If the new sequences extend beyond the existing contig, they will be cut off.
To run the Add Sequences to Contig tool, go to:
Tools | Molecular Biology Tools (![]() ) | Sanger Sequencing Analysis (
) | Sanger Sequencing Analysis (![]() )| Add Sequences to Contig (
)| Add Sequences to Contig (![]() )
)
or
or Right-click in the empty white area of the contig | Add Sequences to Contig (![]() )
)
This opens a dialog where you can select one contig and a number of sequences to assemble. If you have already selected sequences in the Navigation Area, these will be shown in the 'Selected Elements' box. However, you can remove these, or add others, by using the arrows to move sequences between the Navigation Area and Selected Elements boxes. You can also add sequence lists.
Often, the results of the assembly will be better if the sequences are trimmed first (see Automatic trimming).
When the elements are selected, click Next, and you will see the dialog shown in figure 23.11
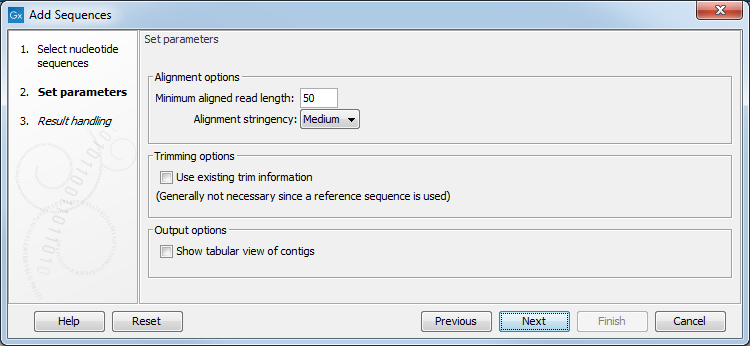
Figure 23.11: Setting assembly parameters when assembling to an existing contig.
The options in this dialog are similar to the options that are available when assembling sequences to reference. The following additional option is available:
- Show tabular view of contigs. A contig can be shown both in a graphical as well as a tabular view. If you select this option, a tabular view of the contig will be opened.
The tabular view of the contig can always be opened by clicking Table (
 ) at the bottom of the view. For more information about the tabular view of contigs, see Assembly variance table.
Click on Finish to launch the analysis.
This will start the assembly process. See View and edit contigs on how to use the resulting contig.
Note that the new sequences will be added to the existing contig which will not be extended. If the new sequences extend beyond the existing contig, they will be cut off.