Editing Metadata tables
CLC Metadata Tables can be edited using functionality under the Edit Table... button at the bottom of the Metadata Table editor (figure 14.16) and by right-clicking on a row or rows and selecting from the options presented (figure 14.17). Information can be added directly, or can be take from another CLC Metadata Table or an Excel, CSV or TSV format file.
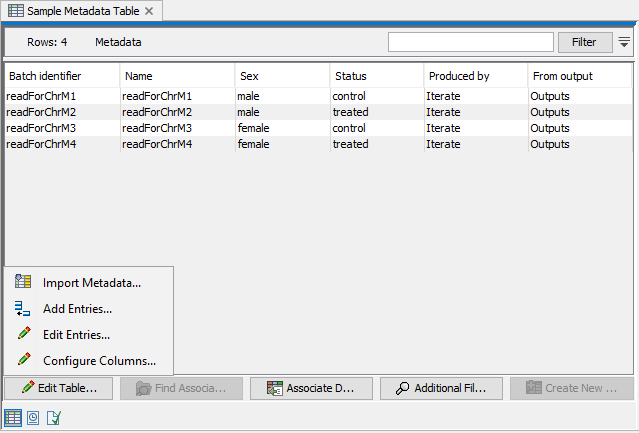
Figure 14.16: Click on the Edit Table... button to open a menu with options for adding, editing or removing information in a CLC Metadata table.
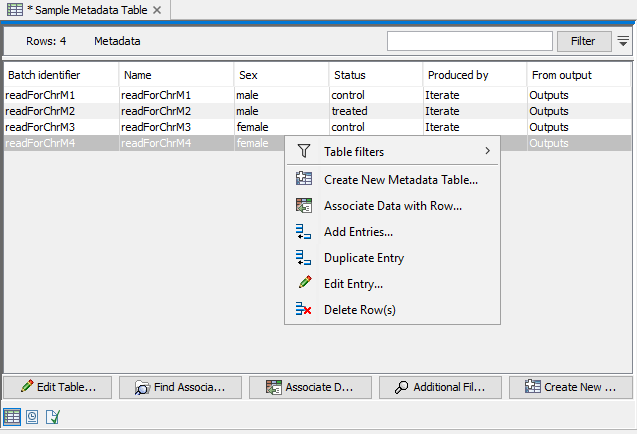
Figure 14.17: Right-click on selected rows of a CLC Metadata Table to open a menu actions that can be taken.
Edit existing rows in a CLC Metadata Table
A dialog to edit entries in a CLC Metadata Table can be opened by:
- Clicking on the Edit Table... button and selecting Edit Entries.. (
 ).
).
- Double clicking on an entry.
- Selecting an entry and hitting the Return key.
Navigate between entries using the buttons on the right. Modifications made take effect as you navigate to another row, or if you close the dialog using Done.
Right-click on an individual row in the table and select the Edit Entry.. (![]() ) option to edit just that entry. An option to delete rows is also in this menu: Delete Row(s) (figure 14.17).
) option to edit just that entry. An option to delete rows is also in this menu: Delete Row(s) (figure 14.17).
Import further rows into a CLC Metadata Table
More information can be imported into an existing CLC Metadata table by clicking on the Edit Table... button and selecting Import Metadata... (![]() ).
).
Information can be supplied in an Excel, CSV or TSV file, by clicking on the standard folder icon (![]() ), or from another CLC Metadata Table, by clicking on the browse folder (
), or from another CLC Metadata Table, by clicking on the browse folder (![]() ) icon.
) icon.
For CLC Metadata Tables with a key column, you choose whether new information should be added to existing entries, and whether rows should be added for new entries (figure 14.18). Matching is based on column names.
If there is no key column designated in the original CLC Metadata Table, as is the case in Workflow Result Metadata tables, then data from the new source can only be entered into new rows. A key column can be specified using the Configure Columns functionality described in the Add or edit columns in a CLC Metadata Table section below.
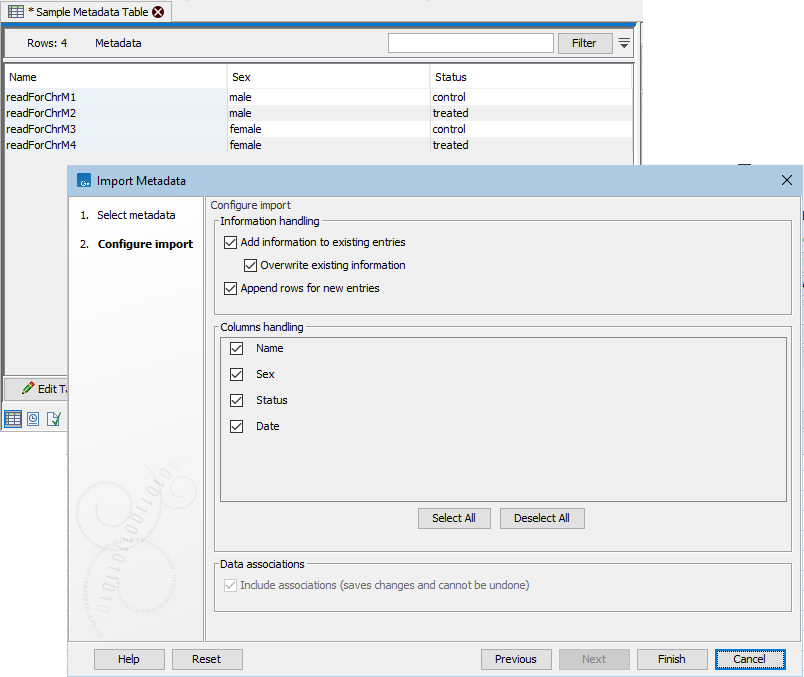
Figure 14.18: Additional information can be imported to an existing CLC Metadata table. You can choose whether new information should be added to existing entries, and whether rows should be added for new entries. The columns to import can also be specified.
Add and delete rows manually
Rows can be added to the end of the CLC Metadata table by clicking on the Edit Table... button and selecting Add Entries... (![]() ). This option is also available in the menu that opens when you right-click on a row in the table (figure 14.17).
). This option is also available in the menu that opens when you right-click on a row in the table (figure 14.17).
The option Duplicate Entry, available when you right-click on a row in the table, will duplicate that row and put it at the bottom of the table. When a key column has been designated, you will be prompted for a new value for that column for the new row. Data with an association to the original row will not automatically have an association to the new row. (A given data element can only have one association to a given CLC Metadata Table.)
Individual rows can also be added using the (![]() ) button, which inserts a new row after the current one.
) button, which inserts a new row after the current one.
Rows may be deleted using the (![]() ) button.
) button.
The (![]() ) and (
) and (![]() ) buttons are used to undo and redo changes respectively.
) buttons are used to undo and redo changes respectively.
Add or edit columns in a CLC Metadata Table
Existing columns can be edited, and new columns added, by clicking on the Edit Table... button and selecting Configure columns....
A dialog opens with information about the left-most column in the CLC Metadata Table (figure 14.19). Use the buttons on the right to navigate to other columns and to add or delete columns.
Navigate between the columns using the (![]() ) Prev and (
) Prev and (![]() ) Next buttons, or by using
left/right arrow keys with Alt key held down. Modifications made to a particular column take effect as you navigate to another column, or if you close the dialog using Done.
) Next buttons, or by using
left/right arrow keys with Alt key held down. Modifications made to a particular column take effect as you navigate to another column, or if you close the dialog using Done.
Individual columns can be added using the (![]() ) and (
) and (![]() ) buttons, which insert new columns before and after the current column respectively. Columns may be deleted using the (
) buttons, which insert new columns before and after the current column respectively. Columns may be deleted using the (![]() ) button.
) button.
The (![]() ) and (
) and (![]() ) buttons are used to undo and redo changes respectively.
) buttons are used to undo and redo changes respectively.
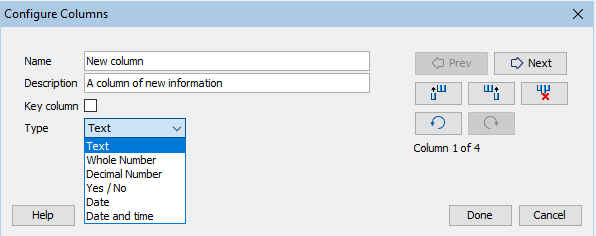
Figure 14.19: When adding a new column, a name, description and data type is specified. If it should become the key column, the Key column box should be checked. Use the buttons on the right to navigate to other columns or add further new columns.
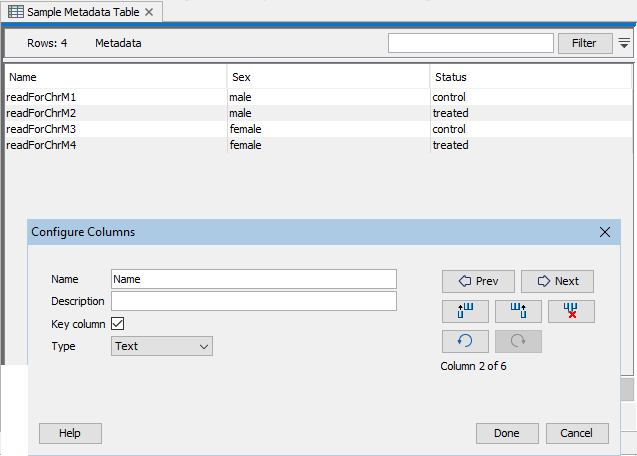
Figure 14.20: The Name column has been designated as the key column.
For each column, the following can be configured:
- Name. A mandatory header name or title for the column.
- Description. An optional description of the information that will be held in the column. The description will appear as a tool tip, visible when you hover the mouse cursor over the column name in the metadata table.
- Key column. Any column containing only unique values can be designated as the key column. If a table already has a key column, this option is disabled for other columns. Information in the key column is used when automatically creating associations from data elements.
- Type. The type of value allowed. The default data type for columns on import is text, but this can be edited to the following types:
- Text Simple text.
- Whole number Integer values, like 42 or -7.
- Decimal number Decimal values, like 3.14 or 1.72e13.
- Yes / No Yes/No or True/False values are accepted. Capitalization is not necessary.
- Date Local dates such as 2015-04-23 for April 23rd, 2015.
- Date and time Local date and time such as 2015-04-23 13:37 for 1:37pm on April 23rd, 2015. Note the use of 24-hour clock and that no time zone information is present.