Basic configuration of workflow elements
When an element is first added to a workflow, it has a default name, default values for any configurable settings, and usually, all settings are locked, meaning that their values cannot be changed when the workflow is launched. All these aspects are configurable.
Beyond affecting what is displayed in the editor, these changes can affect what is seen when launching the workflow and the settings used by default when the workflow is run.
Configuring settings in workflow elements
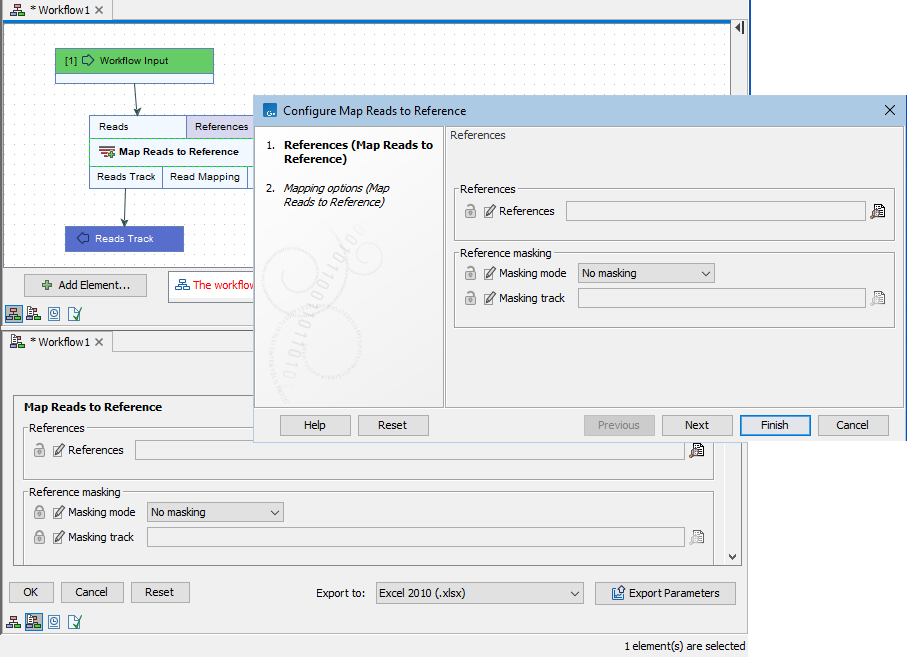
A configuration dialog for editing settings in a workflow element can be opened by:
- Double-clicking on an element name in the editor, or
- Right-clicking on an element name and choosing the Configure Element... option from the menu that appears.
These settings can also be edited in the Workflow Configuration view.
There are three main types of configuration that can be done in this dialog, each described in more detail below:
- Specifying whether a setting should be configurable when launching the workflow (locked/unlocked status)
- Updating default values for workflow settings
- Updating setting labels
Note: Clicking the Reset button in a workflow element configuration dialog sets all name and value changes in that particular configuration step back to the defaults. It has no effect on the locked/unlocked status of the settings.
- Specifying whether a setting should be configurable when launching the workflow
Beside each setting is a lock symbol. Values for locked (
 ) settings cannot be changed when launching the workflow. Values of unlocked (
 ) settings can be changed when launching the workflow.
Click on a lock icon to change it from locked (
 ) to unlocked (
 ), or vice versa.

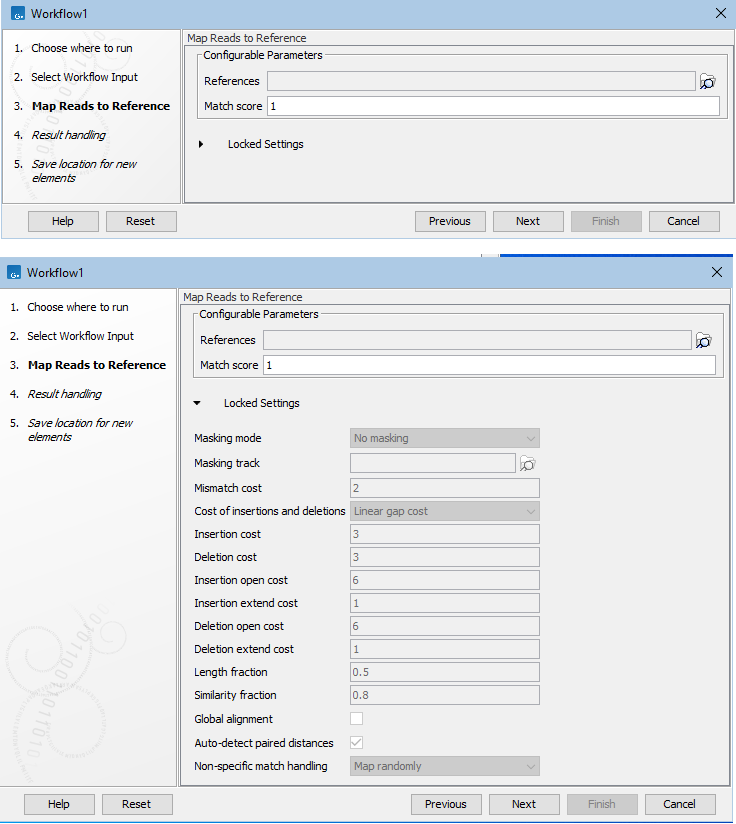
Figure 14.28: Four settings in the Create Alignment element have been unlocked. These will be presented and configurable in the workflow launch wizard.Locked settings can be listed in the launch wizard, but are not shown by default (figure 14.29).

Figure 14.29: The workflow launch wizard for the Create Alignment step of the workflow shown in figure 14.28. The configurable (unlocked) settings are in the top section. The "Locked Settings" section has been expanded, revealing the settings for this tool that cannot be changed when launching this workflow. - Updating default values for workflow settings
When analysis elements are added to a workflow, the default settings are the same as the defaults for the corresponding tool when run from the Tools menu. Changes to these settings can be made in the configuration dialog, thereby updating the default values the workflow will use when it is run.
Settings in control flow elements affect the flow of data through a workflow, and in many cases, especially when working with Fork or Branching elements, configuration will be needed.
- Updating setting labels
Updating a setting's label changes what is displayed in the workflow launch wizard.
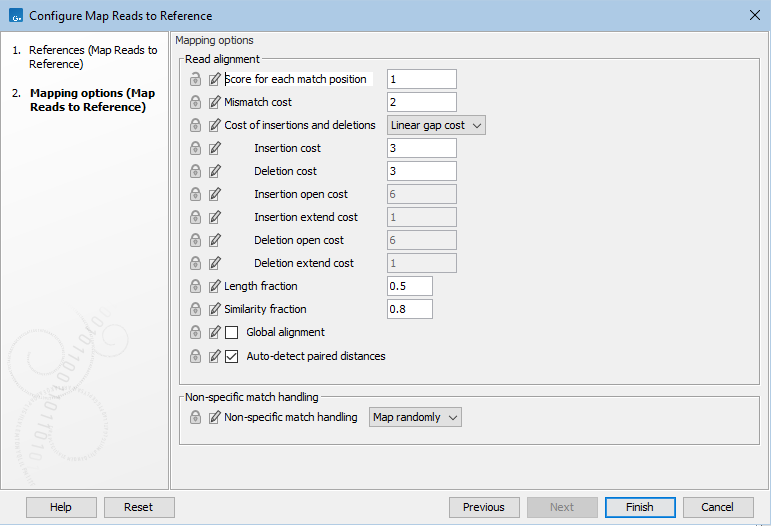
To update a setting name, click on the edit icon (
 ) beside its name (figure 14.30).

Figure 14.30: The "Gap open score" setting has been renamed "Gap opening score" in the element configuration dialog.
Renaming workflow elements
To rename an element, right click on its name and choose the option "Rename Element...".
Apart from changing the label on the workflow element in the editor, renaming has the following effects:
- The new name is used to label the relevant launch wizard step, if one will be shown.
- The Find functionality in the Side Panel finds elements based the new name.
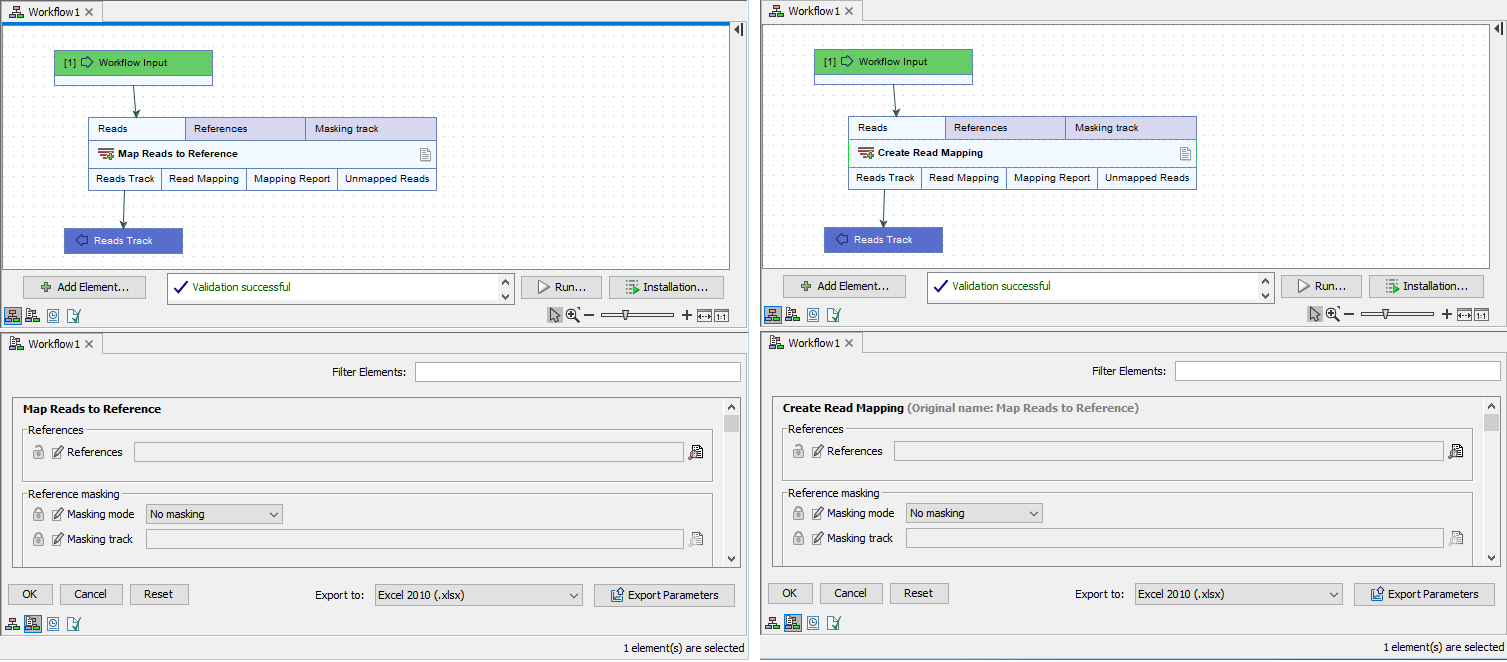
- The new name as well as the original name are present in the Workflow Configuration view (figure 14.31). Terms in the new name or the original name can be used in the Filter Elements functionality there to find settings for configurable elements.
Note: The history of elements created using a workflow with renamed elements will contain the original tool name.

Figure 14.31: A workflow before (left) and after (right) the Create Alignment element was renamed. The Workflow Configuration view after the renaming (right, bottom) contains both the original and updated element names in the section pertaining to that tool.

Figure 14.32: The new element name, "Align Sequences", is visible in the launch wizard of the workflow.
