Managing workflows
Workflows can be managed from the Workflow Manager:
Utilities | Manage Workflows (![]() )
)
or using the "Workflows" button (![]() ) in the toolbar and then select "Manage Workflows..." (
) in the toolbar and then select "Manage Workflows..." (![]() ).
).
The Workflow Manager (figure 15.107) lists workflows installed on your system under the Installed Workflows tab. Workflows under the Installed Workflows tab can be configured, renamed and uninstalled, as described below.
Workflows provided by QIAGEN are listed under the Template Workflows tab.
Copies of workflows can be made by clicking on the "Open Copy of Workflow" button for the relevant workflow. This opens an editable copy of the workflow in the Workflow Editor. That workflow can then, if desired, be saved as an element in Navigation Area, and installed so it appears under the Installed Workflows folder of the Toolbox.
Note: Copies of installed and template workflows can also be opened from under the Workflows tab in the Toolbox at the bottom left side of the Workbench. Right-click on the workflow name and choose "Open Copy of Workflow" from the menu that appears.
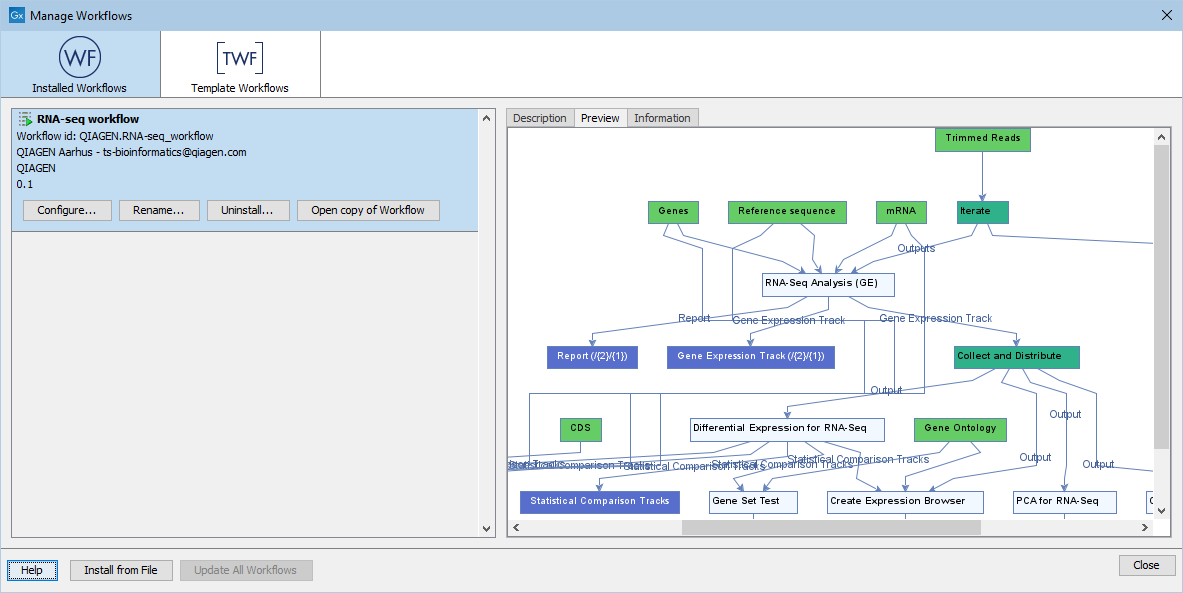
Figure 15.107: An installed workflow has been selected in the Workflow Manager. Some actions can be carried out on this workflow, and a preview pane showing the workflow design is open on the right hand side.
Configure
Clicking on the Configure button for an installed workflow will open a dialog where configurable steps in the workflow are shown (figure 15.108). Settings can be configured, and unlocked settings can be locked if desired.
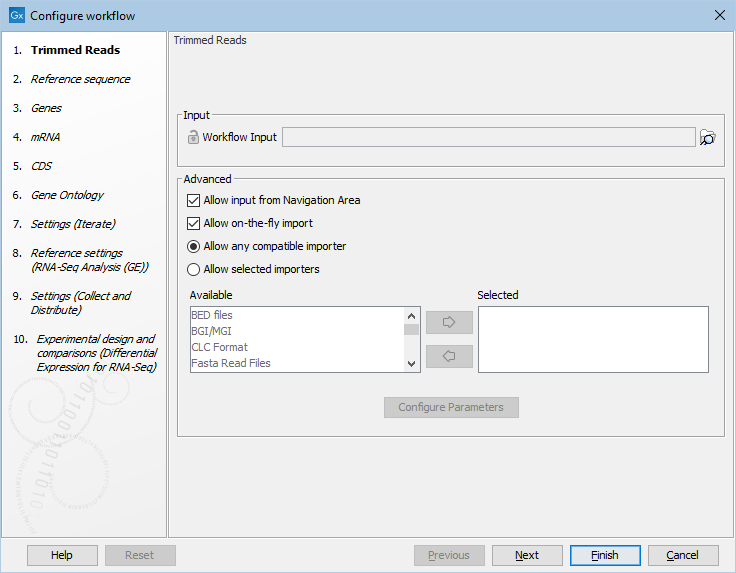
Figure 15.108: Configuring parameters for a workflow.
Note: Parameters locked in the original workflow design cannot be unlocked. Those locked using the Configure functionality of the Workbench Manager can be unlocked again later in the same way, if desired.
Parameter locking is described further in Locking and unlocking parameters.
Note that parameters requiring the selection of data should only be locked if the workflow will only be installed in a setting where there is access to the same data, in the same location, as the system where the workflow was created, or if the parameter is optional and no data should be selected. If the workflow is intended to be executed on a CLC Server, it is important to select data that is located on the CLC Server.
Rename
Clicking on the Rename button for an installed workflow allows you to change the name. The workflow will then be listed with that new name in the "Installed Workflows" folder in the Workflows menu.
The workflow id will remain the same.
Uninstall
Use this button to uninstall am installed workflow.
Description, Preview and Information
In the right hand pane of the Workflow Manager, are three tabs.
- Description Contains the description that was entered when creating the workflow installer (figure 15.109). See Creating a workflow installation file.
- Preview Contains a graphical representation of the workflow
- Information Contains general information about that workflow, such as the name, id, author, etc. (figure 15.110, and described in detail below).
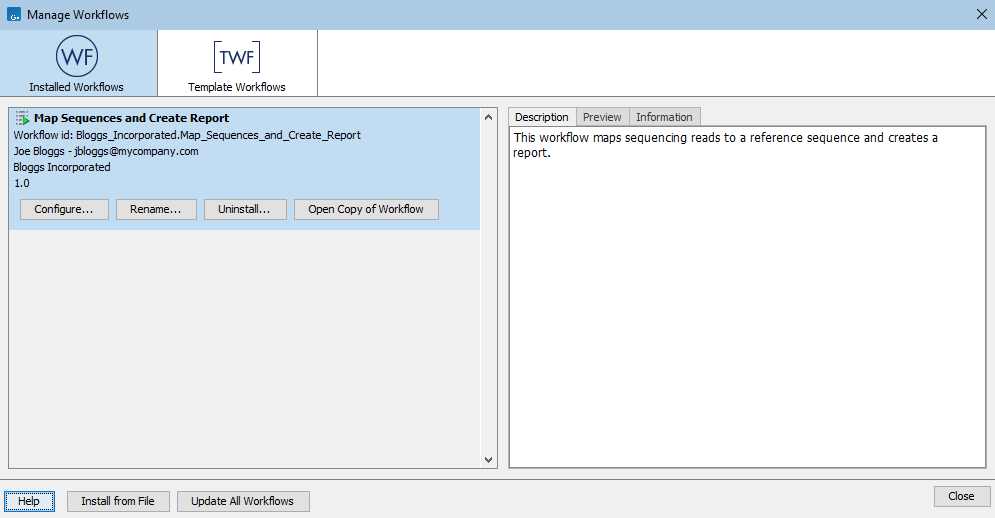
Figure 15.109: The description provided when creating the workflow installer is available in the Description tab in the Workflow Manager.
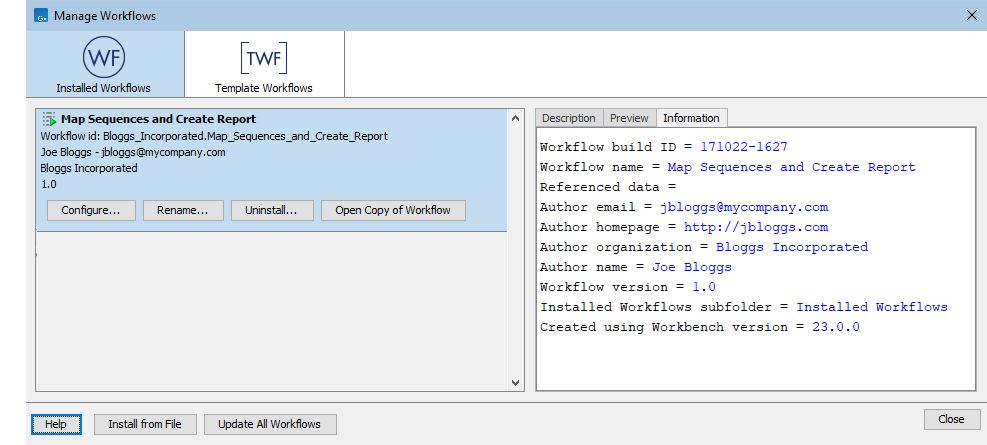
Figure 15.110: The Information tab contains the information provided when the workflow installer was created as well as the workflow build-id.
The Information tab (figure 15.110) contains the following:
- Workflow build ID The date (day month year) followed by the time (based on a 24 hour time) when the workflow installer was created. If the workflow was installed locally without an installation file being explicitly created, the build ID will reflect the time of installation.
- Workflow name The name of workflow
- Referenced data If reference data was referred to by the workflow and the option Bundled or Reference was selected when the installer was made, the reference data referred to is listed in this field. See Creating a workflow installation file for further details about these options.
- Author email The email address the workflow author entered when creating the workflow installer.
- Author homepage The homepage the workflow author entered when creating the workflow installer.
- Author organization The organization the workflow author entered when creating the workflow installer.
- Author name The workflow author's name.
- Workflow version The version that the author assigned to the workflow when creating the installer.
- Created using Workbench version The version of the CLC Workbench used when the workflow installer was created.
Subsections