Realignment
This section describes realigning parts of an existing alignment. To realign an entire alignment, consider using the Redo alignments option in the Create Alignment tool.
Examples where realigning part of an alignment can be helpful include:
- Adjusting the number of gaps. If a region has more gaps than is useful, select the region of interest and realign using a higher gap cost.
- Combine with fixpoints. When you have an alignment where two residues are not aligned although they should have been, you can set an alignment fixpoint on each of those residues and then realign the section of interest using those fixpoints, as described in fixpoints. This should result in the two residues being aligned and everything in the selected region around them being adjusted to accommodate that change.
Realigning a subsection of an alignment
There are two steps to realigning a subsection of an alignment:
- Select the region of interest.
- Realign the selected region.
For step 1, regions of interest can be selected as described in selection in alignments.
For step 2, follow the instructions below:
- Right-click on the selection.
- Choose Realign Selection... (
 ).
).
This will open a dialog allowing you to set the parameters for the realignment (figure 25.12).
Parameters are mostly the same as for Create Alignment, see:
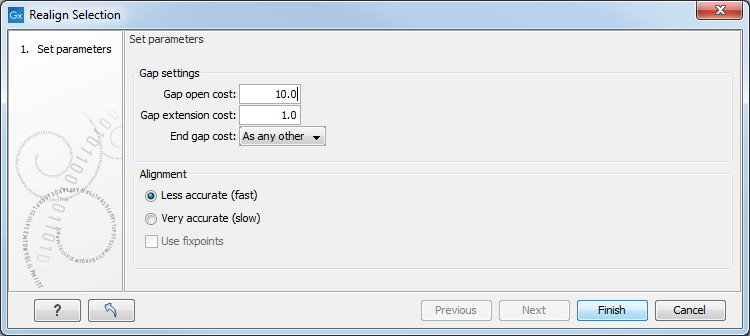
Figure 25.12: Options available when realigning a subset of an alignment.
It is possible for an alignment to become shorter or longer as a result of the realignment of a region. This is because gaps may have to be inserted or deleted in the sequences not selected for realignment. This will only occur for entire columns of gaps in these sequences, ensuring that their relative alignment is unchanged.