CLC Server connection
Using a CLC Server, data can be stored centrally and analyses run on a central machine rather than on a personal computer. After logging into the CLC Server from a CLC Workbench:
- Data in CLC Server locations will be listed in the Workbench Navigation Area.
- When launching analyses that can be run on the CLC Server, you will be offered the choice of running them using the Workbench or the CLC Server.
- Workflows installed on the CLC Server will be available to launch.
- External applications configured and enabled on the CLC Server will be available to launch and to include in workflows.
Logging into a CLC Server from a CLC Workbench
To log in to a CLC Server, open the CLC Server Connection dialog by going to:
File | CLC Server Connection (![]() )
)
or click on the Server icon (![]() ) at the bottom left hand side of the Workbench frame. This icon is blue when there is an active server connection or grey when there is not.
) at the bottom left hand side of the Workbench frame. This icon is blue when there is an active server connection or grey when there is not.
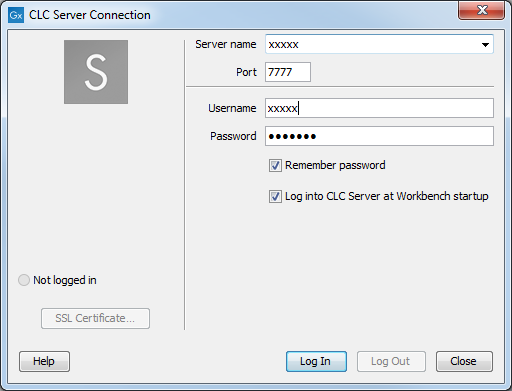
Fill in the details requested in the CLC Server Connection dialog (figure 6.1) and click on the Log In button to connect to the CLC Server. Information about logging into an SSL-enabled CLC Server are provided below.

Figure 6.1: Logging into a CLC Server using the default port, 7777
Your username and the server details are saved between Workbench sessions. To save your password also, check the Remember password box.
To connect to the CLC Server automatically when the CLC Workbench starts up, check the Log into CLC Server at Workbench startup box. This option is only available when the Remember password option has been enabled.
Checking the status of a CLC Server connection
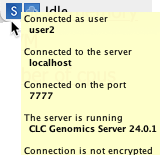
The status of an active connection can be seen by opening the CLC Server Connection dialog, as described above, or by hovering the mouse cursor over the server icon (![]() ) at the bottom left hand side of the Workbench frame (figure 6.2).
) at the bottom left hand side of the Workbench frame (figure 6.2).

Figure 6.2: Hover the mouse cursor over the Server icon in the bottom left corner of the Workbench frame to quickly view the status of the server connection.
Key documentation about working with a CLC Server
Further information about working with a CLC Server from the CLC Genomics Workbench:
- Launching tasks on a CLC Server: Running a tool on a CLC Server.
- Monitoring processes sent to the CLC Server from a CLC Workbench: Processes tab and Status bar
- Viewing and working with data held on a CLC Server: Navigation Area,
- Deleting data held on a CLC Server: Delete, restore and remove elements.
- Importing data to and exporting data from a CLC Server is described in CLC Server data import and export.
For those logging into the CLC Server as a user with administrative privileges, an option called Manage Server Users and Groups... will be available. This is described at https://resources.qiagenbioinformatics.com/manuals/clcserver/current/admin/index.php?manual=Built_in_authentication.html.
Connecting to a CLC Server using SSL
To log into a CLC Server with SSL enabled, provide the secure port in the Port field of the CLC Server Connection dialog in the Workbench.
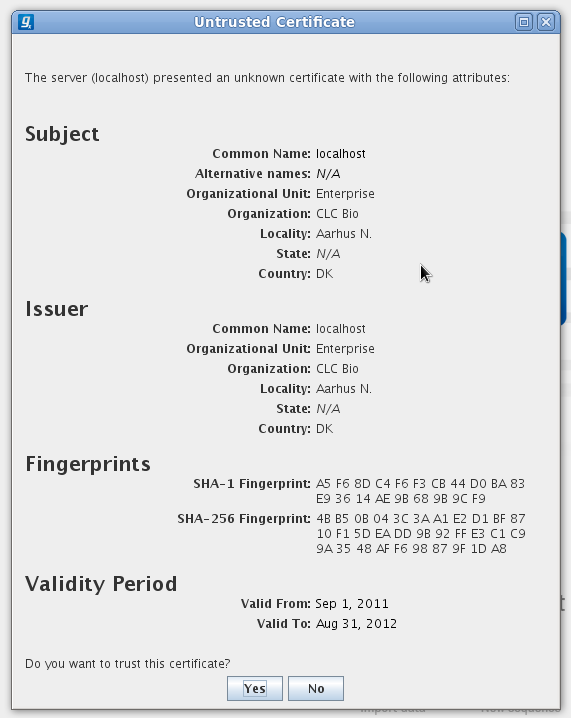
If SSL is detected on the port provided, the CLC Server's certificate will be verified before the connection is established. A warning is displayed if the certificate is not signed by a recognized Certificate Authority (CA) (figure 6.3). When such a certificate has been accepted once, the warning will not appear again.

Figure 6.3: A warning is shown when the certificate is not signed by a recognized CA.
The certificate details can be viewed again later by clicking on the SSL Certificate button in the CLC Server Connection dialog.
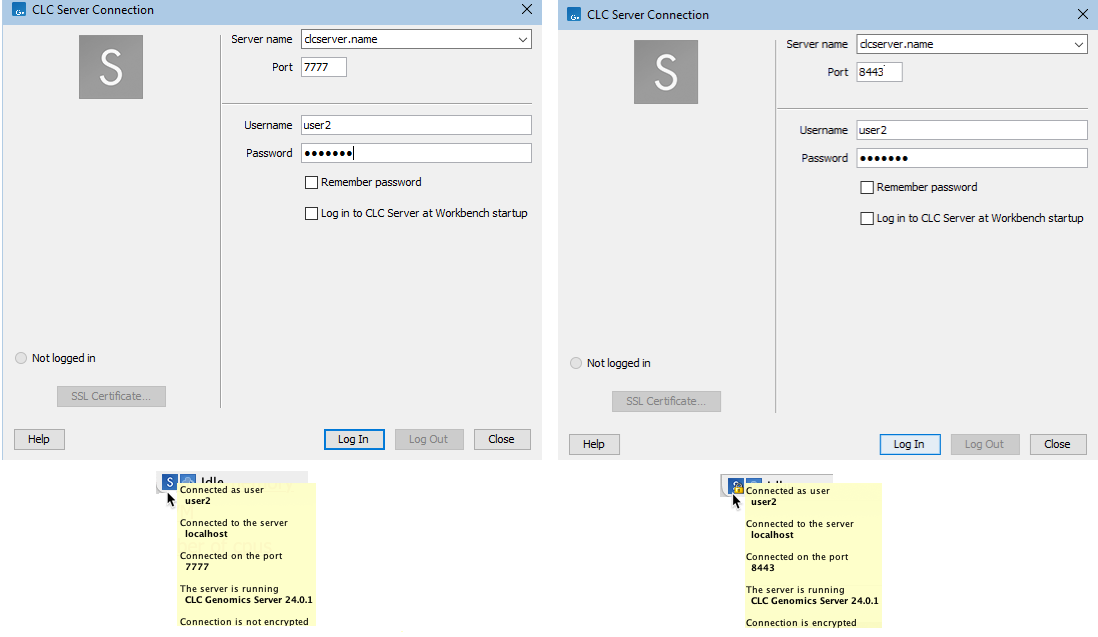
The connection status information in the tooltip revealed when hovering over the (![]() ) icon in the bottom left corner of the Workbench frame includes whether the connection is encrypted or not (figure 6.4).
) icon in the bottom left corner of the Workbench frame includes whether the connection is encrypted or not (figure 6.4).

Figure 6.4: Login details and connection status information for an unencrypted connection to a CLC Server (left) and an encrypted connection (right). A padlock on the server icon in the bottom left corner of the Workbench frame also indicates the connection is encrypted.
Subsections
