Adjusting the workflow layout
The layout of elements within a workflow can be adjusted manually or automatically.
- Manually: Select one or more workflow elements and then, with the left mouse button depressed, drag these elements to where you want them to be on the canvas.
Multiple elements and connections can be selected by keeping the Ctrl key (
 on mac) depressed, while clicking on the desired items in the Workflow Editor.
To select all the elements and connections in the Workflow Editor, use the Ctrl + A (
+ A on mac) keyboard shortcut to select all elements and connections in the Workflow Editor.
- Automatically:
Automatic layout adjusment moves elements and Groups so that no elements are obscured, i.e. no element lies behind an expanded Group, or behind another element. The Auto layout distance setting in the Display palette of the Side Panel determines the distance between elements when auto layout is applied.
- To adjust the layout of all connected elements in the workflow automatically, click on the background canvas and press the L key. Alternatively, right-click on the canvas and choose the option Apply Auto Layout (figure 15.16).
- To adjust the layout of the connected elements in an expanded Group, click on the Group background and press the L key. Alternatively, right-click on the Group and choose the option Apply Auto Layout to Group (figure 15.17).
- To adjust the layout of all connected elements in the workflow automatically, click on the background canvas and press the L key. Alternatively, right-click on the canvas and choose the option Apply Auto Layout (figure 15.16).
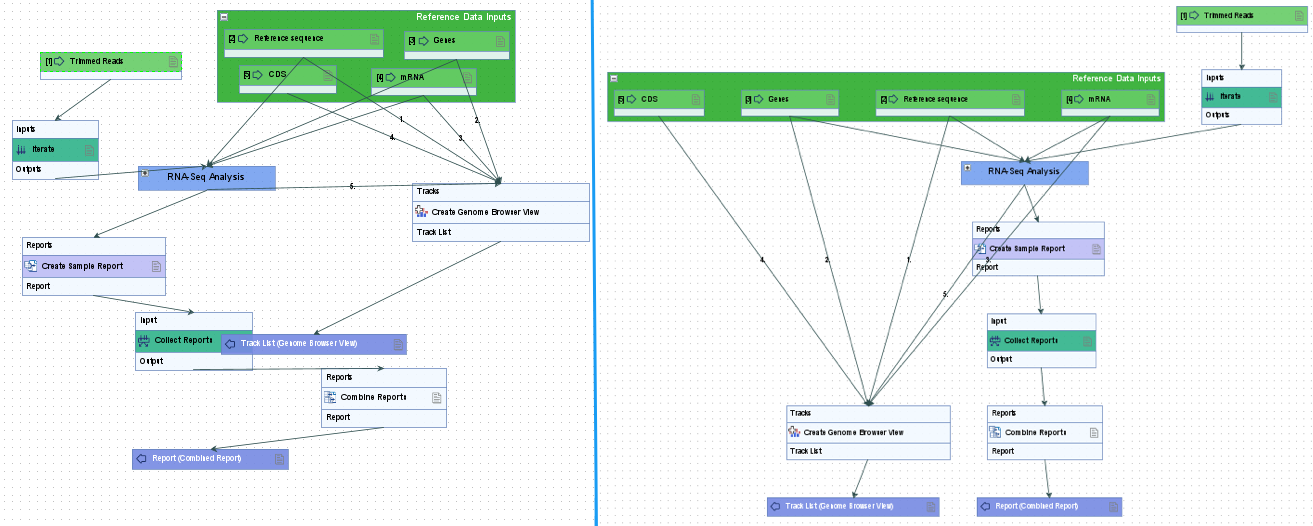
Figure 15.16: A zoomed out view of a workflow before (left) and after (right) applying auto layout.
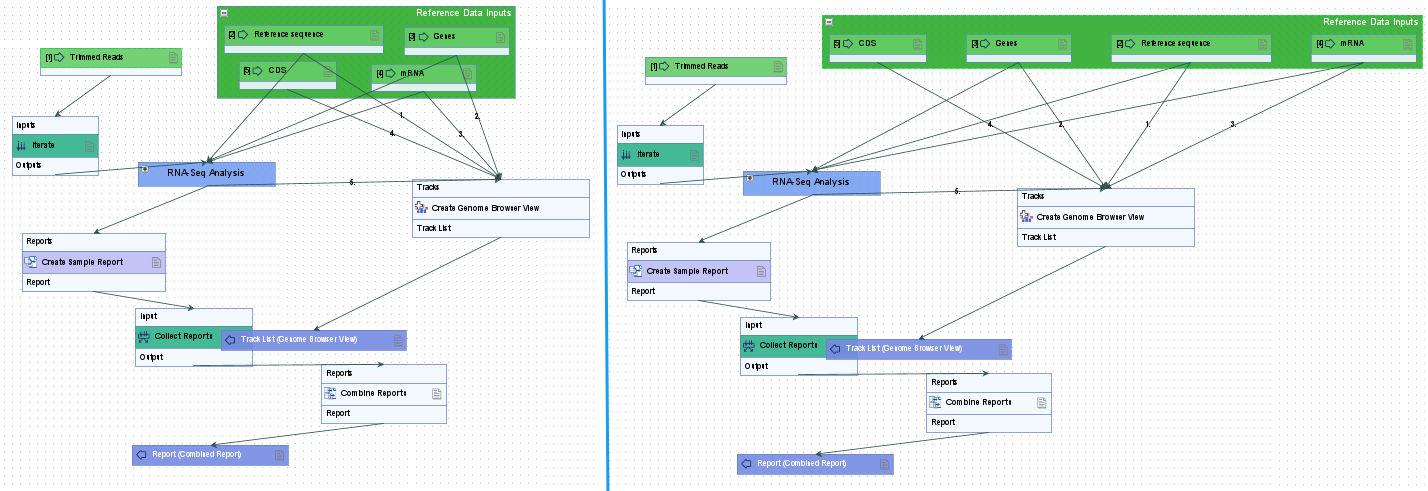
Figure 15.17: A zoomed out view of a workflow before (left) and after (right) applying auto layout to just the Reference Data Inputs group.