The restriction cloning workflow
The restriction cloning workflow consists of the following steps:
- Define one or more fragments
First, select the sequence containing the cloning fragment in the list at the top of the view. Next, make sure the restriction enzyme you wish to use is listed in the Side Panel (see Manage enzymes). To specify which part of the sequence should be treated as the fragment, first click one of the cut sites you wish to use. Then press and hold the Ctrl key (
 on Mac) while you click the second cut site. You can also right-click the cut sites and use the Select This ... Site to select a site. If you just wish to remove the selection of one of the sites, right-click the site on the sequence and choose De-select This ... Site.
When this is done, the panel is updated to reflect the selections (see figure 24.29).
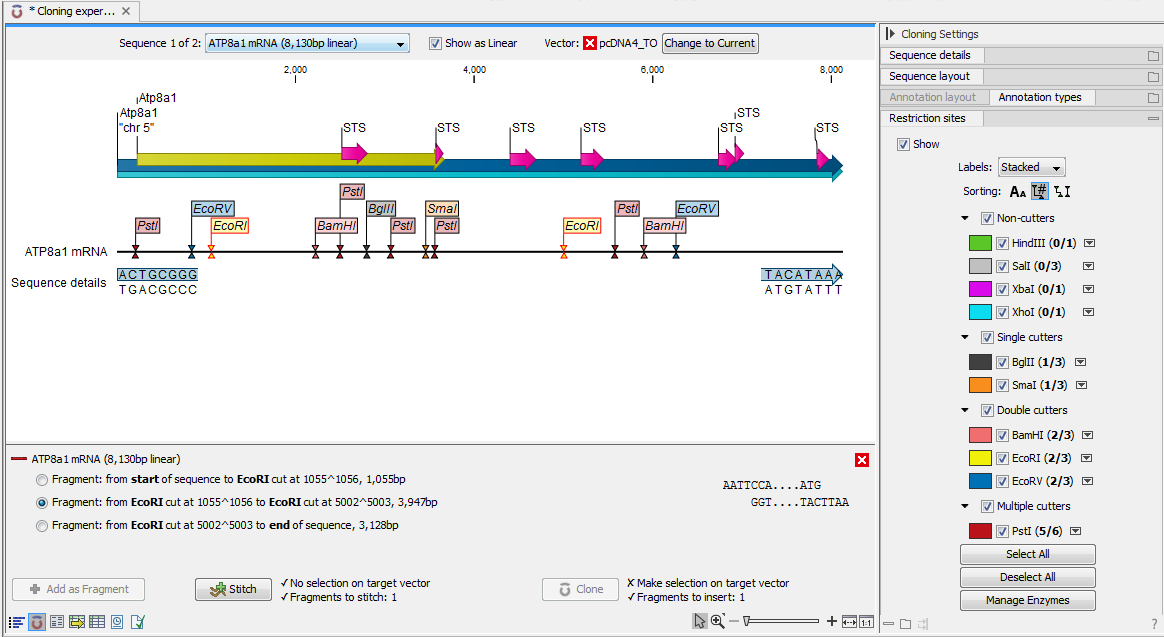
Figure 24.29: EcoRI cut sites selected to cut out fragment.In this example you can see that there are now three fragments that can be used for cloning listed in the panel below the view. The fragment selected per default is the one that is in between the cut sites selected.
If the entire sequence should be selected as fragment, click Add as Fragment (
 ).
).
At any time, the selection of cut sites can be cleared by clicking the Remove (
 ) icon to the right of the target vector selections.
- Defining target vector
The next step is to define where the vector should be cut. If the vector sequence should just be opened, click the restriction site you want to use for opening (figure 24.30).
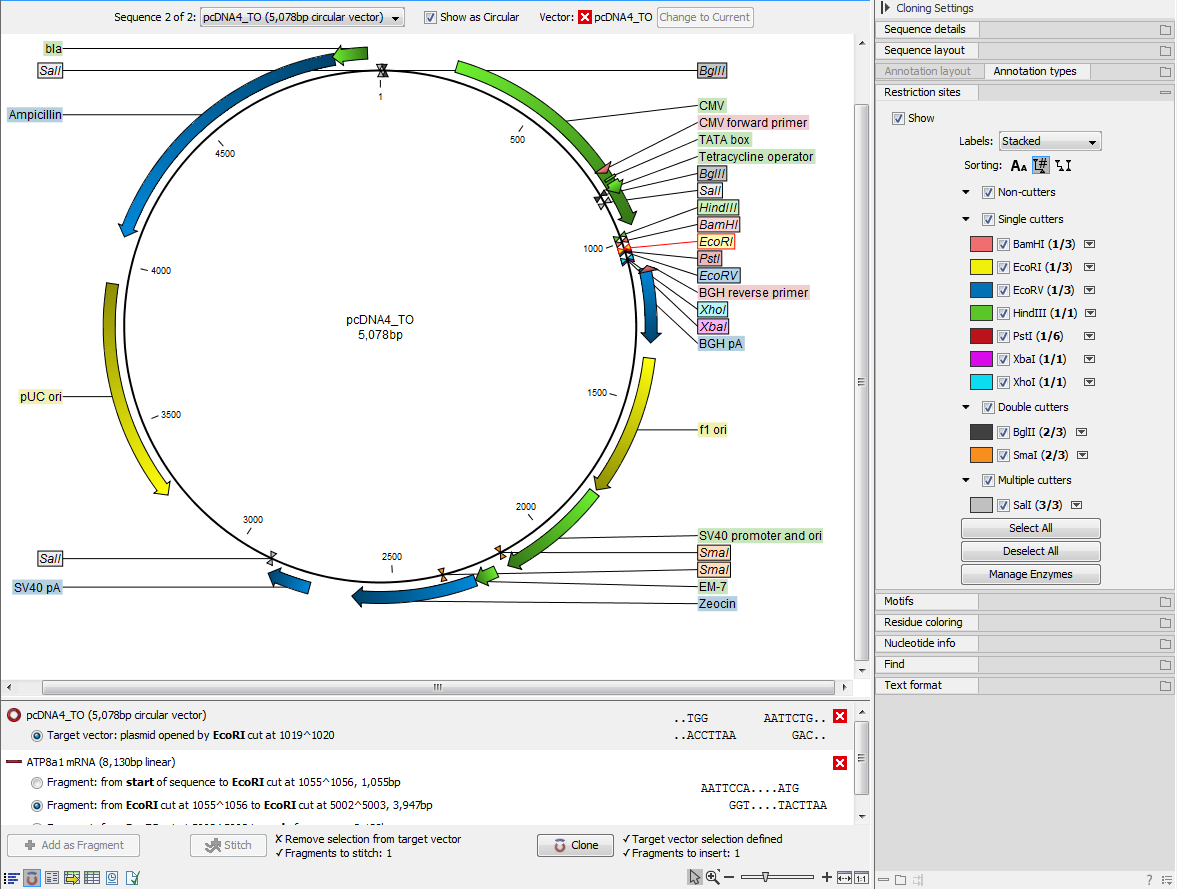
Figure 24.30: EcoRI site used to open the vector. Note that the "Cloning" button has now been enabled as both criteria ("Target vector selection defined" and "Fragments to insert:...") have been defined.If you want to cut off part of the vector, click two restriction sites while pressing the Ctrl key (
on Mac). You can also right-click the cut sites and use the Select This ... Site to select a site. This will display two options for what the target vector should be (for linear vectors there would have been three option).
At any time, the selection of cut sites can be cleared by clicking the Remove () icon to the right of the target vector selections.
- Perform cloning
Once both fragments and vector are selected, click Clone (
 ). This will display a dialog to adapt overhangs and change orientation as shown in figure 24.31.
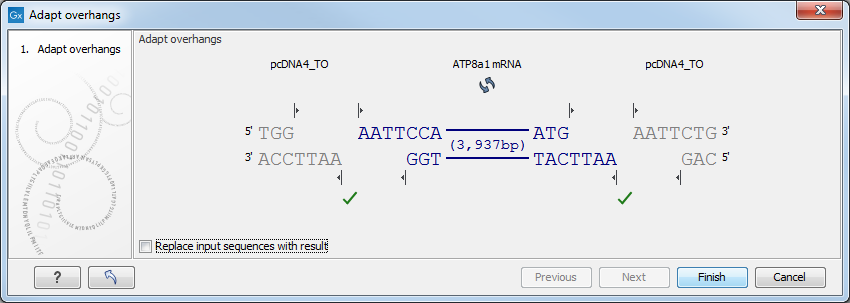
Figure 24.31: Showing the insertion point of the vector.This dialog visualizes the details of the insertion. The vector sequence is on each side shown in a faded gray color. In the middle the fragment is displayed. If the overhangs of the sequence and the vector do not match (
 ), you will not be able to click Finish. But you can blunt end or fill in the overhangs using the drag handles (
 ) until the overhangs match (
 ).
).
The fragment can be reverse complemented by clicking the Reverse complement fragment (
 ).
).
When several fragments are used, the order of the fragments can be changed by clicking the move buttons (
 )/ (
)/ ( ).
).
Per default, the construct will be opened in a new view and can be saved separately. But selecting the option Replace input sequences with result will add the construct to the input sequence list and delete the original fragment and vector sequences.
Note that the cloning experiment used to design the construct can be saved as well. If you check the History (![]() ) of the construct, you can see the details about restriction sites and fragments used for the cloning.
) of the construct, you can see the details about restriction sites and fragments used for the cloning.