Connecting workflow elements
Connections between workflow elements are made between an output channel in one element and a compatible input channel in another. These connections defines the flow of data through the workflow.
The names of output channels usually indicate the type of data generated and the names of input channels usually indicate the type of data expected.
An output channel can be connected to more than one input channel and an input channel can accept data from more than one output channel (figure 15.7).
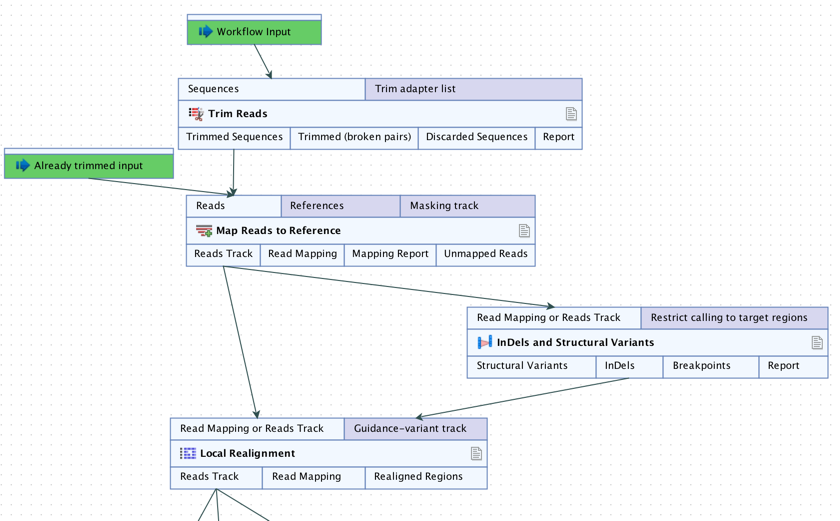
Figure 15.7: In this workflow, two elements are supplying data to the Reads input channel of the Map Reads to Reference element, while data from the Reads Track output channel of Map Reads to Reference is being used as input to two elements.
Making new connections between output and input channels
Two ways that compatible input and output channels can be connected are:
- Click on an output channel and, keeping the mouse button depressed, drag the cursor to the desired input channel. A green border around the input channel name indicates when the connection has been made and the mouse button can be released. An arrow is drawn, linking the channels (figure 15.8).
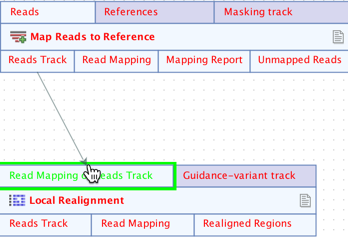
Figure 15.8: Connecting the "Reads Track" output channel from a Map Reads to Reference element to the "Read Mapping or Reads" input channel of a Local Realignment element. - Use the Connect to... option in the right-click menu of an output or input channel. Hover the cursor over this option to see a list of elements in the workflow with compatible channels. Hovering the cursor over any of these items then shows the particular channels that can be connected to (figure 15.9).
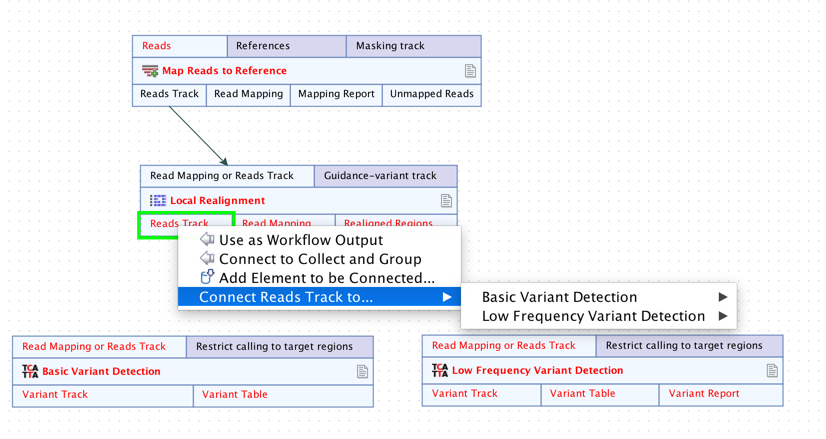
Figure 15.9: Right-clicking on an output channel displays a context specific menu, with options supporting the connection of this channel to input channels of other workflow elements.
Selecting connections
Before acting on existing connections, they must be selected.
An individual connection can be selected by clicking on the connection line. Right-clicking on a connection line will select that connection and open a context menu.
Clicking on the source/destination box on a given channel will select all connections connected to that channel.
As with other items in the editor, keeping the Ctrl key (![]() on Mac) depressed allows multiple connections (and elements) to be selected.
on Mac) depressed allows multiple connections (and elements) to be selected.
Moving existing connections
Connections in the workflow can be moved by selecting them and then:
- Dragging the source/destination box to a new, compatible channel.
- Right-click a selected connection, or on the source/destination box on a channel with one or more connections connected to it, and choose a relevant option from the context menu: Move Selected Connection(s) Source to... or Move Selected Connection(s) Destination to....
Note that connections can only be moved to compatible channels, and when multiple connections are selected but the new channel only supports a single connection, only one of the selected connections will be moved.
Reordering connections to a single tool
Some tools accept multiple incoming connections to their main input channel. In some cases, the order that the incoming connections are processed affects the outputs, for example Combine Reports, where the order of content in the report is affected, or Create Track List, where the order of the tracks in the list is affected.
By default, the processing order reflects the order the connections were attached in.
To make changes to this order, right-click on the relevant input channel and choose the option Update Processing Order... from the context menu. In the Update Processing Order dialog, Connections are identified by the name of the originating element and the output channel name. They can be moved up and down in the list.
Click on the Jump to Source button to bring the focus in the editor to the source element.
Numbers on the connections are added, or updated if further changes are made using the Update Processing Order dialog.
Information about connection sources and destinations
The source and destination of a connection can be investigated in the following ways:
- Hovering the mouse cursor over a connection reveals a tooltip listing the source element/channel and destination element/channel (figure 15.10).
- Right-click a connection and choose the option Jump to Source or Jump to Destination (figure 15.11). The connection will be highlighted and the source/destination element will be brought into view. If the destination element is within a Group, the Group will be expanded so that the element is visible.
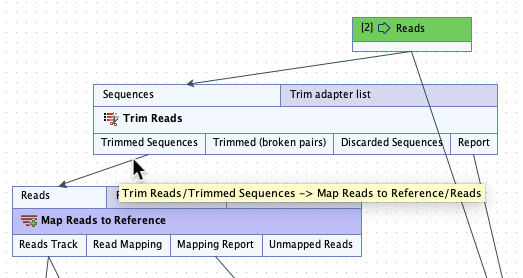
Figure 15.10: Hover the mouse cursor over a connection to reveal a tooltip containing the names of the elements and channels connected.
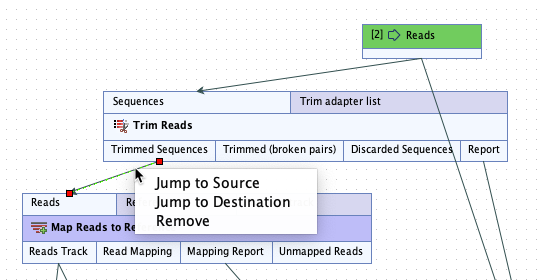
Figure 15.11: Right-click on a connection to reveal options to jump to the source element or the destination element of that connection.
Removing connections
Connections can be removed by selecting them and using the Delete/Backspace key.