Results - binding sites and fragments
Specify the output options as shown in figure 22.19:
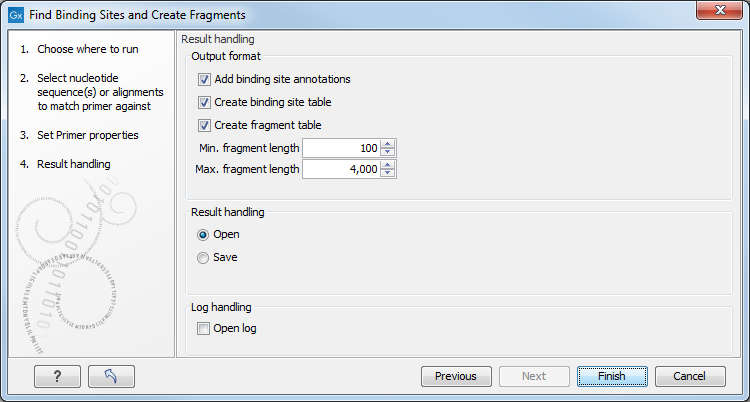
Figure 22.19: Output options include reporting of binding sites and fragments.
The output options are:
- Add binding site annotations. This will add annotations to the input sequences (see details below).
- Create binding site table. Creates a table of all binding sites. Described in details below.
- Create fragment table. Showing a table of all fragments that could result from using the primers. Note that you can set the minimum and maximum sizes of the fragments to be shown. The table is described in detail below.
Click on Finish to launch the analysis.
An example of a binding site annotation is shown in figure 22.20.
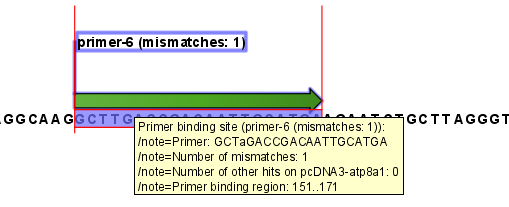
Figure 22.20: Annotation showing a primer match.
The annotation has the following information:
- Sequence of the primer. Positions with mismatches will be in lower-case (see the fourth position in figure 22.20 where the primer has an
aand the template sequence has aT). - Number of mismatches.
- Number of other hits on the same sequence. This number can be useful to check specificity of the primer.
- Binding region. This region ends with the 3' exact match and is simply the primer length upstream. This means that if you have 5' extensions to the primer, part of the binding region covers sequence that will actually not be annealed to the primer.
An example of the primer binding site table is shown in figure 22.21.
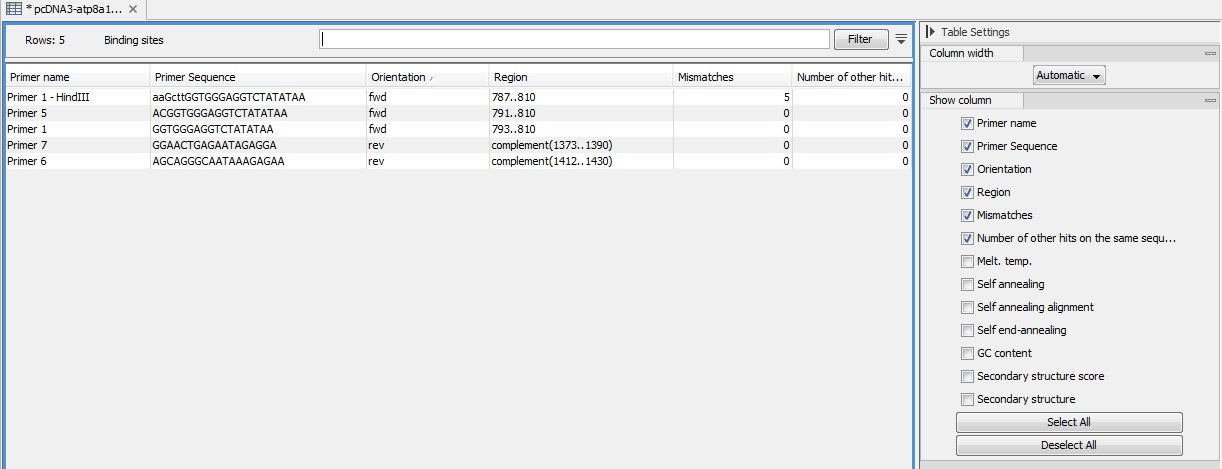
Figure 22.21: A table showing all binding sites.
The information here is the same as in the primer annotation and furthermore you can see additional information about melting temperature etc. by selecting the options in the Side Panel. See a more detailed description of this information in Standard PCR output table. You can use this table to browse the binding sites. If you make a split view of the table and the sequence, you can browse through the binding positions by clicking in the table. This will cause the sequence view to jump to the position of the binding site.
An example of a fragment table is shown in figure 22.22.
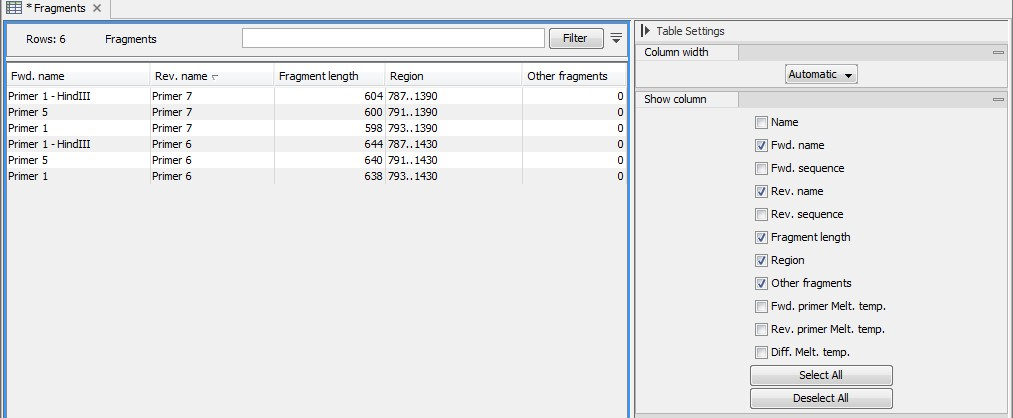
Figure 22.22: A table showing all possible fragments of the specified size.
The table first lists the names of the forward and reverse primers, then the length of the fragment and the region. The last column tells if there are other possible fragments fulfilling the length criteria on this sequence. This information can be used to check for competing products in the PCR. In the Side Panel you can show information about melting temperature for the primers as well as the difference between melting temperatures.
You can use this table to browse the fragment regions. If you make a split view of the table and the sequence, you can browse through the fragment regions by clicking in the table. This will cause the sequence view to jump to the start position of the fragment.
There are some additional options in the fragment table. First, you can annotate the fragment on the original sequence. This is done by right-clicking (Ctrl-click on Mac) the fragment and choose Annotate Fragment as shown in figure 22.23.
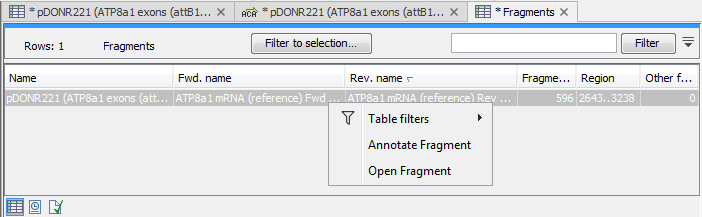
Figure 22.23: Right-clicking a fragment allows you to annotate the region on the input sequence or open the fragment as a new sequence.
This will put a PCR fragment annotations on the input sequence covering the region specified in the table. As you can see from figure 22.23, you can also choose to Open Fragment. This will create a new sequence representing the PCR product that would be the result of using these two primers. Note that if you have extensions on the primers, they will be used to construct the new sequence.
If you are doing restriction cloning using primers with restriction site extensions, you can use this functionality to retrieve the PCR fragment for us in the cloning editor (see Restriction Based Cloning).