Executing a workflow
Once installed and configured, a workflow will appear in the Toolbox under Workflows (
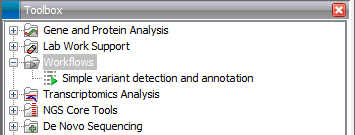
Figure 9.16: A workflow is installed and ready to be used.
The workflow is executed just as any other tool in the Toolbox by double-clicking or selecting it in the menu. This will open a dialog where you provide input data and with options to run the workflow in batch mode (see Batch processing).
If you are connected to a CLC Genomics Server, you will be presented with the option to run the workflow locally on the workbench or on the server. For a Workbench connected to a server, the lack of configuration of a workflow will be explained in the dialog where you select where to execute it (read more in the server manual).
When the workflow is started, you can see the log file with detailed information from each step in the process.
If the workflow is not properly configured, you will see that in the dialog when the workflow is started 9.2.
Footnotes
- ... started9.2
- If the workflow uses a tool that is part of a plug-in, a missing plug-in can also be the reason why the workflow is not enabled. A workflow can also become outdated because the underlying tools have changed since the workflow was created (see Workflow identification and versioning)