Creating a workflow installation file
At the top of the workflow editor, click the Create Installer button to bring up a dialog where you provide information about the workflow to be distributed (see an example with information from a CLC bio workflow in figure 9.12).
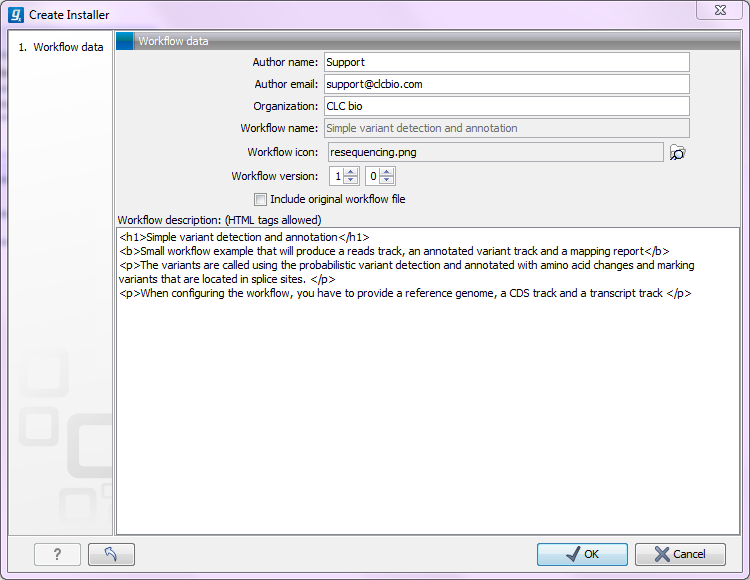
Figure 9.12: Workflow information for the installer.
- Author information
- Providing name, email and organization of the author of the workflow. This will be visible for users installing the workflow and will enable them to look up the source of the workflow any time. The organization name is important because it is part of the workflow id (see more in Workflow identification and versioning)
- Workflow name
- The workflow name is based on the name used when saving the workflow in the Navigation Area. Renaming in the Navigation Area will also reflect when creating the installer. The workflow name is essential because it is used as part of the workflow id (see more in Workflow identification and versioning).
- Workflow description
- Provide a textual description of the workflow. This will be displayed for users when they have installed the workflow. Simple HTML tags are allowed (should be HTML 3.1 compatible, see http://www.w3.org/TR/REC-html32).
- Icon
- An icon can be provided. This will show up in the installation overview and in the Toolbox once the workflow is installed. The icon should be a 16 x 16 pixels gif or png file. If the icon is larger, it will automatically be resized to fit 16 x 16 pixels.
- Version
- A major and minor version can be provided.
- Include original workflow file
- This will include the design file to be include with the installer. Once the workflow is installed in a workbench, you can extract the original workflow file and modify it.
Click OK and you will be asked to specify a name and a folder for saving the file. It will be saved as a .cpw file.