Add attB sites
The first step in the Gateway cloning process is to amplify the target sequence with primers including so-called attB sites. In the CLC Genomics Workbench, you can add attB sites to a sequence fragment in this way:
Toolbox in the Menu Bar | Molecular Biology Tools (![]() ) | Cloning and Restriction Sites (
) | Cloning and Restriction Sites (![]() )| Gateway Cloning (
)| Gateway Cloning (![]() ) | Add attB Sites (
) | Add attB Sites (![]() )
)
This will open a dialog where you can select on or more sequences. Note that if your fragment is part of a longer sequence, you need to extract it first. This can be done in two ways:
- If the fragment is covered by an annotation (if you want to use e.g. a CDS), simply right-click the annotation and Open Annotation in New View
- Otherwise you can simply make a selection on the sequence, right-click and Open Selection in New View
When you have selected your fragment(s), click Next.
This will allow you to choose which attB sites you wish to add to each end of the fragment as shown in figure 19.15.

Figure 19.15: Selecting which attB sites to add.
The default option is to use the attB1 and attB2 sites. If you have selected several fragments and wish to add different combinations of sites, you will have to run this tool once for each combination.
Click Next will give you options to extend the fragment with additional sequences by extending the primers 5' of the template-specific part of the primer (i.e. between the template specific part and the attB sites). See an example of this in figure 19.21 where a Shine-Dalgarno site has been added between the attB site and the gene of interest.
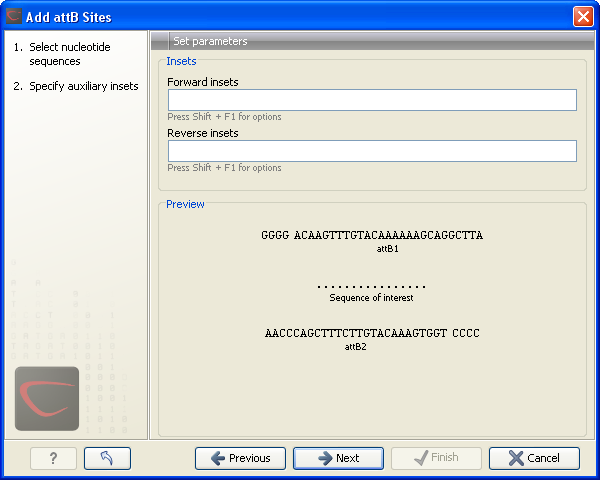
Figure 19.16: Primer additions 5' of the template-specific part of the primer.
At the top of the dialog (see figure 19.16), you can specify primer additions such as a Shine-Dalgarno site, start codon etc. Click in the text field and press Shift + F1 to show some of the most common additions (see figure 19.17).
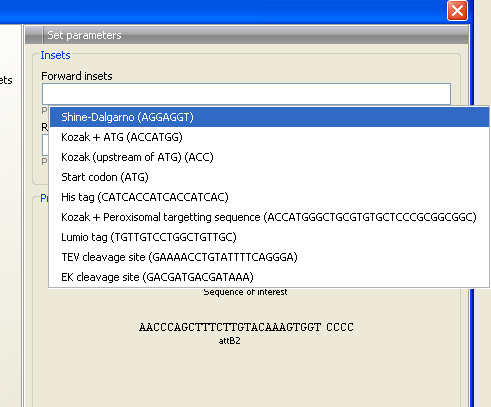
Figure 19.17: Pressing Shift + F1 shows some of the common additions. This default list can be modified, see Extending the pre-defined list of primer additions.
Use the up and down arrow keys to select a tag and press Enter. This will insert the selected sequence as shown in figure 19.18.
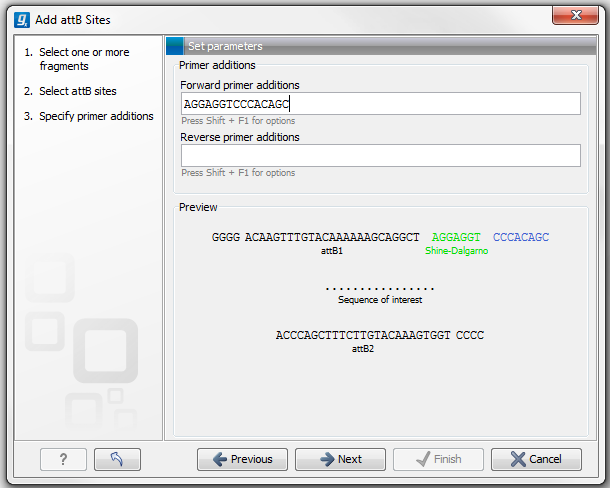
Figure 19.18: A Shine-Dalgarno sequence has been inserted.
At the bottom of the dialog, you can see a preview of what the final PCR product will look like. In the middle there is the sequence of interest (i.e. the sequence you selected as input). In the beginning is the attB1 site, and at the end is the attB2 site. The primer additions that you have inserted are shown in colors (like the green Shine-Dalgarno site in figure 19.18).
This default list of primer additions can be modified, see Extending the pre-defined list of primer additions.
You can also manually type a sequence with the keyboard or paste in a sequence from the clipboard by pressing Ctrl + v (![]() + v on Mac).
+ v on Mac).
Clicking Next allows you to specify the length of the template-specific part of the primers as shown in figure 19.19.
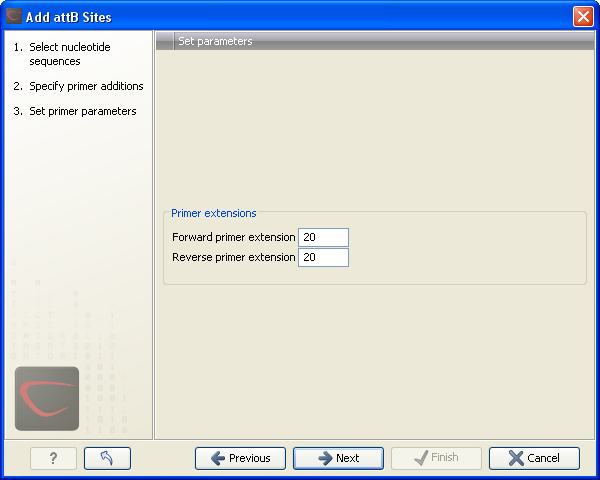
Figure 19.19: Specifying the length of the template-specific part of the primers.
The CLC Genomics Workbench is not doing any kind of primer design when adding the attB sites. As a user, you simply specify the length of the template-specific part of the primer, and together with the attB sites and optional primer additions, this will be the primer. The primer region will be annotated in the resulting attB-flanked sequence and you can also get a list of primers as you can see when clicking Next (see figure 19.20.
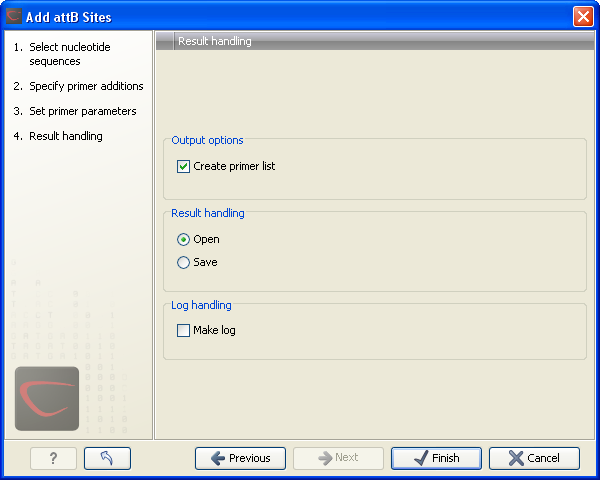
Figure 19.20: Besides the main output which is a copy of the the input sequence(s) now including attB sites and primer additions, you can get a list of primers as output.
Besides the main output which is a copy of the the input sequence(s) now including attB sites and primer additions, you can get a list of primers as output. Click Next if you wish to adjust how to handle the results. If not, click Finish.
The attB sites, the primer additions and the primer regions are annotated in the final result as shown in figure 19.21.
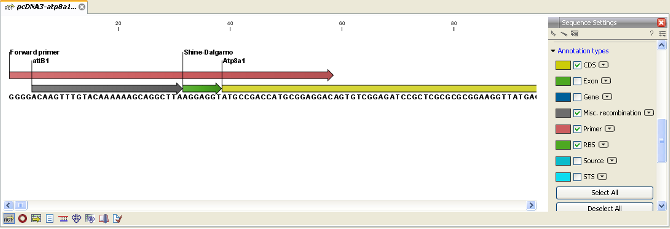
Figure 19.21: the attB site plus the Shine-Dalgarno primer addition is annotated.
There will be one output sequence for each sequence you have selected for adding attB sites. Save (![]() ) the resulting sequence as it will be the input to the next part of the Gateway cloning work flow (see Create entry clones(BP)). When you open the sequence again, you may need to switch on the relevant annotation types to show the sites and primer additions as illustrated in figure 19.21.
) the resulting sequence as it will be the input to the next part of the Gateway cloning work flow (see Create entry clones(BP)). When you open the sequence again, you may need to switch on the relevant annotation types to show the sites and primer additions as illustrated in figure 19.21.
Subsections