Annotate tag experiment
Combining the tag counts (This is done on an experiment level (experiments are collections of samples with defined groupings, see Experimental design):
Toolbox | Transcriptomics Analysis (![]() ) | Expression Profiling by Tags (
) | Expression Profiling by Tags (![]() ) | Annotate Tag Experiment (
) | Annotate Tag Experiment (![]() )
)
You can also access this functionality at the bottom of the Experiment table (![]() ) as shown in figure 27.25.
) as shown in figure 27.25.
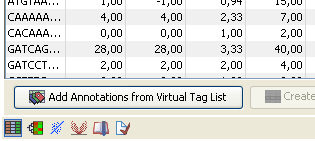
Figure 27.25: You can annotate an experiment directly from the experiment table.
This will open a dialog where you select a virtual tag list (![]() ) and an experiment (
) and an experiment (![]() ) of tag-based samples. Click Next when the elements are listed in the right-hand side of the dialog.
) of tag-based samples. Click Next when the elements are listed in the right-hand side of the dialog.
This dialog lets you choose how you want to annotate your experiment (see figure 27.26).
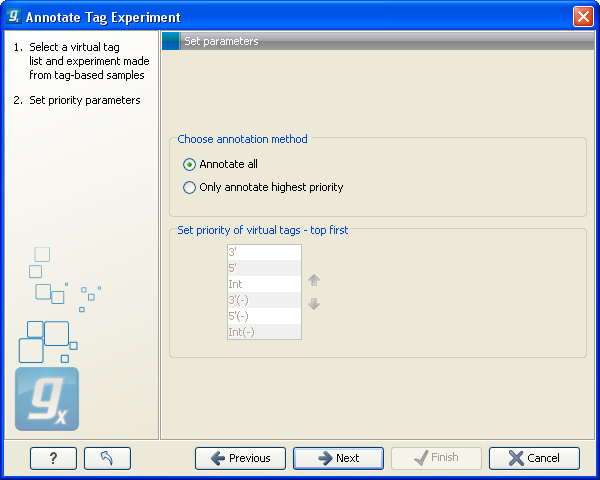
Figure 27.26: Defining the annotation method.
If a tag in the virtual tag list has more than one origin (as shown in the example in figure 27.24) you can decide how you want your experimental data to be annotated. There are basically two options:
- Annotate all
- This will transfer all annotations from the virtual tag. The type of origin is still preserved so that you can see if it is a 3' external, 5' external or internal tag.
- Only annotate highest priority
- This will look for the highest priority annotation and only add this to the experiment. This means that if you have a virtual tag with a 3' external and an internal tag, only the 3' external tag will be annotated (using the default prioritization). You can define the prioritization yourself in the table below: simply select a type and press the up (
 ) and down (
 ) arrows to move it up and down in the list. Note that the priority table is only active when you have selected Only annotate highest priority.
Click Next to choose how you want to tags to be aligned (see figure 27.27).
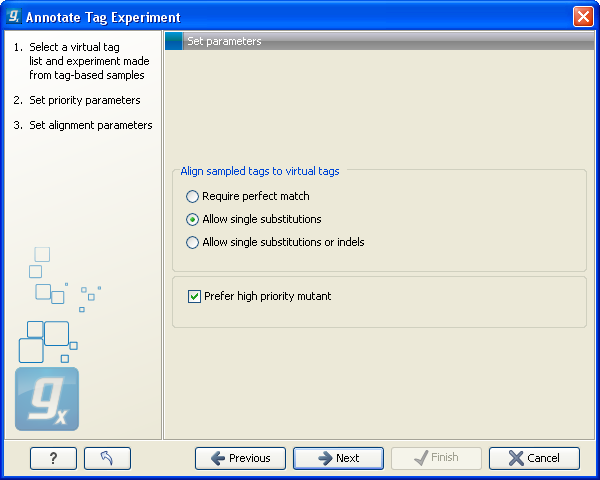
Figure 27.27: Settings for aligning the tags.
When the tags from the virtual tag list are compared to your experiment, the tags are matched using one of the following options:
- Require perfect match
- The tags need to be identical to be matched.
- Allow single substitutions
- If there is up to one mismatch in the alignment, the tags will still be matched. If there is a perfect match, single substitutions will not be considered.
- Allow single substitutions or indels
- Similar to the previous option, but now single-base insertions and deletions are also allowed. Perfect matches are preferred to single-base substitutions which are preferred to insertions, which are again preferred to deletions. 27.2

Click Next if you wish to adjust how to handle the results. If not, click Finish. . This will add extra annotation columns to the experiment. The extra columns corresponds to the columns found in your virtual tag list. If you have chosen to annotate highest priority-only, there will only be information from one origin-column for each tag as shown in figure 27.28.
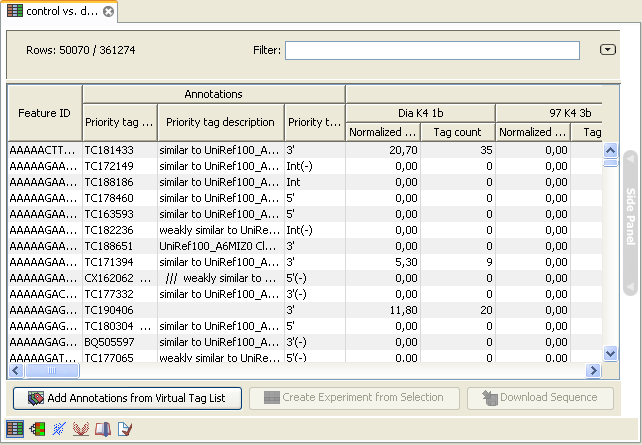
Figure 27.28: An experiment annotated with prioritized tags.
Footnotes
- ... deletions.27.2
- Note that if you use color space data, only color errors are allowed when choosing anything but perfect match.