Emptying recycle bins
Emptying recycle bins using the web interface
When logged into the web interface, go to the Element info (![]() ) tab. Recycle bins you have access to are listed at the bottom of each File System Location in the Navigation Area, on the left. Administrators will see all recycle bins. A given user will see only their own recycle bin.
) tab. Recycle bins you have access to are listed at the bottom of each File System Location in the Navigation Area, on the left. Administrators will see all recycle bins. A given user will see only their own recycle bin.
To empty a given recycle bin, click on that recycle bin in the Navigation Area. Then click on the Empty Recycle Bin... button in the Info tab, on the right.
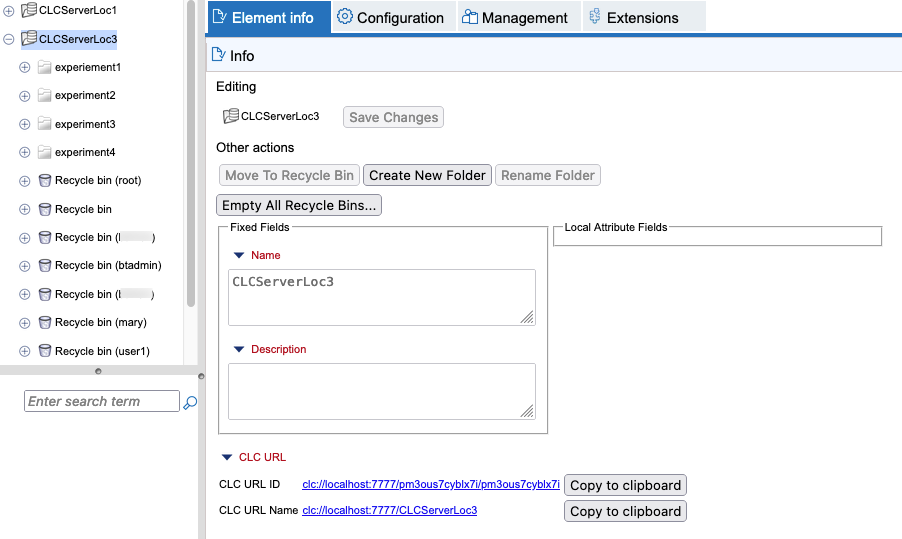
Administrators can empty all recycle bins for a given File System Location by clicking on that location in the Navigation Area, and then clicking on the Empty All Recycle Bins... button that will be visible under the Info tab (figure 18.2).

Figure 18.4: An administrator has clicked on the CLCServerLoc3 location and could now empty all recycle bins in that location by clicking on the Empty All Recycle Bins button under the Info tab, on the right.
You will be asked for confirmation before contents of recycle bins are deleted. The action of emptying a recycle bin cannot be undone.
The listing of recycle bins in a given location can be refreshed at any time by going to the Navigation Area, closing the folder containing those recycle bins, and then opening that folder again.
Emptying recycle bins using a CLC Workbench
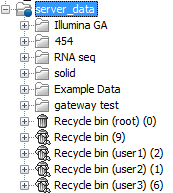
When logged in to the CLC Server from the CLC Workbench, the recycle bins you have permission to see are listed at the bottom of each CLC Server File System Location in the Navigation Area (figure 18.3).
To empty specific recycle bin, right-click on it and select the Empty Recycle Bin option in the menu that appears.
Administrators can see or can empty all recycle bins in a given File System Location by right-clicking on that location in the Navigation Area, then selecting from the menu that appears:
Location | Show All Recycle Bins
or
Location | Empty All Recycle Bins

Figure 18.5: Showing all recycle bins for a particular server File System Location.
The action of emptying a recycle bin cannot be undone.
