Import/export directories
Import/export directories are areas designated for use by the CLC Server to write to, for example when exporting results, or to read from, for example when importing data or when accessing BLAST databases.
To configure an import/export directory, go to:
Configuration (![]() ) | External data (
) | External data (![]() ) | Import/export directories
) | Import/export directories
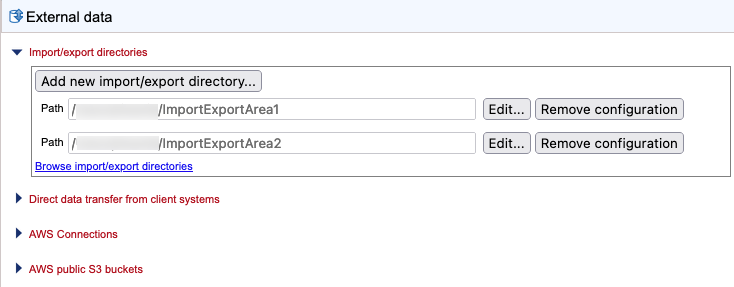
Click on the Add new import/export directory button and enter the relevant path (figure 8.2). The specified folder and its subfolders will then be available to client software logged into the CLC Server when relevant activities are carried out.
At least one import/export directory must be configured to enable direct data transfer from client systems (see Direct data transfer from client systems).
Access to import/export directories can be restricted using settings under:
Configuration (![]() ) | Global permissions (
) | Global permissions (![]() ) | Import/export directories
) | Import/export directories
Requirements for import/export areas
- Folders configured as import/export directories must be readable and writable by the user that runs the CLC Server process. Users logged into the CLC Server from their Import/export directories can access files in that area, and potentially write files to that area. However, it is the user running the server process that actually interacts with the file system.
- Import/export directories should NOT be set to subfolders of any defined CLC file system location. CLC Server file system locations are intended for data imported into or generated by CLC software. Import/export directories are intended for holding other data, for example, sequencing data that will be imported, data that is exported from the CLC Server, or BLAST databases.
- On grid setups and job node setups, an area configured as import/export directory must be a shared directory, accessible from the nodes and from the master server.

Figure 8.2: Areas external to the CLC Server that it can read data from and write data to, are configured as import/export directories in the External data area.
Browsing import/export areas
The contents of import/export directories can be browsed by going to:
Element info (![]() ) | Browse server import/export directories (
) | Browse server import/export directories (![]() )
)
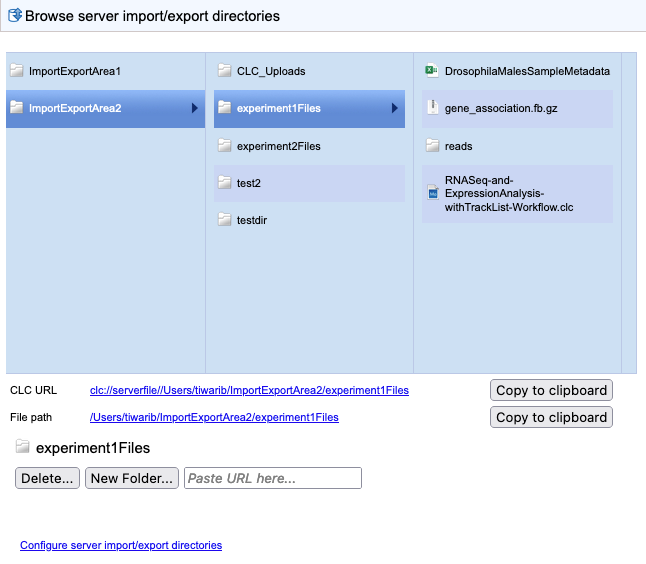
When a folder or file is selected, information about it is displayed below the file browser (figure 8.3).
URLs for files in import/export locations can be copied using the Copy to clipboard button. CLC URLs can be useful when copying data to AWS S3 locations (see Browsing AWS S3 locations), when sharing the location of files with others that have access to the same system, and when specifying files to be imported, or locations to export to, using the CLC Server Command Line Tools. When a Web URL is entered into the address bar of a web browser, the web client opens with the relevant item under the "Browse server import/export directories" tab.
Some data management tasks can be carried out from in this area. Folders or files can be deleted, new folders can be created, and files can be copied from AWS S3 locations or CLC File Server Locations into a selected folder by pasting a file URL into the text field near the bottom, replacing the Paste URL here... text.
URLs for data in AWS S3 buckets are shown when browsing under
Element info (![]() ) | Browse S3 locations (
) | Browse S3 locations (![]() ).
).
Data from a CLC File Server Locations is normally saved to an import/export directory when using export functionality.
URLs that can be used to copy data directly from a CLC Server File System Location are shown when browsing CLC data in the web client under Element info (![]() ) | Info (
) | Info (![]() ) and can also be obtained by using the Copy function in the Navigation Area of a Workbench.
) and can also be obtained by using the Copy function in the Navigation Area of a Workbench.

Figure 8.3: Browsing a CLC Server import/export directory in the web client.
