Input and output
Besides connecting the elements together, you have to decide what the input and the output of the workflow should be. We will first look at specification of the output, which is done by right-clicking the output box of any tool and selecting Use as Workflow Output as shown in figure 34.12.
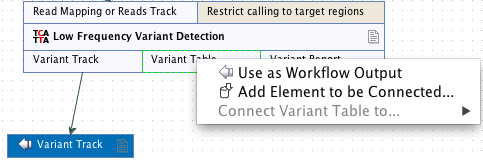
Figure 34.12: Selecting a workflow output.
You can mark several outputs this way throughout the workflow. Note that no intermediate results are saved unless they are marked as workflow output34.1.
By double-clicking the output box, you can specify how the result should be named as shown in figure 34.13.
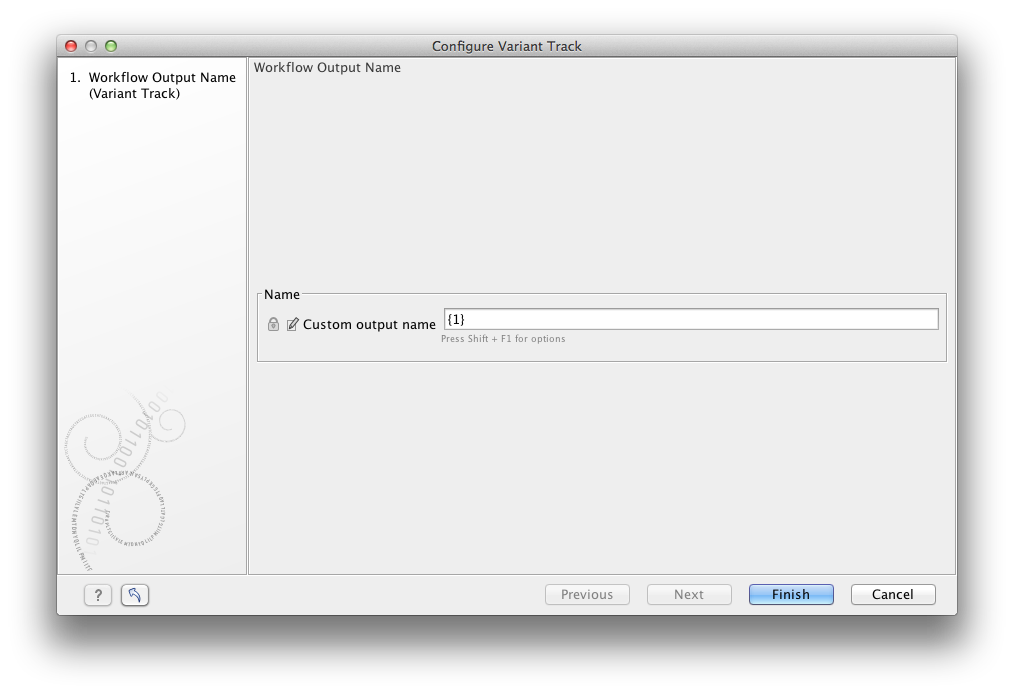
Figure 34.13: Specifying naming of a workflow output.
In this dialog you can enter a name for the output result, and you can make use of two dynamic placeholders for creating this name (press Shift + F1 to get assistance):
- {1} Represents the default name of the result. When running the tool outside of a workflow, this is the name given to the result.
- {2} Represents the name of the workflow input (not the input to this particular tool but the input to the entire workflow).
An example of a meaningful name to a variant track could be {2} variant track as shown in figure 34.14. If your workflow input is named Sample 1, the result would be Sample 1 variant track.
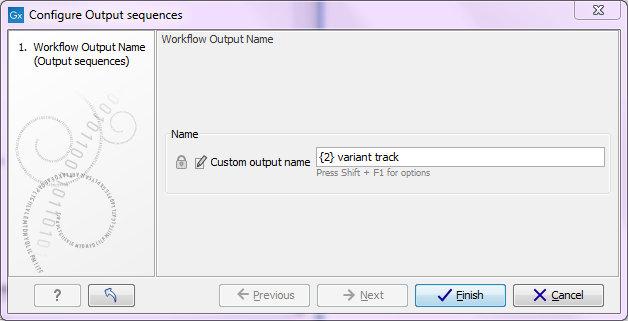
Figure 34.14: Providing a custom name for the result.
In addition to output, you also have to specify where the data should go into the workflow by adding an element called Workflow Input. This can be done by:
- Right-clicking the input box of the first tool and choosing Connect to Workflow Input. By dragging from the workflow input box to other input boxes several tools can use the input data directly.
- Pressing the button labeled Add Element (or right-click somewhere in the workflow background area and select Add Element from the menu that appears). The input box must then be connected to the relevant tool(s) in the workflow by dragging from the Workflow Input box to the "input description" part of the relevant tool(s) in the workflow.
At this point you have only prepared the workflow for receiving input data, but not specified which data to use as input. To be able to do this you must first save the workflow. When this has been done, the button labeled Run is enabled which allows you to start executing the workflow. When you click on the button labeled Run you will be asked to provide the input data.
Multiple input files can be used when:
- Data is generated within the Workflow
- Data is held within the Workbench
- Data is a combination of the two situations above
Please note that once the multiple input feature is used in a workflow, it is not possible to run the workflow in batch mode. Please also note that the input elements can be renamed, which is useful if you want to be able to discriminate the elements in the process description shown during workflow execution.
The example in figure 34.15 shows how to generate a track list in a workflow. It is possible to include reference tracks and also tracks from any step, or multiple steps within the workflow as long as output Read Tracks are defined and linked to.
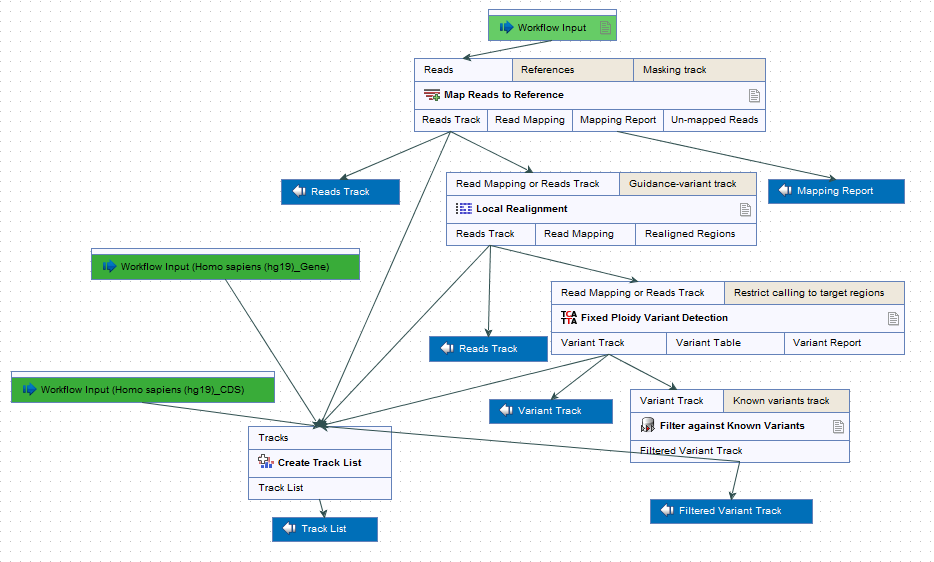
Figure 34.15: Generation of a track list including data generated within the Workflow, as well as data held in the Workbench.
Footnotes
- ... output34.1
- When the workflow is executed, all the intermediate results are indeed saved temporarily but they are automatically deleted when the workflow is completed. If a part of the workflow fails, the intermediate results are not deleted.