How to run the "Prepare Raw Data" ready-to-use workflow
If you have sequencing reads without overlapping pairs, you can use the "Prepare Raw Data" ready-to-use workflow for preparation of your sequences before you proceed to data analysis such as variant calling.
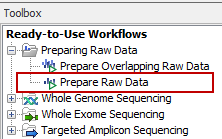
- Go to the toolbox and double-click on the "Prepare Raw Data" ready-to-use workflow (figure 12.8).

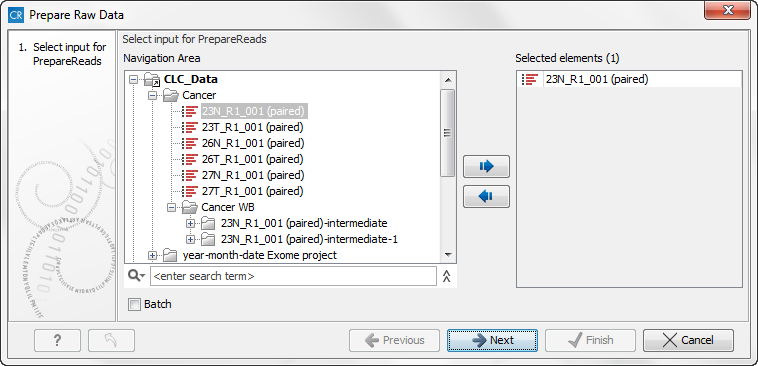
Figure 12.8: The ready-to-use workflows are found in the toolbox.This will open the wizard shown in figure 12.9 where you can select the reads that you wish to prepare for further analyses.

Figure 12.9: Select the sequencing raw data that you wish to prepare before further analysis. At this step you can also choose whether you wish to prepare several reads in batch mode.At this step you can choose to prepare one sample at the time or you can select several samples and prepare them simultaneously. If you choose to select more than one sample you can choose to either select multiple samples and use the small arrow to send them to the "Selected elements" in the right side of the wizard. Alternatively you can run the samples in "batch mode". This is done by selecting "Batch" (tick "Batch" at the bottom of the wizard as shown in figure 12.4) and select the folder that holds the data you wish to analyse. If you have your sequencing data in separate folders, you should choose to run the analysis in batch mode.
The difference between analyzing multiple samples in batch mode versus in non-batch mode is the reporting. If you use batch mode, you will get an individual report for every single sample whereas you will get one combined report for all samples if you do not run in batch mode.
- When you have selected the sample(s) you want to prepare, click on the button labeled Next.
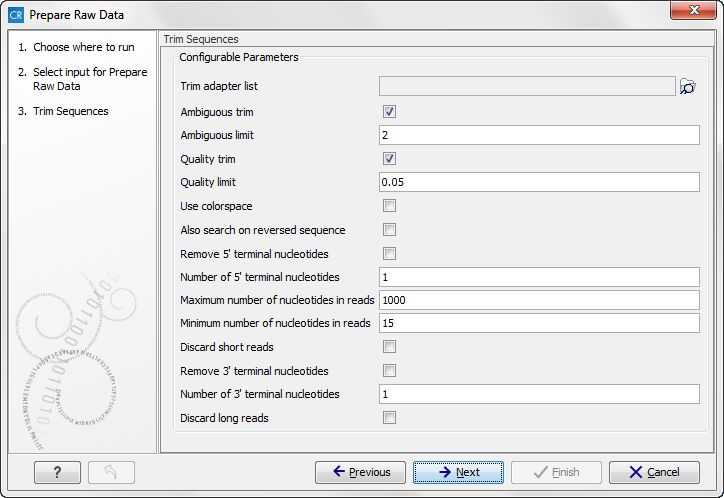
As part of the data preparation, the sequences are trimmed. In the next wizard (figure 12.10) you can specify different trimming parameters and select the adapter trim list that should be used for adapter trimming by clicking on the folder icon (
 ). To obtain this file you will have to get in contact with the vendor and ask them to send this adapter trim list file to you. The adapter trim list has been supplied by the vendor of the enrichment kit and sequencing machine. See Import adapter trim list for a description of how to import the adapter trim list.

Figure 12.10: Select your adapter trim list. You can use the default trim parameters or adjust them if necessary. - Click on the button labeled Next, which will take you to the next wizard (figure 12.11).

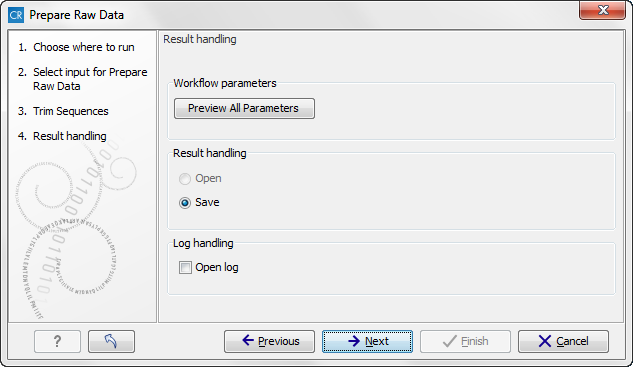
Figure 12.11: Check the settings and save your results.If you click on the button labeled Preview All Parameters you get the chance to check the selected settings. At this step you can only check the settings, it is not possible to make any changes at this point.
The settings can be exported with the two buttons found at the bottom of this wizard; one button allows specification of the export format, and the other button (the one labeled "Export Parameters") allows specification of the export destination. When selecting an export location, you will export the analysis parameter settings that were specified for this specific experiment.
- Click on the button labeled OK to go back to the previous wizard and choose Save.
