Assemble sequences to reference
This section describes how to assemble a number of
sequence reads into a contig using a reference sequence. A reference
sequence can be particularly helpful when the objective is to
characterize SNP variation in the data.
To start the assembly:
Toolbox | Sequencing Data Analysis (![]() )|
Assemble Sequences to Reference (
)|
Assemble Sequences to Reference (![]() )
)
This opens a dialog where you can alter your choice of sequences to assemble. If you have already selected sequences in the Navigation Area, these will be shown in Selected Elements, however you can remove these or add others, by using the arrows to move sequences between the Navigation Area and Selected Elements boxes. You can also add sequence lists.
Note! You can assemble a maximum of 2000 sequences at a time.
To assemble more sequences, please use the Map Reads to Reference (![]() ) under NGS Core Tools (
) under NGS Core Tools (![]() ) in the Toolbox.
) in the Toolbox.
To assemble more sequences, you need the CLC Genomics Workbench (see http://www.clcbio.com/genomics).
When the sequences are selected, click Next, and you will see the dialog shown in figure 31.9
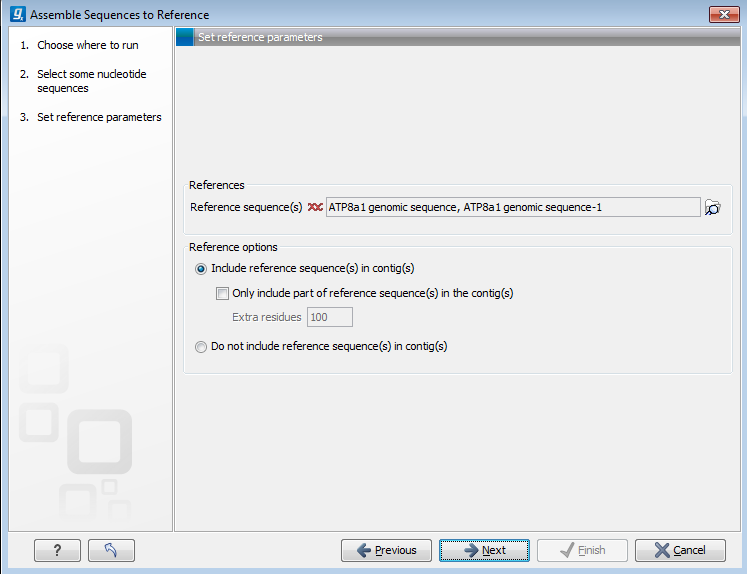
Figure 31.9: Parameters for how the reference should be handled when assembling sequences to a reference sequence.
This dialog gives you the following options for assembling:
- Reference sequence. Click the Browse and select element icon (
 ) in order to select one or more sequences to use as reference(s).
- Include reference sequence(s) in contig(s).
This will create a contig for each reference with the corresponding reference sequence at the top
and the aligned sequences below. This option is useful when comparing sequence reads to a closely related reference
sequence e.g. when sequencing for SNP characterization.
- Only include part of reference sequence(s) in the contig(s). If the aligned sequences only cover a small part of a reference sequence, it may not be desirable to include the whole reference sequence in a contig. When this option is selected, you can specify the number of residues from reference sequences that should be included on each side of regions spanned by aligned sequences using the Extra residues field.
- Do not include reference sequence(s) in contig(s). This will produce contigs without any reference sequence where the input sequences have been assembled using reference sequences as a scaffold. The input sequences are first aligned to the reference sequence(s). Next, the consensus sequence for regions spanned by aligned sequences are extracted and output as contigs. This option is useful when performing assembling sequences where the reference sequences that are not closely related to the input sequencing.
When the reference sequence has been selected, click Next, to see the dialog shown in figure 31.10
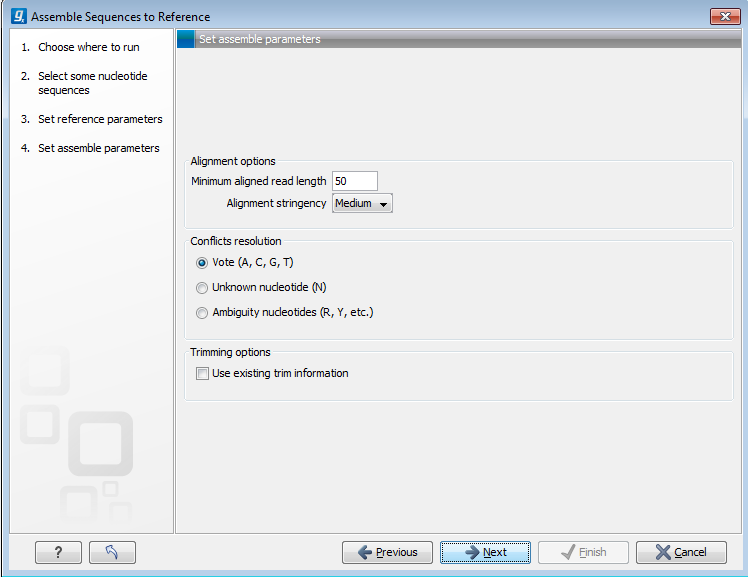
Figure 31.10: Options for how the input sequences should be aligned and how nucleotide conflicts should be handled.
In this dialog, you can specify the following options:
- Minimum aligned read length. The minimum number of nucleotides in a read which must match a reference sequence. If an input sequence does not meet this criteria, the sequence is excluded from the assembly.
- Alignment stringency. Specifies the stringency of the scoring function used for aligning the input sequences to the reference sequence(s). A higher stringency level often produce contigs with lower levels of ambiguity but also reduces the ability to align distant homologs or sequences with a high error rate to reference sequences. The result of a higher stringency level is often that the number of contigs increases and the average length of contigs decreases while the quality of each contig increases. Three
stringency levels can be set:
- Low.
- Medium.
- High.
The stringency settings Low, Medium and High are based on the following score values (mt=match, ti=transition, tv=transversion, un=unknown):
Score values Low Medium High Match (mt) 2 2 2 Transversion (tv) -6 -10 -20 Transition (ti) -2 -6 -16 Unknown (un) -2 -6 -16 Gap -8 -16 -36 Score Matrix A C G T N A mt tv ti tv un C tv mt tv ti un G ti tv mt tv un T tv ti tv mt un N un un un un un - Conflicts resolution. If there is a conflict, i.e. a position where aligned sequences disagreement about the residue (A, C, T or G), you can specify how the contig sequence should reflect this conflict:
- Unknown nucleotide (N). The contig will be assigned an 'N' character in all positions with conflicts (conflicts are registered already when two nucleotides differ).
- Ambiguity nucleotides (R, Y, etc.). The contig will display an ambiguity nucleotide reflecting the different nucleotides found in the aligned sequences (nucleotide ambiguity is registered when two nucleotides differ). For an overview of ambiguity codes, see IUPAC codes for nucleotides.
- Vote (A, C, G, T). The conflict will be solved by counting instances of each nucleotide and then letting the majority decide the nucleotide in the contig. In case of equality, ACGT are given priority over one another in the stated order.
- Trimming options. When aligning sequences to a reference sequence, trimming is generally not necessary, but if you wish to use trimming you can check this box. It requires that the sequence reads have been trimmed beforehand (see Trim sequences for more information about trimming).
Click Next if you wish to adjust how to handle the results. If not, click Finish. This will start the assembly process. See View and edit contigs on how to use the resulting contigs.