How to handle results of analyses
This section will explain how results generated from tools in the Toolbox are handled by CLC Genomics Workbench. Note that this also applies to tools not running in batch mode. All the analyses in the Toolbox are performed in a step-by-step
procedure. First, you select elements for analyses, and then there
are a number of steps where you can specify parameters (some of the
analyses have no parameters, e.g. when translating DNA to RNA). The
final step concerns the handling of the results of the analysis, and
it is almost identical for all the analyses so we explain it in this
section in general.

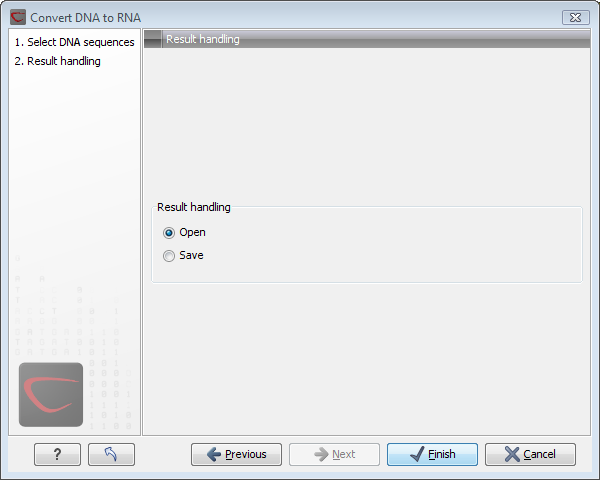
Figure 8.4: The last step of the analyses exemplified by Translate DNA to RNA.
In this step, shown in figure 8.4, you have two options:
- Open. This will open the result of the analysis in a view. This is the default setting.
- Save. This means that the result will not
be opened but saved to a folder in the Navigation Area. If you select this option, click Next
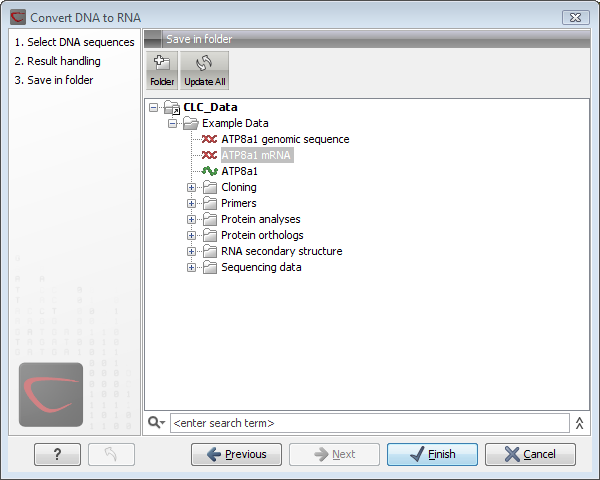
and you will see one more step where you can specify where to save the results (see figure 8.5).
In this step, you also have the option of creating a new folder or adding a location by clicking the buttons (
 )/ (
)/ ( ) at the top of the dialog.

Figure 8.5: Specify a folder for the results of the analysis.
Subsections
