Providing alternative CNV controls
This section describes how to create and modify a copy of a template workflow configured with QIAGEN CNV control reference data so that it can be used with alternative CNV controls.
- Find the template workflow in the Toolbox, right-click on it, and select Open Copy of Workflow.
- Locate and expand the "CNV Detection" group. Searching for cnv detection using the Find palette in the Side Panel can help locate the group.
- Delete the connections from Branch on XY and Remove Targets on XY to Copy Number Variant Detection (Targeted) (figure 12.1).
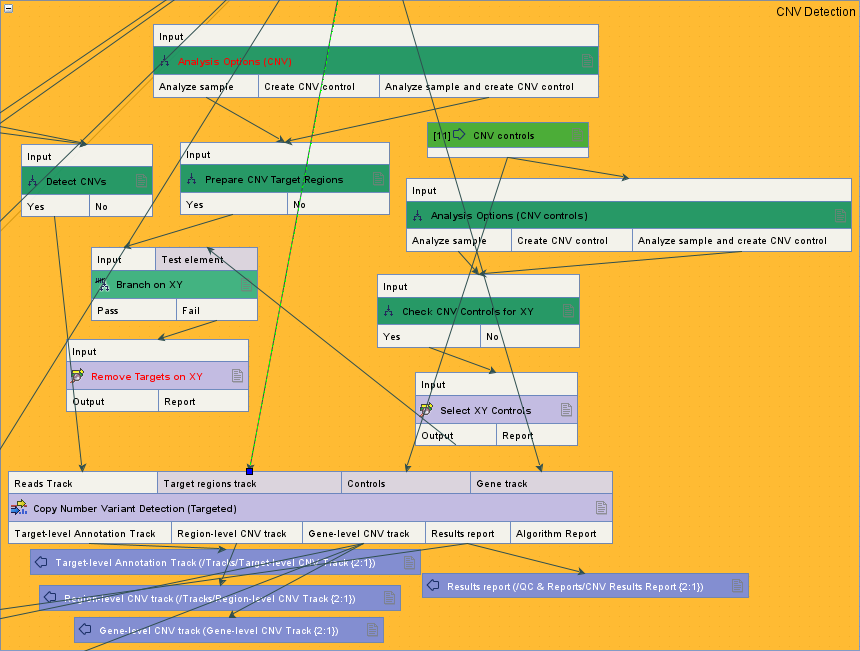
Figure 12.1: The "CNV Detection" group in a template workflow that is configured with QIAGEN CNV control reference data. - Drag the input connect from Analysis Options (CNV) and move it to the "Target regions track" input channel of Copy Number Variant Detection (Targeted) (figure 12.1).
- Delete the following workflow elements:
- Analysis Options (CNV)
- Prepare CNV Target Regions
- Branch on XY
- Remove Targets on XY
- Analysis Options (CNV controls)
- Check CNV Controls for XY
- Select XY Controls
To delete an element, first select it and then use one of the following options:
- Press the Delete key on the keyboard.
- Click on Delete (
 ) in the top Toolbar.
- Right-click on the element and choose Delete Selected (
 ).
).
The group content should resemble that in figure 12.2.
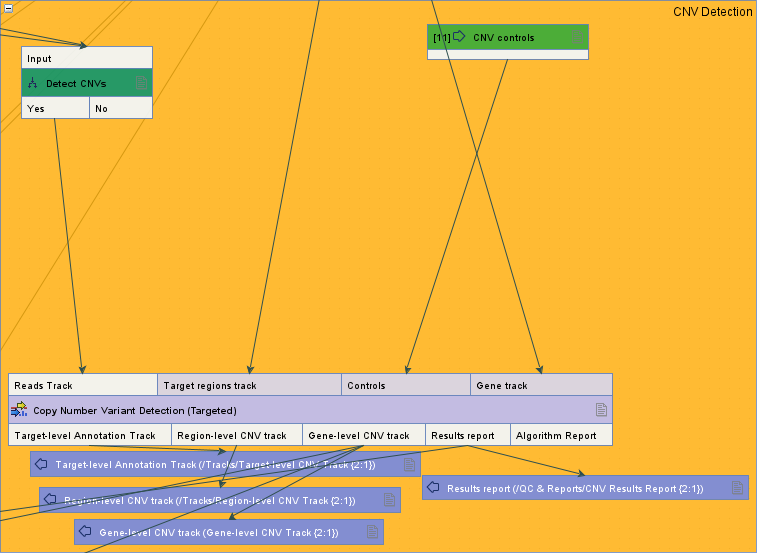
Figure 12.2: The "CNV Detection" group after removing elements. - Double-click on the "CNV controls" Workflow Input element. In the "Configure CNV controls" dialog that opens (figure 12.3):
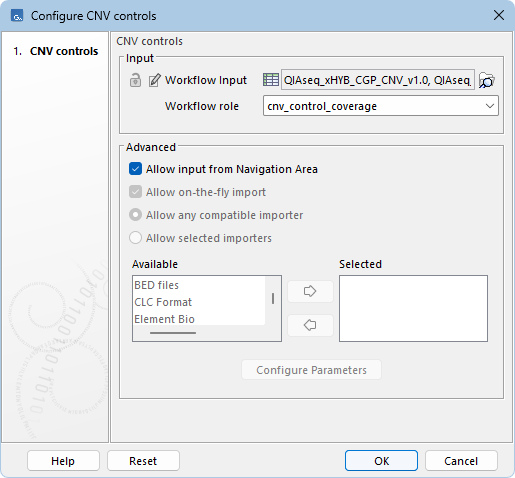
Figure 12.3: Configuring the "CNV controls" workflow element.- Click on the (
 ) button.
- In the "Select Workflow Input" dialog, remove the preconfigured QIAGEN CNV control reference data by selecting them and clicking on the arrow that points to the left (
 ) (figure 12.4).
Click on OK.
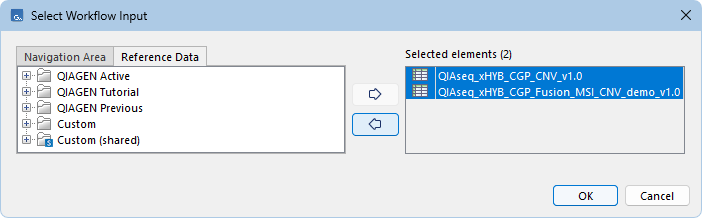
Figure 12.4: Removing the preconfigured QIAGEN CNV control reference data elements. - Delete the preconfigured cnv_control_coverage text in the "Workflow role" field (figure 12.3).
- Click on OK to save and close the dialog.
- Click on the (
- Save the workflow in the Navigation Area by clicking on Save (
 ) in the top Toolbar.
When running the modified workflow copy, the alternative CNV controls can be selected in the Select CNV controls wizard step.