Label settings
- Label font settings Can be used to specify/adjust font type, size and typography (Bold, Italic or normal).
- Hide overlapping labels Disable automatic hiding of overlapping labels and display all labels even if they overlap.
- Show internal node labels Labels for internal nodes of the tree (if any) can be displayed. Please note that subtrees and nodes can be labeled with a custom text. This is done by right clicking the node and selecting Edit Label (see figure 22.15).
- Show leaf node labels Leaf node labels can be shown or hidden.
- Rotate Subtree labels Subtree labels can be shown horizontally or vertically. Labels are shown vertically when "Rotate subtree labels" has been selected. Subtree labels can be added with the right click option "Set Subtree Label" that is enabled from "Decorate subtree" (see Node right click menu).
- Align labels Align labels to the node furthest from the center of the tree so that all labels are positioned next to each other. The exact behavior depends on the selected tree layout.
- Connect labels to nodes Adds a thin line from the leaf node to the aligned label. Only possible when Align labels option is selected.
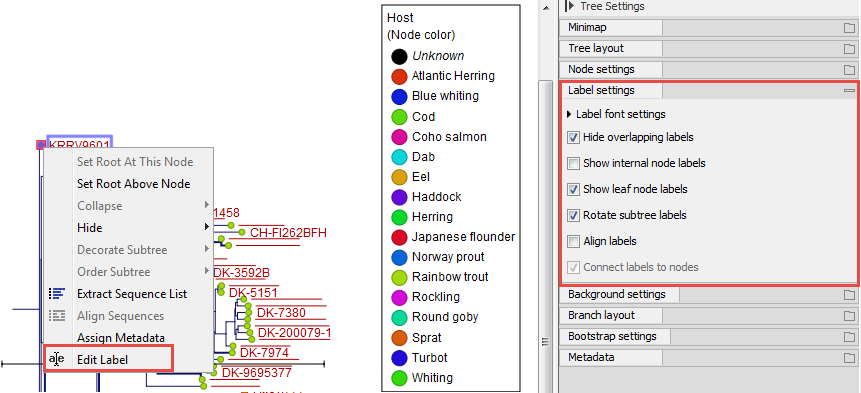
Figure 22.15: "Edit label" in the right click menu can be used to customize the label text. The way node labels are displayed can be controlled through the labels settings in the right side panel.
When working with big trees there is typically not enough space to show all labels. As illustrated in figure 22.15, only some of the labels are shown. The hidden labels are illustrated with thin horizontal lines (figure 22.16).
There are different ways of showing more labels. One way is to reduce the font size of the labels, which can be done under Label font settings in the Side Panel. Another option is to zoom in on specific areas of the tree (figure 22.16 and figure 22.17). The last option is to disable Hide overlapping labels under "Label settings" in the right side panel. When this option is unchecked all labels are shown even if the text overlaps. When allowing overlapping labels it is usually a good idea to disable Show label background under "Background settings" (see section 22.5.5).
Note! When working with a tree with hidden labels, it is possible to make the hidden label text appear by moving the mouse over the node with the hidden label.
Note! The text within labels can be edited by editing the metadata table values directly.
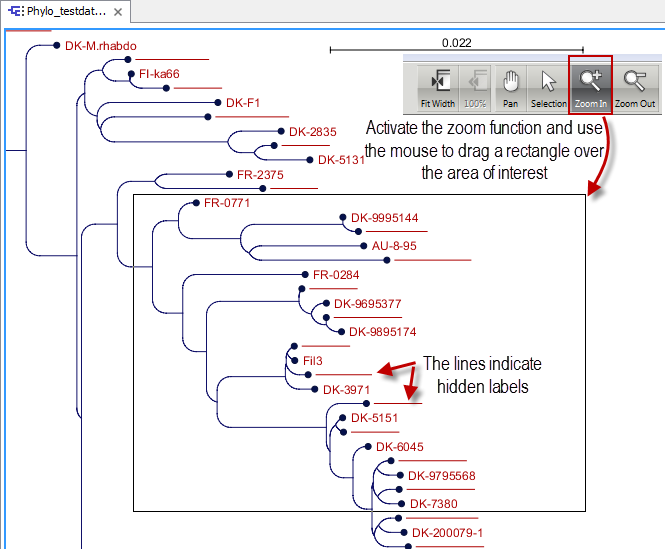
Figure 22.16: The zoom function in the upper right corner of the Workbench can be used to zoom in on a particular region of the tree. When the zoom function has been activated, use the mouse to drag a rectangle over the area that you wish to zoom in at.
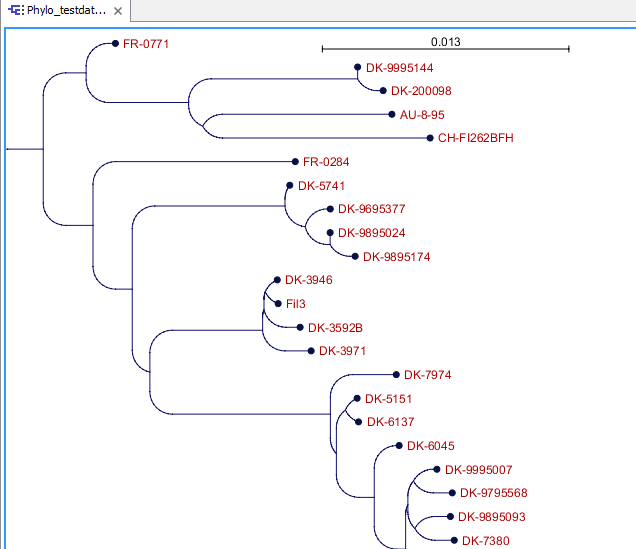
Figure 22.17: After zooming in on a region of interest more labels become visible. In this example all labels are now visible.