Grouping criteria
Filter sets can be refined further by applying Match all or Match any to different groups of criteria, determining how rows match the criteria before Keep or Remove is applied. Groups can also be organized into subgroups, making it possible to build filter sets of any complexity.
To select criteria, hold Ctrl (![]() on Mac) and click the desired criteria. To select a range, hold Shift and click the first and last criteria. To group the selected criteria, right-click and choose Group Selected Criteria (figure 9.8).
on Mac) and click the desired criteria. To select a range, hold Shift and click the first and last criteria. To group the selected criteria, right-click and choose Group Selected Criteria (figure 9.8).
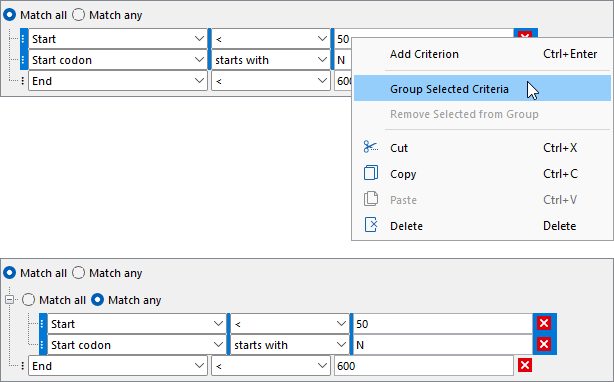
Figure 9.8: Filter criteria can be grouped, and groups have their own "Match all" and "Match any" options. Top: Three criteria are configured with "Match all": rows satisfying all criteria would match. Selecting the first two criteria and right-clicking them reveals a menu from which the criteria can be grouped. Bottom: Two of the filter criteria are in a group that uses "Match any". Rows satisfying any one of the two criteria, as well as the last ungrouped criterion, would match.
To ungroup criteria:
- Select one or more criteria from the same group, right-click, and choose Remove Selected from Group. The selected criteria are moved one level up.
Note: a group is not automatically deleted when all its criteria have been removed. To delete a group, right-click it and choose Delete. Deleting a group also deletes all criteria within it.
- Right-click a group and choose Dissolve Group. All criteria are moved one level up and the group itself is deleted.
Criteria can also be moved between groups using drag and drop:
- Criteria can be moved into or out of groups.
- Groups themselves can be rearranged within other groups.
- Dragging one criterion onto another creates a new group containing both.
Adding descriptions to groups
When working with complex filters, collapsing groups can reduce visual clutter and make navigation easier. To collapse or expand groups, click the +/- icon in front of Match all. To summarize the purpose of a group, a description can be added by right-clicking the group and choosing Add Annotation Description (figure 9.9). When available, the group description is shown in the "Match status" column instead of the individual criteria. The top-level group is always expanded, but it can have a description. To remove a description, right-click the group and choose Remove Annotation Description.
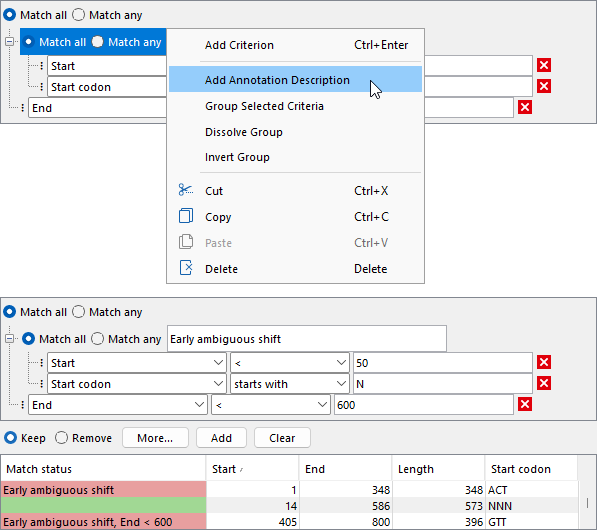
Figure 9.9: Groups can have a description. Top: Right-clicking a group reveals a menu from which a description can be added. Bottom: The group has a description, which is shown in the match status as a single entry instead of listing the individual criteria.
Group descriptions make the match status more concise by hiding the individual criteria. To see all relevant criteria for each row, click the More... button below the filter criteria and choose Add detailed match status (figure 9.10).
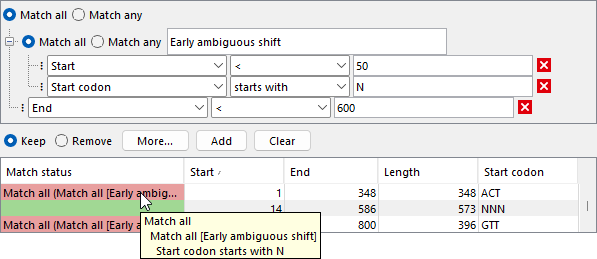
Figure 9.10: All relevant filter criteria are shown in the detailed match status. The tooltip preserves the group structure of the filter criteria and lists the criteria responsible for a row being excluded.
For an intuitive and easy-to-understand match status, it is recommended to add group descriptions that correspond to the Keep and Remove options used (figure 9.11).
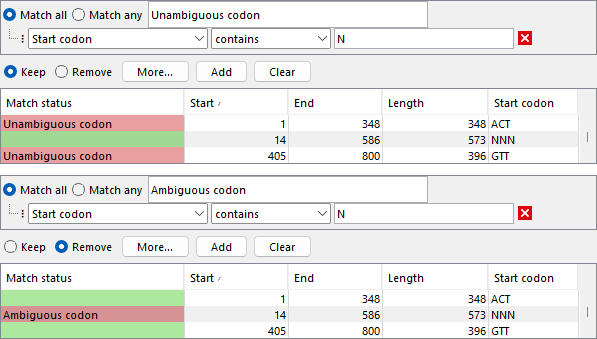
Figure 9.11: Group descriptions are intuitive when they correspond to the selected "Keep" or "Remove option". Top: The top-level group contains a single filter criterion and uses "Keep". Bottom: The same top-level group uses "Remove" instead, and the group description conveys the opposite meaning.
Inverting groups
A group can be inverted (i.e., negated) by right-clicking it and choosing Invert Group (figure 9.12). For an inverted group, the rules for satisfying it are the opposite of a non-inverted group:
- For Match all: the group is satisfied if not all criteria and subgroups are satisfied (i.e., at least one is not satisfied).
- For Match any: the group is satisfied only if none of the criteria or subgroups are satisfied.
Inverted groups are indicated by "Inverted" before Match all. They are not strictly necessary, as the same behavior can be achieved without inversion by adjusting the criteria operators and the Match all and Match any options (figure 9.12). However, using inversion can make filters easier to understand. Some conditions may be clearer when rows do not satisfy them, while others are more intuitive when rows satisfy them. The top-level group cannot be inverted. To achieve the same effect, use the Remove option.
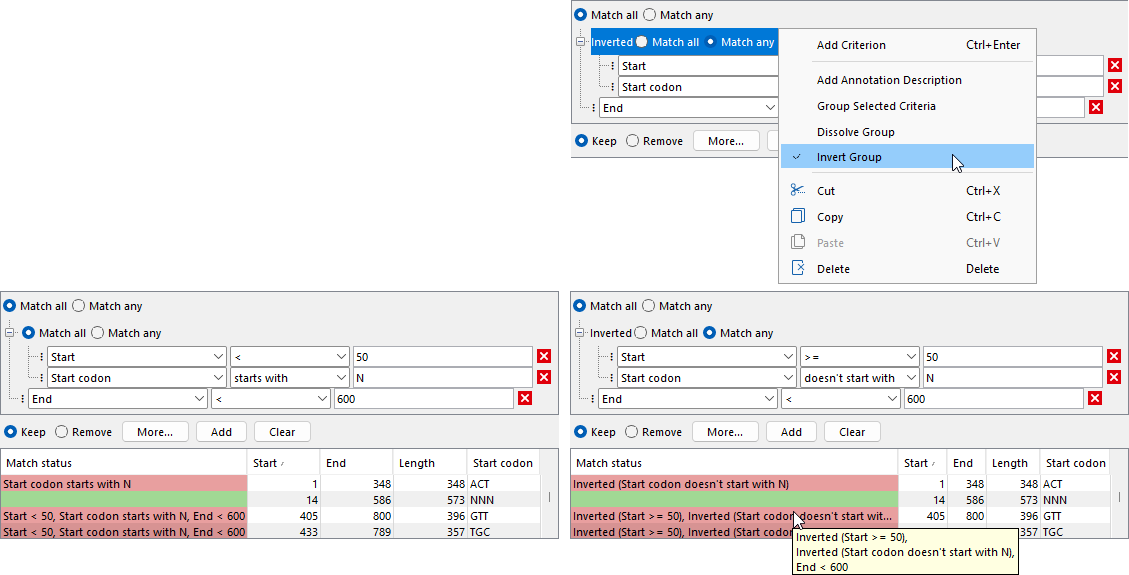
Figure 9.12: Groups can be inverted. Top right: Selecting a group and right-clicking it reveals a menu from which inversion can be toggled. Inverted groups are indicated by the label "Inverted" placed in front of "Match all". Bottom right: An inverted group, with the match status reflecting the inversion. Bottom left: An equivalent non-inverted group that uses "Match all" instead of "Match any", with the operators reversed.
If all groups at the same level (i.e., all subgroups of the same parent group) are inverted, it may be useful to eliminate these inversions (figure 9.13) by:
- Changing the inversion of the parent group. If the parent group is the top-level group, change between Keep and Remove instead.
- Changing between Match all and Match any in the parent group.

Figure 9.13: Inversions can be simplified in filter sets. Top: The top-level group uses "Match all" with "Keep", and its two subgroups are inverted. Bottom: The subgroups are no longer inverted; instead, the top-level group uses "Match any" with "Remove", which has the same effect as inversion. The two filter sets are equivalent.