Translation of DNA or RNA to protein
In CLC Genomics Workbench you can translate a nucleotide sequence into a protein sequence using the Toolbox tools. Usually, you use the +1 reading frame which means that the translation starts from the first nucleotide. Stop codons result in an asterisk being inserted in the protein sequence at the corresponding position. It is possible to translate in any combination of the six reading frames in one analysis. To translate:
select a nucleotide sequence | Toolbox in the
Menu Bar | Classical Sequence Analysis (![]() ) | Nucleotide Analysis (
) | Nucleotide Analysis (![]() )|
Translate to Protein (
)|
Translate to Protein (![]() )
)
or right-click a nucleotide sequence | Toolbox
| Classical Sequence Analysis (![]() ) | Nucleotide Analysis (
) | Nucleotide Analysis (![]() )|
Translate to Protein (
)|
Translate to Protein (![]() )
)
This opens the dialog displayed in figure 15.5:
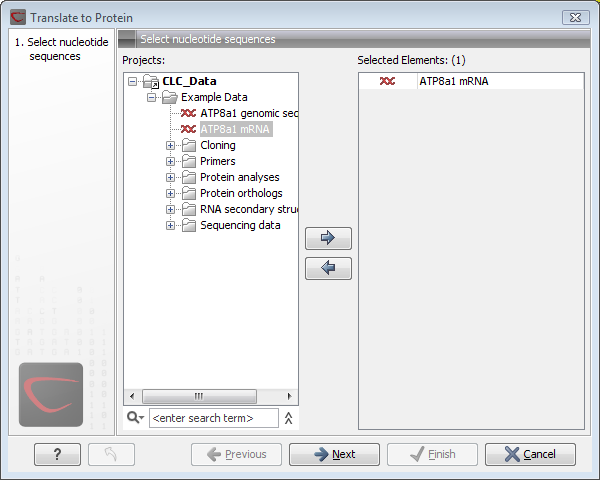
Figure 15.5: Choosing sequences for translation.
If a sequence was selected before choosing the Toolbox action, the sequence is now listed in the Selected Elements window of the dialog. Use the arrows to add or remove sequences or sequence lists from the selected elements.
Clicking Next generates the dialog seen in figure 15.6:
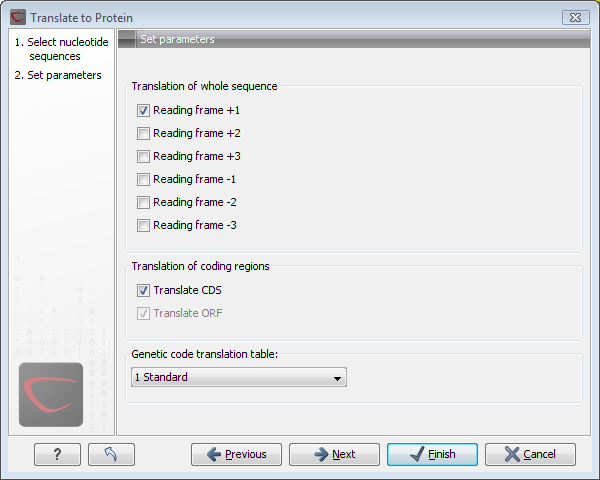
Figure 15.6: Choosing +1 and +3 reading frames, and the standard translation table.
Here you have the following options:
- Reading frames
- If you wish to translate the whole sequence, you must specify the reading frame for the translation. If you select e.g. two reading frames, two protein sequences are generated.
- Translate coding regions
- You can choose to translate regions marked by and CDS or ORF annotation. This will generate a protein sequence for each CDS or ORF annotation on the sequence.
- Genetic code translation table
- Lets you specify the genetic code for the translation. The translation tables used are listed in here.
Click Next if you wish to adjust how to handle the results. If not, click Finish. The newly created protein is shown, but is not saved automatically.
To save a protein sequence, drag it into the Navigation Area or
press Ctrl + S (![]() + S on Mac) to activate a save dialog.
+ S on Mac) to activate a save dialog.
Subsections