Export graphics to files
CLC Genomics Workbench supports two ways of exporting graphics:
- You can export the current view, either the visible area or the entire view, by clicking on the Graphics button (
 ) in the top Toolbar. This is the generally recommended route for exporting graphics for individual data elements, and is described below.
- For some data types, graphics export tools are available in the main Export menu, which can be opened by clicking on the Export (
 ) button in the top Toolbar. These are useful if you wish to export different data using the same view in an automated fashion, for example by running the export tool in batch mode or in a workflow context. That functionality is described in Graphics export.
Exporting a view of data element to a graphics format file
To export a view of an open data element to a graphics file, click on the Graphics button (![]() ) in the top Toolbar, or choose Export Graphics from under the File menu.
) in the top Toolbar, or choose Export Graphics from under the File menu.
How the data looks on the screen is how it will look in the exported file. Before exporting, the options in the Side Panel can be used to make adjustments as necessary.
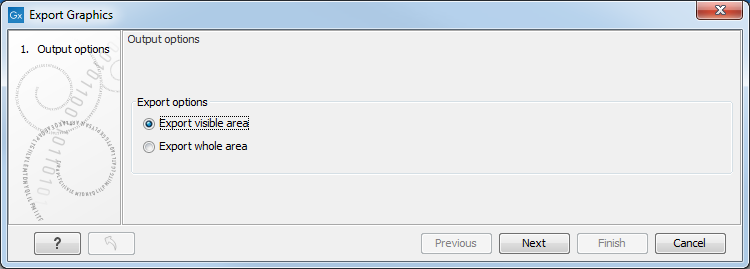
For views that can be zoomed into or out of, you will be offered the choice of exporting the whole view or just the visible area (figure 7.36). For 3D structures, the section visible will always be exported, i.e. the equivalent to selecting to export just the visible area.

Figure 7.36: The whole view or just the visible area can be selected for export.
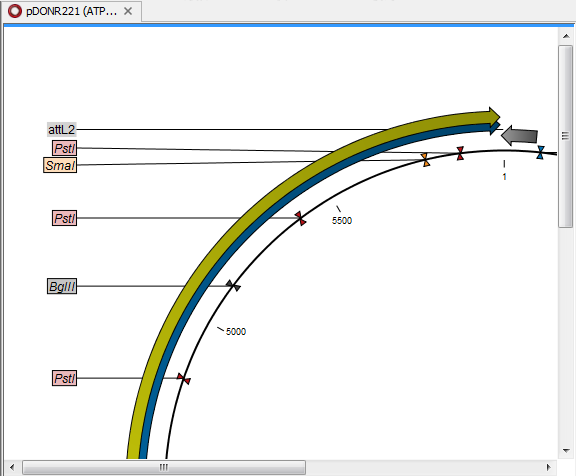
A view of a circular sequence, zoomed in so that you can only see a part of it, is shown in figure 7.37.

Figure 7.37: A circular sequence, as it looks on the screen when zoomed in.
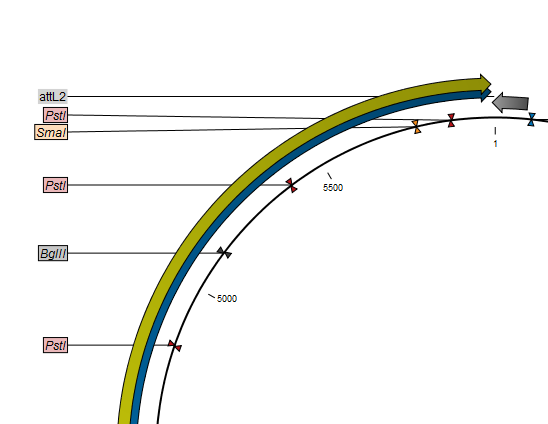
When the option Export visible area is selected, the exported file will only contain the part of the sequence that is visible in the view. The result of doing this for the view shown in figure 7.37 is shown in figure 7.38.

Figure 7.38: The exported graphics file when Export visible area was selected.
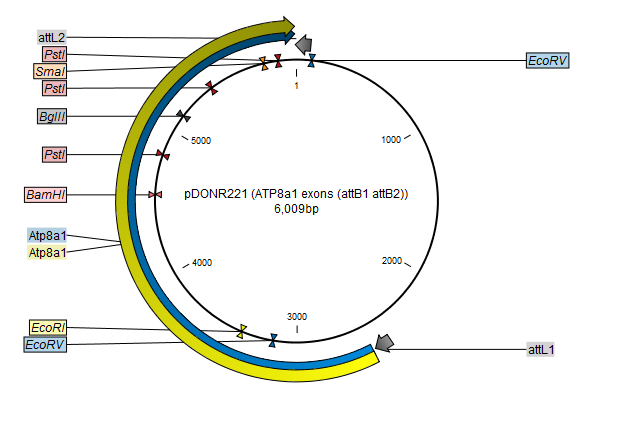
If you select Export whole view, the result would look like that shown in figure 7.39, where the part of the sequence not visible on screen is also exported.

Figure 7.39: The exported graphics file when Export whole view was selected. The whole sequence is shown, not just the part visible on screen when the view was exported.
You are prompted for the file format to use, and the name and location to save the output to.
For vector-based image formats, click on Finish to start the export. For bitmap-basd image formats, click on Next to select a resolution level. You can click on Finish directly instead, in which case the image will be exported using the setting used the last time this functionality was run. If it has not been run before the default settings are used.
The available export formats are described in Graphics export file formats.
Subsections
