Batch processing
Batch processing refers to running an analysis multiple times, once per batch unit. For example, if you have 10 sequence lists and wish to run 10 mapping analyses, one per sequence list, you could launch all 10 analyses by setting up one batch job. Here, each sequence list would be a "batch unit".
This section focuses on batch processing when using individual tools. Further details about batch processing of workflows is provided in Launching workflows individually and in batches and Running part of a workflow multiple times .
Batch mode
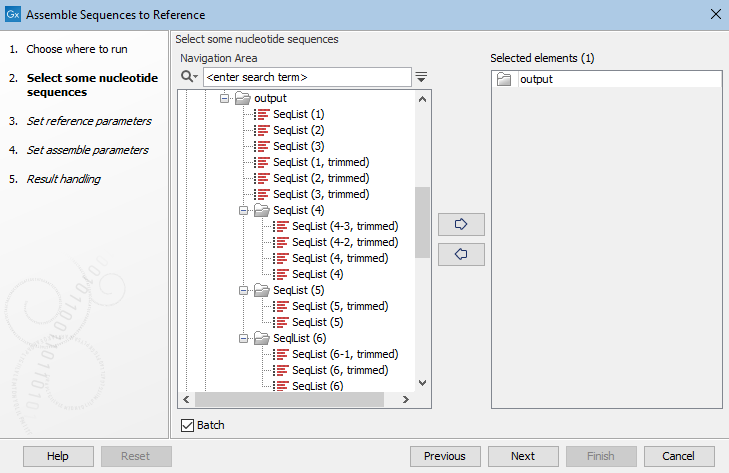
Batch mode is activated by clicking the Batch checkbox in the dialog where the input data is selected (figure 10.8).

Figure 10.8: When launching an analysis in Batch mode, individual elements and/or folders can be selected. Here, a single folder that contains both elements and subfolders of elements has been selected.
In Batch mode, the analysis is run once per batch unit. A batch unit consists of the data elements to be analyzed together. A batch unit can be a single data element, or can consist of multiple data elements.
Batch units are made up of:
- Each data element selected in the launch wizard.
- Elements and folders within a folder selected in the launch wizard, where:
- Each data element contained directly within that selected folder is a batch unit.
- Each subfolder directly under the selected folder is a batch unit. I.e. all elements within that subfolder are analyzed together.
- Elements within more deeply nested subfolders (e.g. subfolders of subfolders of the originally selected folder) are not used in the analysis.
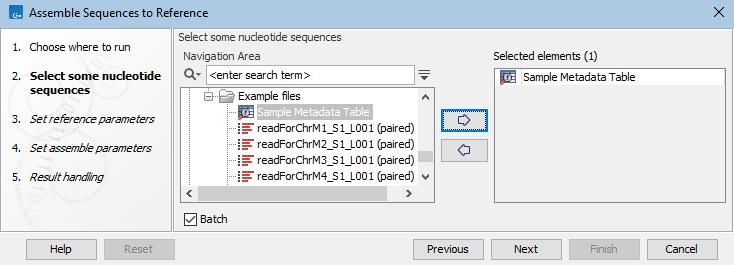
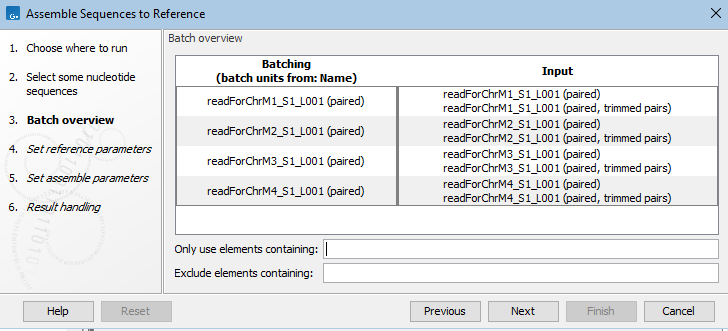
- Elements with associations to a CLC Metadata Table selected in the launch wizard. Each row in the CLC Metadata Table is a batch unit. Data elements associated with a row, of a type compatible as input to the analysis, are the default contents of a batch unit. See figure 10.9 and figure 10.10.

Figure 10.9: When the Batch box is checked, a CLC Metadata Table can be selected as input.
Figure 10.10: Data associated with each row in a CLC Metadata Table, of a type compatible with that analysis, make up the default content of batch units.
Batch overview
In the batch overview step, the elements in each batch unit can be reviewed, and refined based on their names using the fields Only use elements containing and Exclude elements containing.
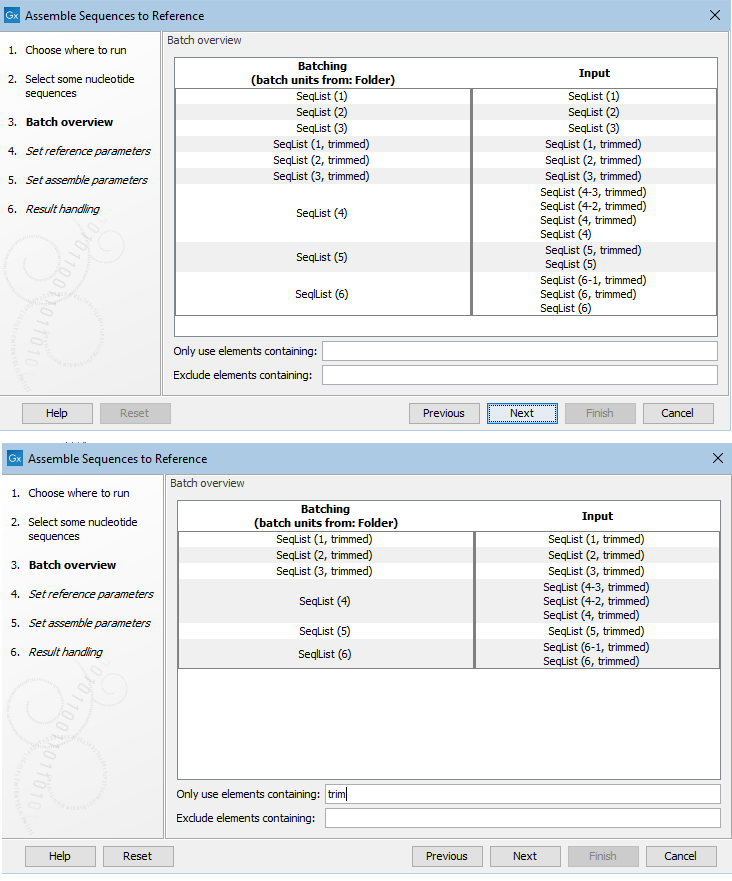
In figure 10.11, the batch units, i.e. those elements and folders directly under the folder selected in figure 10.8, are shown. In each batch unit, data elements that could be used in the analysis are listed on the right hand side. Some batch units contain more than one data element. Those data elements would be analyzed together. To limit the analysis to just sequence lists containing trimmed sequences, the term "trim" has been entered into a filter field near the bottom.

Figure 10.11: Overview of the batch units (left) and the input elements defined by each batch unit (right). By default, all elements that can be used as inputs are listed on the right (top). By entering terms in the filter fields, the list of elements in the batch units can be refined. Here, only sequence lists including trimmed sequences will be included (bottom) .
Folders that do not contain any elements compatible with the analysis are not shown in the batch overview.
Organization of the results
The options for where to save analysis outputs are shown in figure 10.12.

Figure 10.12: Options for saving results when an analysis is runin Batch mode.
The available options are:
- Save in input folder Save all outputs into the same folder as the input data. For batch units defined by folders, the results of each analysis are saved into the folder with the input data. If the batch units were individual data elements, results are put into the same folder as the input elements.
- Save in specified location You will be prompted in the next step to select a folder where the outputs should be saved to. The Create subfolders per batch unit checkbox allows you to specify whether subfolders should be created to store the results from each batch unit:
- When checked results for each batch unit are written to a newly created subfolder under the folder you select in the next step. A subfolder is created for each batch unit. (This is the default option.)
- When unchecked, results from all batch units are written to the folder you select in the next step.
The log file
In the final wizard step there is an option to Create a log. When checked, a log containing information about all the batch units will be created. This log includes the term "combined log" in its name. A log is also created for each individual batch unit.
Batch unit processes
When the job is running, there is one "master" process representing the overall batch job, and a separate process for each batch unit.
On a CLC Workbench, the batch units are executed sequentially - one batch unit at a time. This avoids overloading the computer.
On a CLC Server, all the processes are placed in the queue, and the queue takes care of distributing the jobs. If there are multiple job nodes or grid nodes, batch units may be processed in parallel.
Stopping a batch run
To stop the whole batch run, stop the "master" process.
On a CLC Workbench, find the master process in the Processes tab in the bottom left side. Click on the little triangle on the right hand side of the master process and choose the option Stop.
