Adding locations
When a Workbench is first installed it has one data location configured by default.
Unless your administrator has set things up otherwise, this location will be named CLC_Data. It points to the following folder on the underlying system:
- Windows: C:\Users\<your_username>\CLC_Data
- Mac: ~/CLC_Data
- Linux: /homefolder/CLC_Data
To add a new location, click on the (![]() ) icon at the top of the Navigation Area, or go to:
) icon at the top of the Navigation Area, or go to:
File | New |
Location (![]() )
)
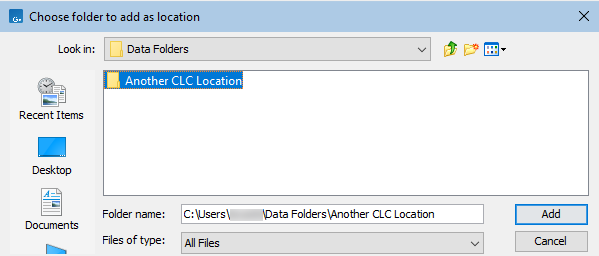
Navigate to the folder you want to add as a data location (see figure 3.5).
The name of the new location will be the name of the folder selected. To see the full path to the folder on the file system, hover the mouse cursor over the location icon
(![]() ).
).

Figure 3.5: Navigating to a folder to use as a new location.
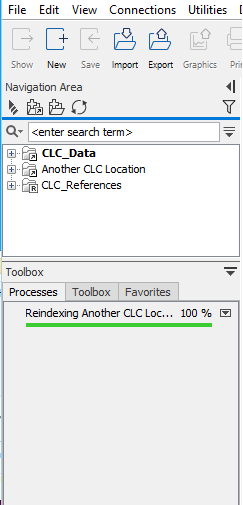
When you click Open, the new location is added to the Navigation Area (figure 3.6).

Figure 3.6: The new location has been added. Because this folder had not been used as a CLC location before, index files are built for this area, as recorded in the Processes tab below the Navigation Area.
Additional notes about CLC locations
Requirements for folders being used as CLC locations:
- You must have permission to read from that folder, and if you plan to save new data elements or update data elements, you must have permission to write to that folder.
- The folder chosen as a CLC location must not a subfolder of any area already being used as a CLC Workbench or CLC Server location.
Folders on a network drive or a removable drive can act as CLC locations. Please note though that interruptions to file access can lead to problems. For example, if you have set up a CLC location on One Drive, start editing a cloning experiment, and your laptop goes to sleep, unsaved work may be lost, and errors relating to the lost connection may be reported. If your CLC locations are on such systems, enabling offline line access (aka "always available files") can avoid such issues.
Locations appear inactive in the Navigation Area if the relevant drive is not available when you start up the Workbench. Once the drive is available, click on the Update All symbol (![]() ) at the top of the Navigation area to refresh the view. All available locations will then be shown as active. There can be sometimes be a short delay before the interface update completes.
) at the top of the Navigation area to refresh the view. All available locations will then be shown as active. There can be sometimes be a short delay before the interface update completes.
Sharing data
Sharing data is possible when a network drive is available to multiple Workbenches. In this case, you can add the same folder as a CLC location on each Workbench. However, it is important to note that data sharing is not actively supported: we do not support concurrent alteration of data and while the software will often detect this situation and handle it appropriately, by for example only allowing read access to all but the one party editing the file, we do not guarantee this. In addition, any functionality that involves using the data search indices, (e.g. search functionality, associating metadata with data), will not work properly for shared data locations. Re-indexing a Data Location can help in the short term, but as soon as a new file is created by another piece of software, the index will be out of date.
If you decide to share data via Workbenches this way, it is vital that when adding a CLC location already used by other Workbenches as a CLC location, the exact same folder in the file system hierarchy as the other Workbenches have used is the one selected to add as a location. Indicating a folder higher up or lower down in the hierarchy will cause problems with the indexing of the files. This can lead to newly created objects made by Workbench A not being found when searching from Workbench B and vice versa, as well as issues with associations to CLC Metadata Tables.
