Running tools
All the analyses in the Toolbox are performed in a step-by-step procedure:
- Data elements to be used in the analysis are selected.
- Any configurations necessary for the tool to run are made.
- The results are opened or saved.
You can open a tool from the Toolbox by double clicking on its name in the Toolbox. In case you do not know which folder the tool you are looking for belongs to, you can use the very useful Launch button (![]() ) and type any part of the tool name in the search field. Double click on the name of the tool in the table.
) and type any part of the tool name in the search field. Double click on the name of the tool in the table.
When you open a tool, a wizard pop up in the center of the View Area. Through a succession of windows you will enter the data you want to analyze, the parameters of the analysis you want to perform and how you want to handle the results of the analysis. You can navigate between windows by clicking the buttons Next and Previous at the bottom of the window.
If you are working on a network and have access to a server, you will first be asked to "Choose where to run" the tool. This window gives the following options:
- Workbench to run the tool on your own computer.
- CLC Server to run the tool on a server.
- Grid to be able to choose from the drop down menu.
After having decided where to run the tool, the next window of the wizard is usually asking you to select the input file(s). This window displays on the left a replicate of your Navigation Area in which only the files that have a format adapted to the tool will be shown. The specific input file formats required by a tool are described for each tool independently in the relevant sections of the manual that you can access easily by clicking on the Help button. For example, you can see a view of the Navigation Area in the workbench and the same Navigation Area in the wizard in figure 8.1. The Assemble Sequences tool will only accept nucleotide sequences (as such or part of a list), which explains why the file called "Read mapping", or the amino acid sequence ATP8a1 are not being displayed in the wizard Navigation Area.
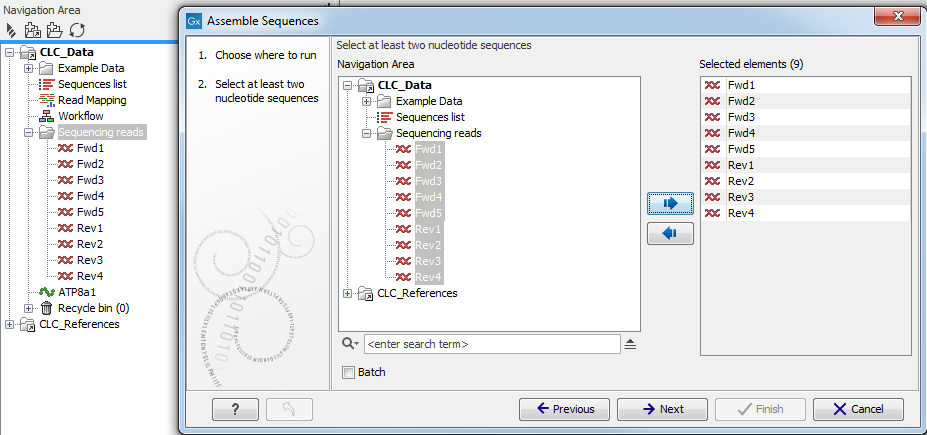
Figure 8.1: You can select input files for the tool from the Navigation Area replicate on the left hand side of the wizard window.
To select a file, you need to move it from the "Navigation Area" view to the "Selected elements" view. You can move a file by clicking on the arrows between the 2 views, or by double click on the file itself. Sometimes, having a file selected in the workbench Navigation Area will automatically put it in the Selected elements view. If you do not wish to work with this file as input, make sure to deselect it. You can deselect by using the arrow to send it out the selected elements view, or again by double clicking on it.
You also have the option in this window to work in batch, which means that the tool will run multiple times using each selected file as an independent dataset (as opposed to treat all selected files as a single input). To learn more about working in batch, please see Batch processing.
Once all elements are selected, you can click Next to proceed to the next step(s) of the wizard. During these steps you are usually required to set parameters for the tool (see figure 8.2 for an example). You can read about specific settings for each tool in the relevant section of the manual accessible directly using the Help button. A pop up window will open to the section of the manual describing the tool you are using. The Reset button will reset all parameters from the pop window to their default values.
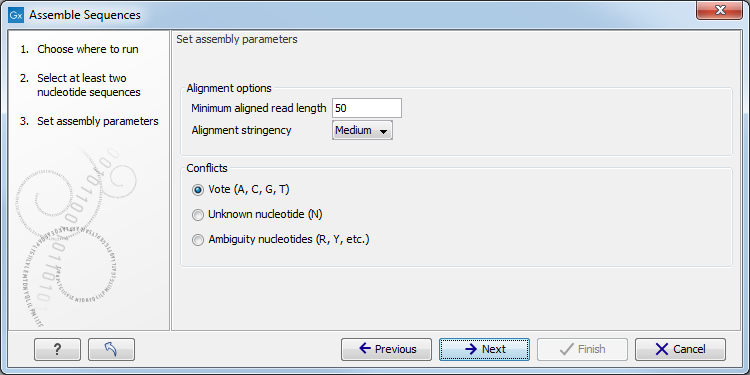
Figure 8.2: An example of a "Set parameters" window.