Managing workflows
Workflows can be managed from the workflow manager:
Help | Manage Workflows (![]() )
)
or using the "Workflows" button (![]() ) in the toolbar and then select "Manage Workflow..." (
) in the toolbar and then select "Manage Workflow..." (![]() ).
).
The workflow manager lists Custom workflows and Ready-to-Use workflows, but the functionalities described below (Configure, Rename, and Uninstall) are only available to custom workflows. You can always create a copy of a Ready-to-Use workflow (by opening the Ready-to-Use workflow and saving a copy in your Navigation Area) to enable the options described below.
Configure
Select the workflow of interest and click on the button labeled Configure. You will be presented with a dialog listing all the reference data that need to be selected. An example is shown in figure 9.42.
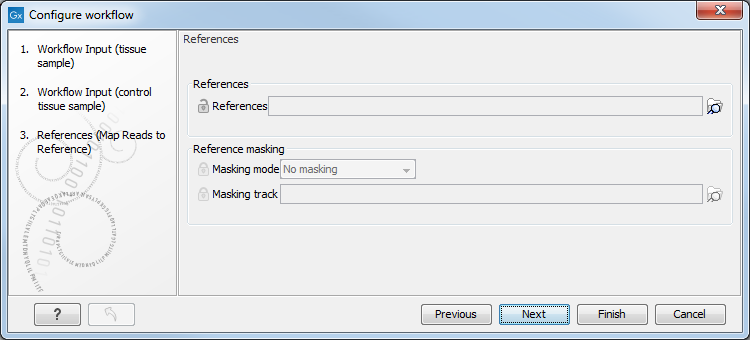
Figure 9.42: Configuring parameters for the workflow.
This dialog also allows you to lock parameters of the workflow (see more about locking in Locking and unlocking parameters).
Note that if the workflow is intended to be executed on a server, it is important to select reference data that is located on the server.
Rename
In addition to the configuration option, it is also possible to rename the workflow. This will change the name of the workflow in the Toolbox. The workflow id (see Workflow identification and versioning) remains the same. To rename an element right click on the element name in the Navigation Area and select "Rename" or click on the F2 button.
Uninstall
Use this button to install a workflow.
Description, Preview and Information
In the right side of the window, you will find three tabs. Description contains the description that was entered when creating the workflow installer (see figure 9.37), the Preview shows a graphical representation of the workflow (figure 9.43), and finally you can get Information about the workflow (figure 9.44).
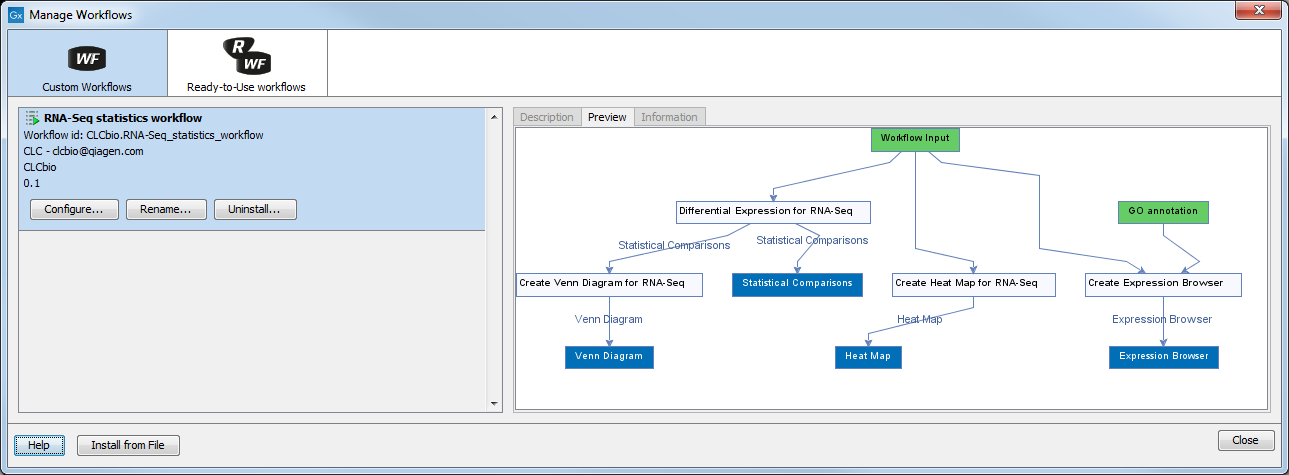
Figure 9.43: Preview of the workflow.
The "Information" field (figure 9.44) contains the following:
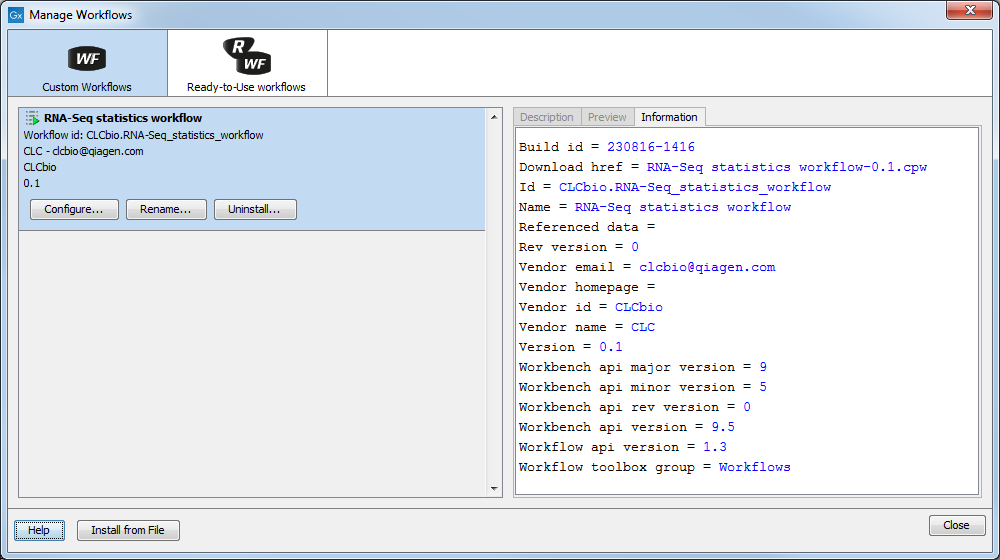
Figure 9.44: Workflow identification and versioning.
- Build id
- The date (day month year) followed by the time (based on a 24 hour time) when the workflow was exported to a file through the Installation button at the bottom of the workflow window. If the workflow was installed locally without going through a file, the build ID will reflect the time of installation.
- Download href
- The name of the workflow .cpw file
- Id
- The unique id of a workflow, by which the workflow is identified
- Major version
- The major version of the workflow
- Minor version
- The minor version of the workflow
- Name
- Name of workflow
- Rev version
- Revision version. The functionality is activated but currently not in use
- Vendor id
- ID of vendor that has created the workflow
- Version
- <Major version>.<Minor version>
- Workbench api version
- Workbench version
- Workflow api version
- Workflow version (a technical number that can be used for troubleshooting)