Defining the table structure
Click on the button labeled Setup Table at the bottom of the view (figure 3.12).
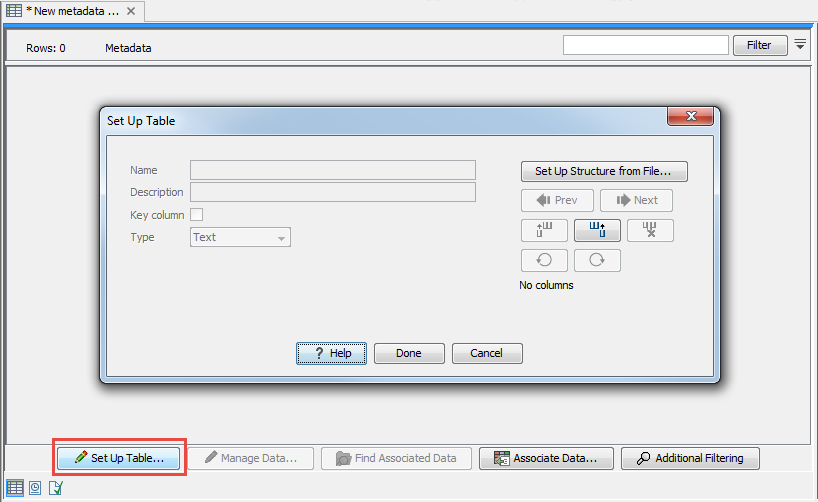
Figure 3.12: Dialog used to add columns to an empty Metadata Table.
To create a metadata table from scratch, use the "Add column right" or "Add column left" buttons (![]() ) to define the table structure with the amount of columns you will need, and edit the fields of each column as needed.
) to define the table structure with the amount of columns you will need, and edit the fields of each column as needed.
To import the table from a file, click on Setup Structure from File. In the dialog that appears (figure 3.13), you need to provide the following information:
- Filename The EXCEL or delimited TEXT file to import. Column names should be in the first row of this file.
- Encoding For text files only: the encoding used to create the file. The default is UTF-8.
- Separator For text files only: The character used to separate the columns. The default is semicolon (;).
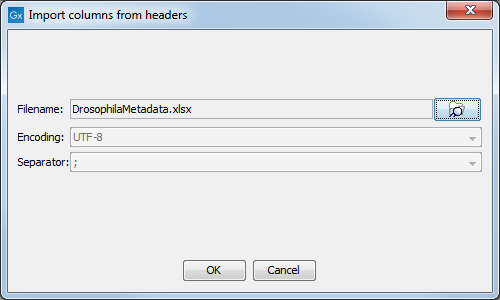
Figure 3.13: Creating a metadata table structure based on an external file.
For each column in the external file, a column will be created in the new metadata table. By default the type of these imported columns is "Text". You will see a reminder to set the column type for each column and to designate one of the columns as the key column.
Edit the following information for each column:
- Name. A mandatory header name or title for the column.
- Description. An optional description of the information that will be held in the column. The description will appear as a tool tip, visible when you hover the mouse cursor over the column name in the metadata table.
- Key column. Put a check in the box in the one column that will be the "key" column. All rows in this column must be populated and all entries in this column must be unique.
- Type. The type of value allowed. The available types are:
- Text Simple text.
- Whole number Integer values, like 42 or -7.
- Decimal number Decimal values, like 3.14 or 1.72e13.
- Yes / No Yes/No or True/False values are accepted. Capitalization is not necessary.
- Date Local dates such as 2015-04-23 for April 23rd, 2015.
- Date and time Local date and time such as 2015-04-23 13:37 for 1:37pm on April 23rd, 2015. Note the use of 24-hour clock and that no time zone information is present.
Navigate between the columns using the (![]() ) Prev and (
) Prev and (![]() ) Next buttons, or by using
left/right arrow keys with Alt key held down.
) Next buttons, or by using
left/right arrow keys with Alt key held down.
Modifications made to a particular column take effect as you navigate to another column, or if you close the dialog using Done.
The (![]() ) and (
) and (![]() ) buttons are used undo and redo changes respectively. When the columns have been configured, click on the button labeled Done.
) buttons are used undo and redo changes respectively. When the columns have been configured, click on the button labeled Done.
Columns may be deleted using the (![]() ) button. After metadata has been imported, additional columns can be added to the table structure. This can be done by importing the altered structure from an external file, where any columns not already in the metadata table will be added. Alternatively, individual columns can be added using the (
) button. After metadata has been imported, additional columns can be added to the table structure. This can be done by importing the altered structure from an external file, where any columns not already in the metadata table will be added. Alternatively, individual columns can be added using the (![]() ) and (
) and (![]() ) buttons, which insert new columns
before and after the current column respectively.
) buttons, which insert new columns
before and after the current column respectively.