Selecting and editing
When you are in Selection mode (Press down the mouse button where the selection should start | move the mouse cursor to where the selection should end | release the mouse button
One of the advantages of the secondary structure 2D view is that it is integrated with other views of the same sequence. This means that any selection made in this view will be reflected in other views (see figure 22.13).
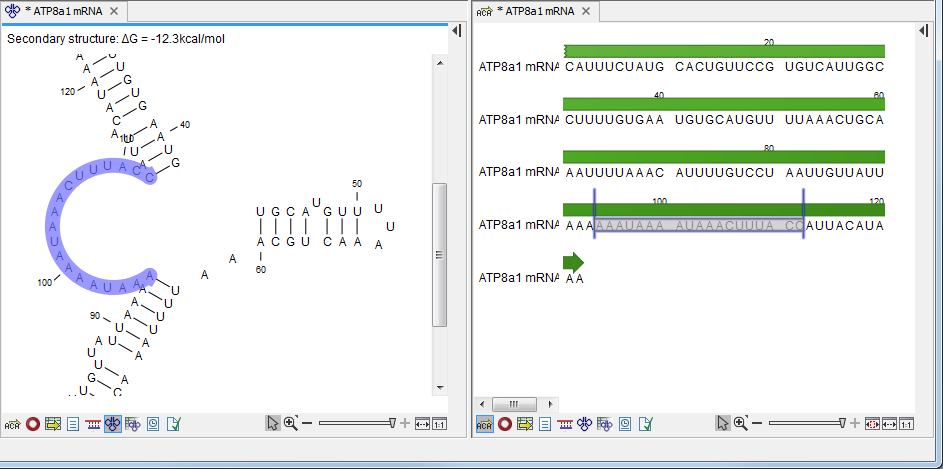
Figure 22.13: A split view of the secondary structure view and a linear sequence view.
If you make a selection in another sequence view, this will will also be reflected in the secondary structure view.
The CLC Genomics Workbench seeks to produce a layout of the structure where none of the elements overlap. However, it may be desirable to manually edit the layout of a structure for ease of understanding or for the purpose of publication.
To edit a structure, first select the Pan (![]() ) mode in the
Tool bar (right-click on the zoom icon below the View Area). Now place the mouse cursor on the opening of a stem, and a
visual indication of the anchor point for turning the substructure
will be shown (see figure 22.14).
) mode in the
Tool bar (right-click on the zoom icon below the View Area). Now place the mouse cursor on the opening of a stem, and a
visual indication of the anchor point for turning the substructure
will be shown (see figure 22.14).
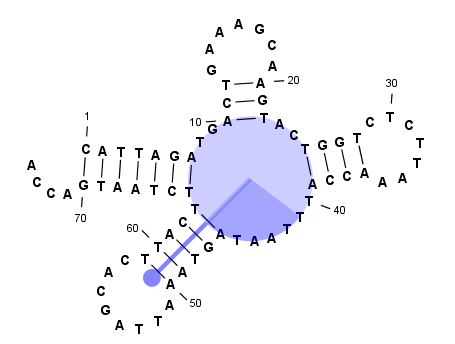
Figure 22.14: The blue circle represents the anchor point for rotating the substructure.
Click and drag to rotate the part of the structure represented by the line going from the anchor point. In order to keep the bases in a relatively sequential arrangement, there is a restriction on how much the substructure can be rotated. The highlighted part of the circle represents the angle where rotating is allowed.
In figure 22.15, the structure shown in figure 22.14 has been modified by dragging with the mouse.
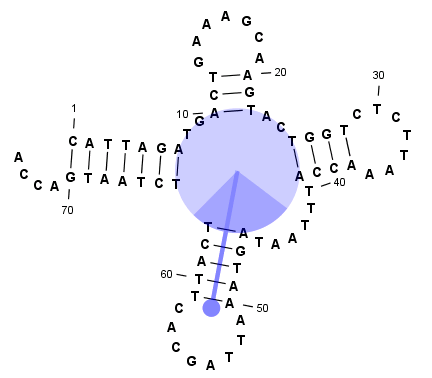
Figure 22.15: The structure has now been rotated.
Press Reset layout in the Side Panel to reset the layout to the way it looked when the structure was predicted.