Node right click menu
Additional options for layout and extraction of subtree data are available when right clicking the nodes (figure 21.15):

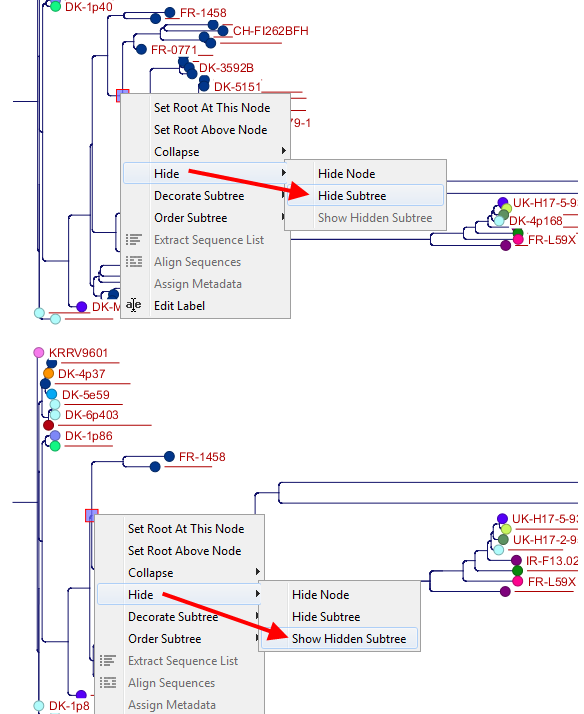
Figure 21.20: A subtree can be hidden by selecting "Hide Subtree" and is shown again when selecting "Show Hidden Subtree" on a parent node.

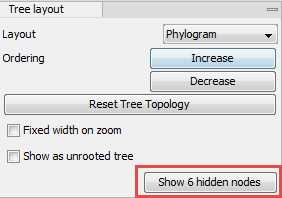
Figure 21.21: When hiding nodes, a new button labeled "Show X hidden nodes" appears in the Side Panel under "Tree Layout". When pressing this button, all hidden nodes are brought back.
- Set Root At This Node Re-root the tree using the selected node as root. Please note that re-rooting will change the tree topology.
- Set Root Above Node Re-root the tree by inserting a node between the selected node and its parent. Useful for rooting trees using an outgroup.
- Collapse Branches associated with a selected node can be collapsed with or without the associated labels. Collapsed branches can be uncollapsed using the Uncollapse option in the same menu.
- Hide Can be used to hide a node or a subtree. Hidden nodes or subtrees can be shown again using the Show Hidden Subtree function on a node which is root in a subtree containing hidden nodes (see figure 21.20). When hiding nodes, a new button appears labeled "Show X hidden nodes" in the Side Panel under "Tree Layout" (figure 21.21). When pressing this button, all hidden nodes are shown again.
- Decorate Subtree A subtree can be labeled with a customized name, and the subtree lines and/or background can be colored. To save the decoration, see figure 21.11 and use option: Save/Restore Settings | Save Tree View Settings On This Tree View only.
- Order Subtree Rearrange leaves and branches in a subtree by Increasing/Decreasing depth, respectively. Alternatively, change the order of a node's children by left clicking and dragging one of the node's children.
- Extract Sequence List Sequences associated with selected leaf nodes are extracted to a new sequence list.
- Align Sequences Sequences associated with selected leaf nodes are extracted and used as input to the Create Alignment tool.
- Assign Metadata Metadata can be added, deleted or modified. To add new metadata categories a new "Name" must be assigned. (This will be the column header in the metadata table). To add a new metadata category, enter a value in the "Value" field. To delete values, highlight the relevant nodes and right click on the selected nodes. In the dialog that appears, use the drop-down list to select the name of the desired metadata category and leave the value field empty. When pressing "Add" the values for the selected metadata category will be deleted from the selected nodes. Metadata can be modified in the same way, but instead of leaving the value field empty, the new value should be entered.
- Edit label Edit the text in the selected node label. Labels can be shown or hidden by using the Side Panel: Label settings | Show internal node labels
