View preferences
There are six groups of default View settings:
- Toolbar lets you choose the size of the toolbar icons, and whether to display names below the icons (figure 4.4).
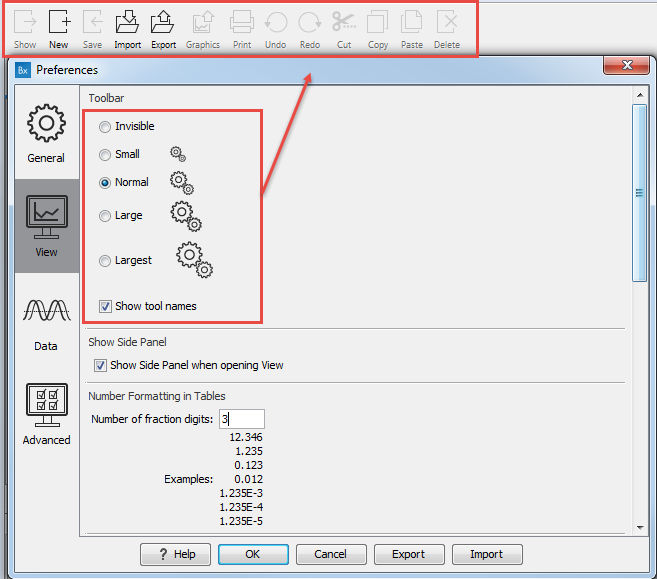
Figure 4.4: Number formatting of tables. - Show Side Panel allows you to choose whether to display the side panel when opening a new view. Note that for any open view, the side panel can be collapsed by clicking on the small triangle at the top left side of the settings area or by using the key combination Ctrl + U (
 + U on Mac).
- Number formatting in tables specifies how the numbers should be formatted in tables (see figure 4.5). The examples below the text field are updated when you change the value so that you can see the effect. After you have changed the preference, you have to re-open your tables to see the effect.
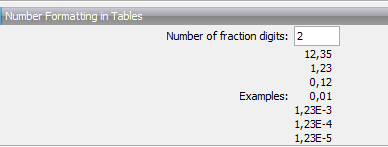
Figure 4.5: Number formatting of tables. - Sequence Representation (legacy) allows you to change the source of the name to use when listing sequence elements in the Navigation Area. This legacy functionality will be retired in a future version of the CLC Main Workbench.
- Name (the default)
- Accession (sequences downloaded from databases like GenBank have an accession number).
- Latin name.
- Latin name (accession).
- Common name.
- Common name (accession).
- User Defined View Settings gives you an overview of the Side Panel settings available for each view (figure 4.6). The content of this list depends on the types of elements that are saved in CLC Locations.
For views with custom view settings defined, the default settings to use can be specified here. Defaults can also be specified via the Manage View Settings dialog described in Side Panel view settings.
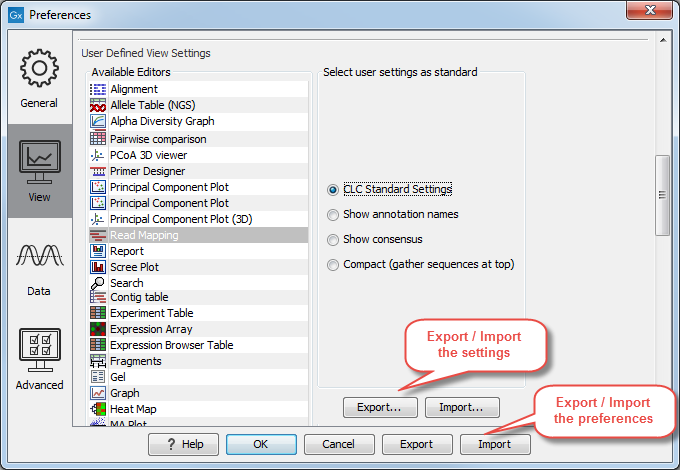
Figure 4.6: View settings for available views are listed in the View tab of Preferences. Default view settings to apply for each view can be specified here.The Export... and Import... buttons just below the view settings list allows settings for one or more view types to be shared with other CLC Workbench users. Select the views of interest in the "Available Editors" list and then click on the Export button. You will have the opportunity to deselect any custom view settings you do not wish to export. When prompted, select a folder to save the exported settings to, and then provide a filename in the field at the top. A file of that name with the suffix
.vsfwill be saved.To import view settings, click on the Import... button and select a (
.vsf) file to import.Settings for a particular view can also be exported and imported via functionality in the Side Panel, as described in Side Panel view settings.
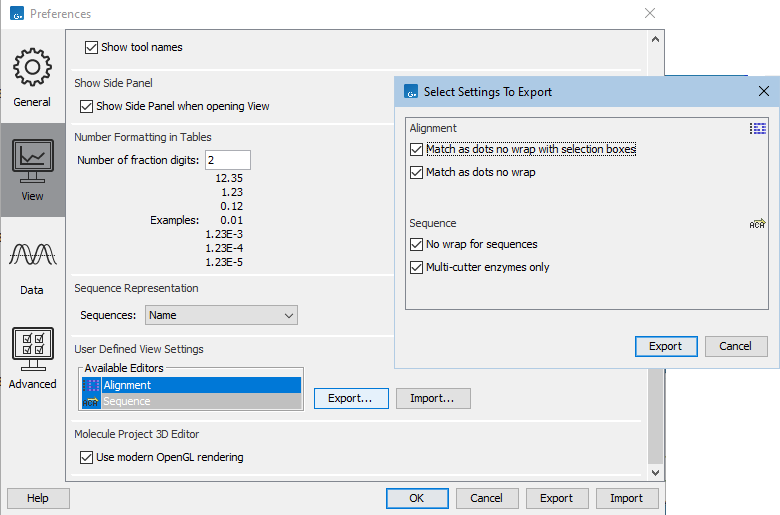
Figure 4.7: View settings for available views are listed in the View tab of Preferences. Settings for multiple views can be exported by selecting the relevant views and then clicking on the Export... button. All custom views are listed. Any not to be exported can be delselected before exporting.When importing view settings, select a
.vsffile and click on the Import... button below the list of view settings. Choose whether to merge into the existing styles, i.e. the existing saved view settings, or whether to overwrite existing settings (figure 4.8). Note: If you choose to overwrite existing settings, all earlier saved view settings are deleted.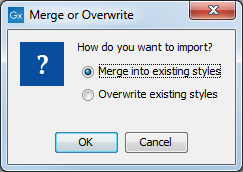
Figure 4.8: When importing view settings, you are asked if you wish to overwrite existing settings or if you wish to merge the new settings into the old ones.Note: The Export and Import buttons referred to here are the ones directly under the list of view settings. The buttons at the bottom of the Preferences dialog are for exporting all preferences, as described in Export/import of preferences.
- Molecule Project 3D Editor gives you the option to turn off the modern OpenGL rendering for Molecule Projects (see Troubleshooting 3D graphics errors).
