Snippets in workflows
When creating a new workflow, you will often have a number of connected elements that are shared between workflows. These components are called snippets. Instead of building workflows from scratch it is possible to reuse components of an existing workflow.
Snippets can be created from an existing workflow by selecting the elements and the arrows connecting the selected elements. Next, you must right-click in the center of one of the selected elements. This will bring up the menu shown in figure 13.19.
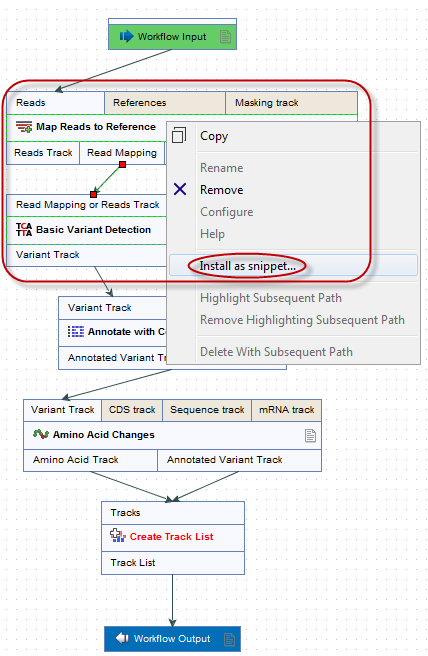
Figure 13.19: The selected elements are highlighted with a red box in this figure. Select "Install as snippet".
When you have clicked on "Install as snippet" the dialog shown in figure 13.20 will appear. The dialog allows you to name the snippet and view the selected elements that are included in the snippet. You are also asked to specify whether or not you want to include the configuration of the selected elements and save it in the snippet or to only save the elements in their default configuration.
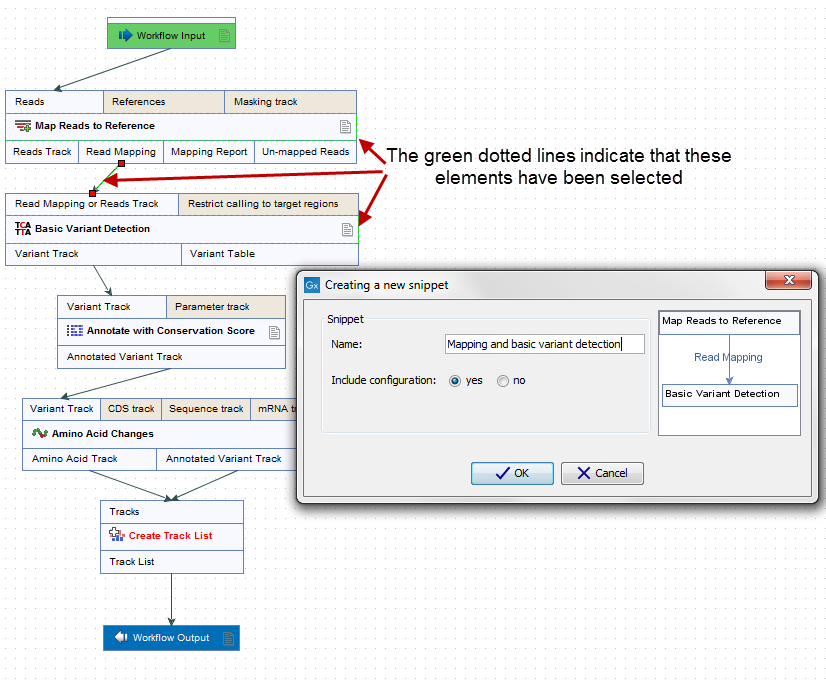
Figure 13.20: In the "Create a new snippet" dialog you can name the snippet and select whether or not you would like to include the configuration. In the right-hand side of the dialog you can see the elements that are included in the snippet.
Click OK. This will install your snippet and the installed snippet will now appear in the Side Panel under the "Snippets" tab (see figure 13.21)
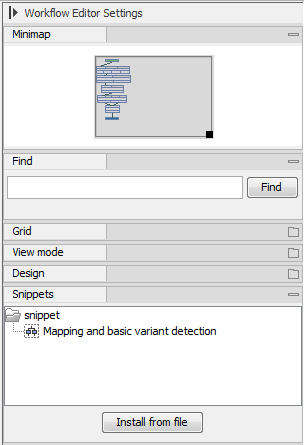
Figure 13.21: When a snippet is installed, it appears in the Side Panel under the "Snippets" tab.
Right-clicking on the installed snippet in the Side Panel will bring up the following options (figure 13.22):
- Add. Adds the snippet to the current open workflow
- View. Opens a dialog showing the snippet, which allows you to see the structure
- Rename. Allows renaming of the snippet.
- Configure. Allows to change the configuration of the installed snippet.
- Uninstall. Removes the snippet.
- Export. Exports the snippet to ones computer, allowing to share it.
- Migrate. Updates the snippet (if required).
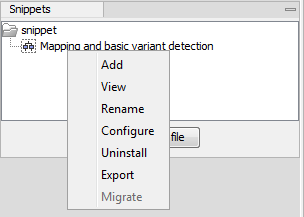
Figure 13.22: Right-clicking on an installed snippet brings up a range of different options.
If you right-click on the top-level folder you get the options shown in figure 13.23:
- Create new group. Creates a new folder under the selected folder.
- Remove group. Removes the selected group (not available for the top-level folder)
- Rename group. Renames the selected group (not available for the top-level folder)
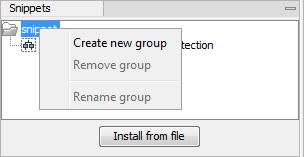
Figure 13.23: Right-clicking on the snippet top-level folder makes it possible to manipulate the groups.
In the Side Panel it is possible to drag and drop a snippet between groups to be able to rearrange and order the snippets as desired. An exported snippet can either be installed by clicking on the 'Install from file' button or by dragging and dropping the exported file directly into the folder where it should be installed.
Add a snippet to a workflow
Snippets can be added to a workflow in two different ways; It can either be added by dragging and dropping the snippet from the Side Panel into the workflow editor, or it can be added by using the "Add element" option that is shown in figure 13.24.
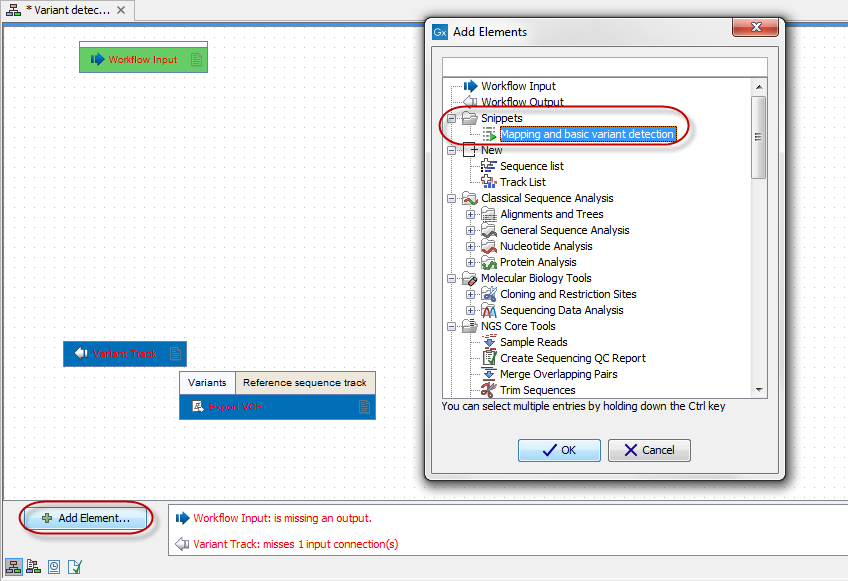
Figure 13.24: Snippets can be added to a workflow in the workflow editor using the 'Add Element' button found in the lower left corner.
