View Area
The View Area is where elements are displayed when opened. Each open element is shown in a view, with a tab at the top containing the element's name (figure 2.2). Mouse-over a tab to see summary information about the element.
Tabs can be dragged to put them in the order desired, and to move them to a different area in a split view (Arrange views in View Area).
Right-clicking on a tab opens a menu with various navigation options, as well as the ability to select tools and viewing options, etc.
Opening and viewing elements in the View Area
There are multiple ways to open an element in the View Area, including:
- Double click on an element in the Navigation Area.
- Right-click on an element in the Navigation Area, and choose the Show option from the context menu.
- Drag elements from the Navigation Area into the Viewing Area.
- Select an element in the Navigation Area and use the keyboard shortcut Ctrl + O (
 + O on macs)
- Choose the option to "Open" results when launching an analysis. (This is only recommended when small numbers of elements will be generated, and where it is not important to save the results directly.)
When opening an element while another element is already open, the newly opened element will become the active tab. Click on any other tab to open it and make it the active view. Alternatively, use the keyboard shortcuts to navigate between tabs: Ctrl + PageUp or PageDown (or ![]() + PageUp or PageDown on macs).
+ PageUp or PageDown on macs).
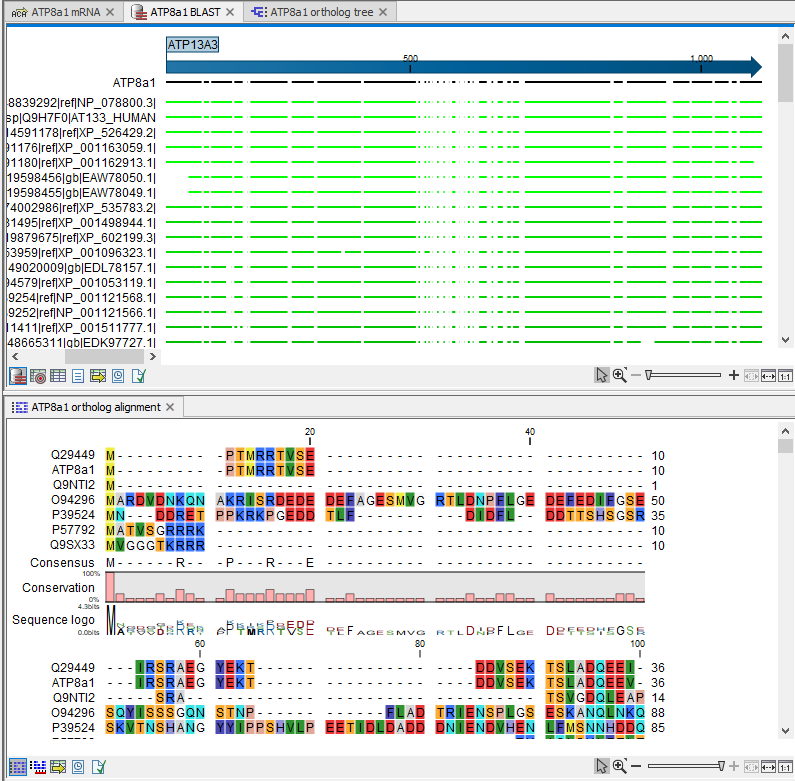
Figure 2.2: Four elements are open in the View Area, organized in 2 areas horizontally - 3 elements in the top area, and one in the bottom. The active view is in the top area, as indicated by the blue bar just under the tabs.
To provide more space for viewing data, you can hide Navigation Area and Toolbox by clicking the hide icon (![]() ) at the top of the Navigation Area. You can also hide the Side Panel using the same icon at the top of the Side Panel.
) at the top of the Navigation Area. You can also hide the Side Panel using the same icon at the top of the Side Panel.
Accessing different views of the same data element
Various views of a data element are available. These can be opened by clicking on the icons at the bottom of an open view. The last two icons are always those for opening the History (![]() ) and Element Info (
) and Element Info (![]() ) views. These are described in History and Element Info views.
) views. These are described in History and Element Info views.
For illustration, the icons for views available for sequence elements are shown in figure 2.3. Clicking on the Show As Circular (![]() ) icon would present the sequence in a circular view. Mouse over any of these icons to see the type of view they represent.
) icon would present the sequence in a circular view. Mouse over any of these icons to see the type of view they represent.
![]()
Figure 2.3: The icons presented at the bottom of an open nucleotide sequence. Clicking on each of these presents a different view of the data.
Linked views
More than one view of a given element can be open at the same time by taking advantage of multiple viewing areas, i.e. split views. To open an additional view of the same data element, keep the Ctrl key (![]() on macs) depressed and then click on the icon for the additional view you wish to open. This will open the new view in a second, horizontal view area. If the View Area is already split horizontally, the new view will be opened in the area not occupied by the original view.
on macs) depressed and then click on the icon for the additional view you wish to open. This will open the new view in a second, horizontal view area. If the View Area is already split horizontally, the new view will be opened in the area not occupied by the original view.
The two open views are linked. For example, selecting a region of sequence in one view would also select it in the other view. An example is shown in figure 2.4, where a region was selected in one view, and that selection is then also shown in the other view.
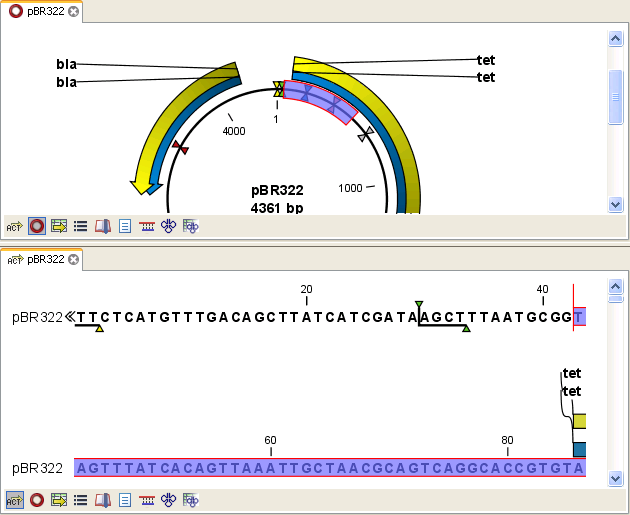
Figure 2.4: A split view of the same sequence element
The linked nature of multiple views can also pertain to separate data elements in some cases. These are described in relevant areas of the manual.
Further information about split views is provided in Arrange views in View Area.
Subsections
- Close views
- Save changes in a view
- Undo/Redo
- Arrange views in View Area
- Moving a view to a different screen
- Side Panel