Adding elements to a workflow
Elements can be added to a workflow in various ways:
- Drag tools directly from the Toolbox in the bottom left panel of the Workbench into the canvas area of the Workflow Editor.
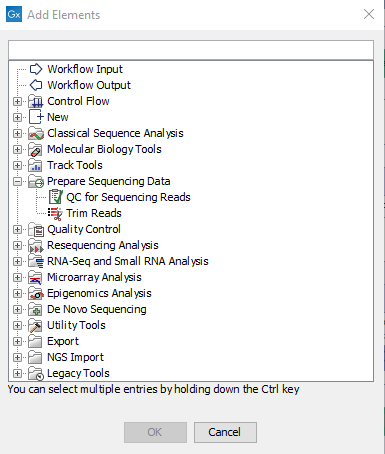
- Use the Add Element dialog, illustrated in figure 12.1. There are multiple ways to open this dialog with all workflow elements listed:
- Click on the Add Element (
 ) button at the bottom of the Workflow Editor.
- Right-click on an empty area of the canvas and select the Add Element (
 ) option.
- Use the keyboard shortcut Shift + Alt + E.

Figure 12.1: Adding elements to a workflow.Select one or more elements you wish to add to the workflow and click OK. Multiple elements can be selected by keeping the Ctrl key (
 on Mac) depressed when selecting elements.
- Click on the Add Element (
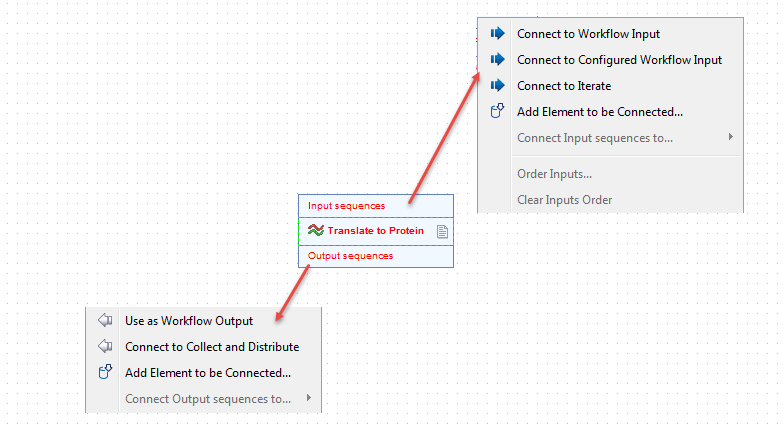
- Use one of the relevant options offered when right-clicking on an input or output channel of a workflow element, as shown in figure 12.2 and figure 12.3.

Figure 12.2: Connection options are shown in menus when you right click on an input or output channel of a workflow element.
Figure 12.3: Right clicking on an output channel brings up a menu with relevant connection options.- Connect to Workflow Input or Connect to Configured Workflow Input and
- Use as Workflow Output to add data to be processed or saved.
- Add Element to be Connected... to open the Add Elements pop-up dialog described above.
- Connect to Iterate and Connect to Collect and Distribute to create an iterative process within a workflow.
Once added, workflow elements can be moved around on the canvas using the 4 arrows icon (![]() ) that appears when hovering on an element.
) that appears when hovering on an element.
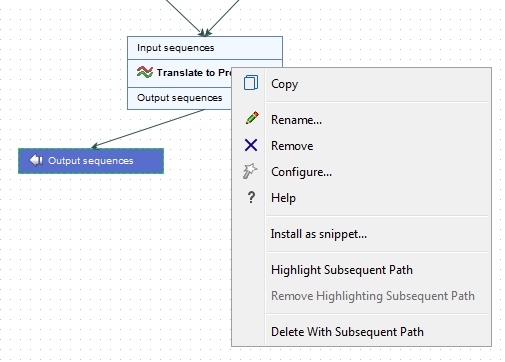
Workflow elements can be removed by selecting them and pressed the delete key, or by right-clicking on the element name and choosing Remove from the context specific menu, as shown in figure 12.4.

Figure 12.4: Right clicking on an element name brings up a context specific menu that includes options for renaming or removing elements.
