Upload sequencing data
Before you can start an analysis, the raw data files (FASTQ or BAM) must be available to RNA-seq Analysis Portal. This section describes how to upload data from your local system. If your sequencing data is stored in Illumina BaseSpace or SRA, go to the step Align and count.To upload data from your local system:
- Click on the Upload data button at the top of the Analysis Portal page to open the Upload sequencing data dialog.
- Select up to 500 files at a time in the box on the left side, either by drag-and-dropping or by clicking on browse to select them. Each FASTQ or BAM file can be up to 200 GB in size.
- In the File to sample section on the right, check that, if using FASTQ files, they are grouped into samples as expected (figure 4). Grouping is based on FASTQ file naming. If the sample grouping is not as expected, check and adjust the file names as necessary. See Appendix A for information about the expected naming pattern.
- Click on Upload.
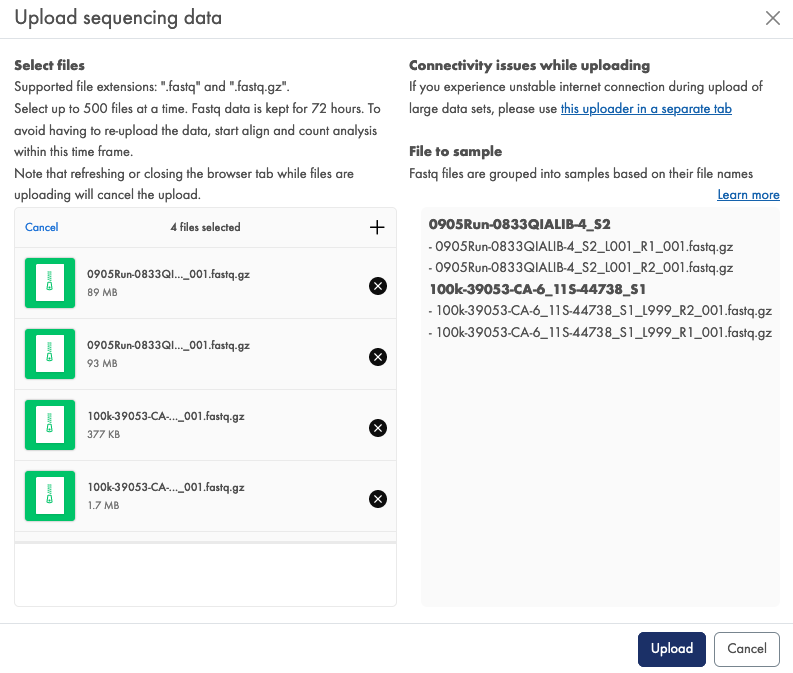
Figure 4: Selection of locally stored data in the Upload sequencing data dialog.
You can monitor upload progress by clicking the Uploads icon next to Help at the right hand side of the navigation bar. When an upload completes, a Align sample data button will appear next to it in the Uploads dropdown (figure 5).
You are now ready to start analyzing your data. You can proceed in two ways:
- Click on the Align sample data button in the Uploads dropdown (figure 5). This will open the Align and count dialog with the sample data pre-selected and lets you to skip a couple of steps. Follow the Align and count instructions from bullet 3.
- Follow the instructions under Align and count from the beginning.

Figure 5: Upload progress is visible from the Uploads icon.
Note: Do not refresh your browser while files are being uploaded as this will cancel the upload.
Uploaded data is kept for 72 hours. To avoid having to upload the data once again, start the align and count analysis within this time frame.
If you upload files for the same sample in different upload actions, those files will still be grouped together as expected and be represented as one sample in the Align and count dialog.
Should you experience connectivity issues like time-outs or unstable internet connection, you can use the alternative uploader. Click the link in the upper right corner in the Upload dialog in the "Connectivity issues" section. This opens in a separate tab in your browser. This tab must stay open during the upload and not be refreshed. Select files as described above and click 'Upload'. The alternative uploader lets the application do multiple retries and reconnections and keeps the session active for +20 hours.