Create experiment
The Create experiment step is for setting up differential expression analysis for groups of samples based on sample metadata. A brief description is below. Refer to the Create experiment dialog section later in this manual for details.

Figure 13: On page 1 of the Create experiment dialog you select project and samples.
- Click on the Create experiment button at the top of the Analysis Portal page. Alternatively, go into the project you selected in the Align and count dialog and click on Create experiment there. This opens the Create experiment dialog (figure 13).
- Select the project with the samples to be analyzed. If you clicked Create experiment from within a project, that project will be preselected.
- Define a subset of the project samples by selecting the relevant vendor, sample kit, sequencing platform, and reference.
It is only possible to run differential expression analyses using samples analyzed with the same sample kit, sequencing platform and reference settings. - From the subset now listed in the bottom half of the dialog, select the samples to analyze.
- Select how to proceed:
- Click on Create QC report to create an experiment containing only the Experiment summary and QC. This allows you to see sample statistics without running a full experiment. The dialog will close.
- Click on Setup experiment to go to page 2 of the dialog and proceed as described in the following.
- Fill in the Experiment name and Experiment description fields.
- Define the sample grouping, either by adding a sample metadata file, or by adding attributes and values manually. Samples can be divided into groups based on the values of each attribute.
In the Experimental design section, specify the details of the analysis.
- In the Test differential expression due to drop-down menu, select the attribute to test for expression effects. In figure 14, we selected Tissue.
- In the While controlling for drop-down menu, you can select an attribute to correct for. In figure 14, we did not select an attribute to correct for.
- In the Experimental setup (comparisons) drop-down menu, select the type of comparison to run:
- Across groups (ANOVA-like)
- All group pairs
- Against control group
- If you selected Against control group, you need to specify a control group attribute value, i.e. the group to compare the remaining groups to.
The number of differential expressions that will created is stated at the bottom of the dialog.
- Click on Start.
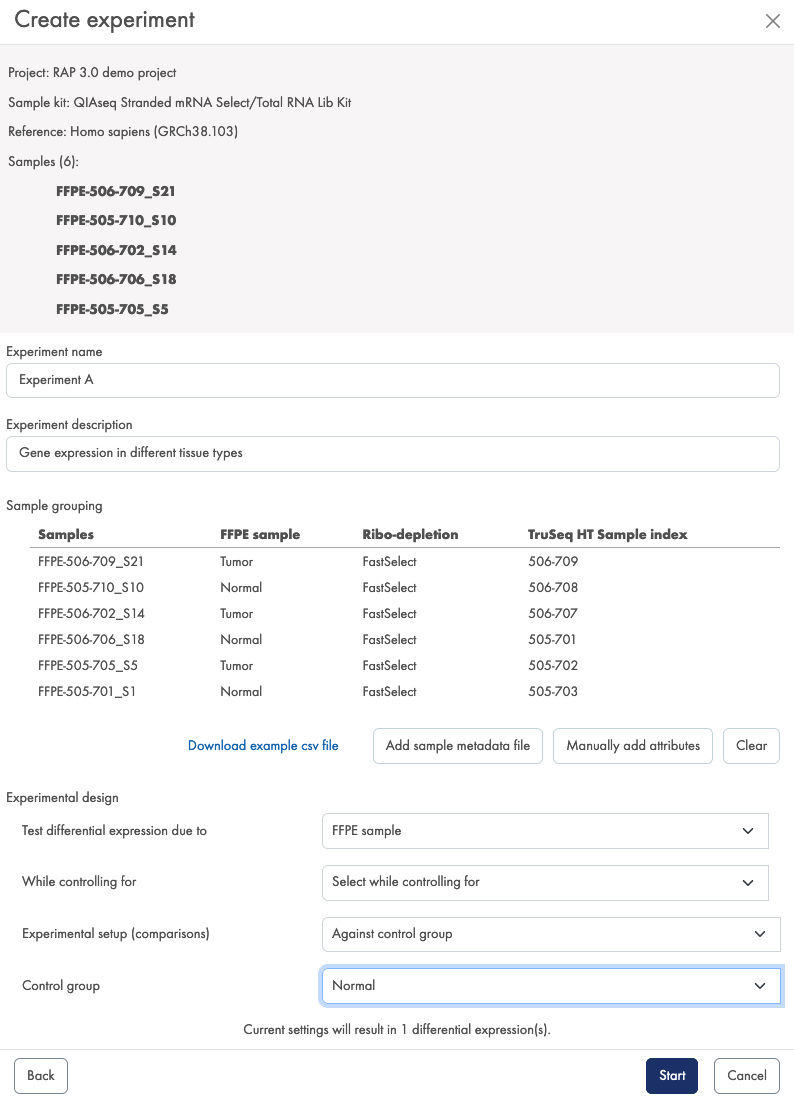
Figure 14: In Create experiment dialog page 2 you define how samples should be compared.
Your experiment will now be created and will be listed under the specified project.
When the analysis is complete, the status of the Experiment overview changes from In progress... to Done and an additional tile, Experiment summary and QC, is added.
Depending on your preferences, you will receive an email notification when your experiment is done, see Email notification setup in the User Interface chapter.
Results of the differential expression analyses can now be inspected and refined.