Installing Velvet
To get started, you need to do the following:- Install Velvet on the server computer. The program and installation information is available from https://github.com/dzerbino/velvet/tree/master. If you have job nodes, Velvet will need to be installed on all the nodes that will be configured to run it.
- Download the scripts and configuration files from http://www.resources.qiagenbioinformatics.com/external-applications/velvet-example.zip. These files have been created assuming that Velvet is installed in
/usr/local/velvet. If it is installed elsewhere, please update the files with the correct path to the program on your server. - Check to ensure execute permissions are set on the velvetg and velveth executable files in the Velvet installation directory. These must be executable by the user that owns the CLC Server process.
- Unzip the velvet-example.zip file and place the
clcbiofolder and its contents in the Velvet installation directory. This contains a script (velvet.sh) that links the two Velvet programs, velvetg and velveth, together. If the Velvet binaries are not in the folder/usr/local/velvet, you will need to edit the line that starts with exe= to include the correct path. - Set the permissions on the velvet.sh script in the clcbio subfolder so that it can be executed by the user that owns the CLC Server process.
- Use the
velvet.xmlfile as a new configuration on the server: Log into the server via the web interface and go to the External applications ( ) tab under Admin (
 ) and click Import Configuration.
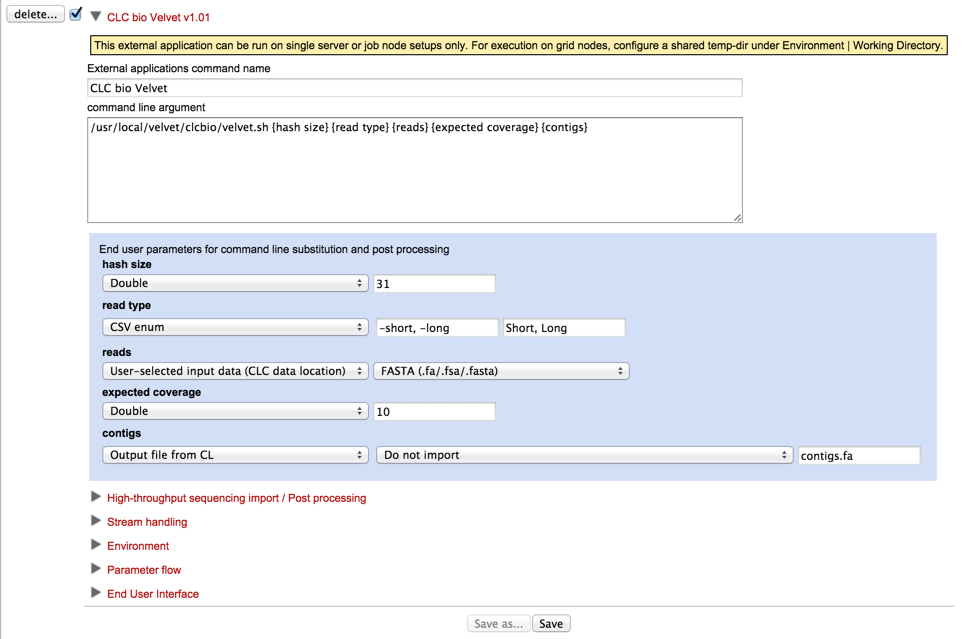
When the configuration has been imported, click the CLC bio Velvet header and you should see a configuration as shown in figure 12.8.

Figure 12.8: The Velvet configuration has been imported. - Update the path to the Velvet installation at the very top if necessary.
If you wish to execute this job on grid nodes, then a shared temp-dir must be specified in the Working directory section of the Execution area of the configuration. See Working directory for details.
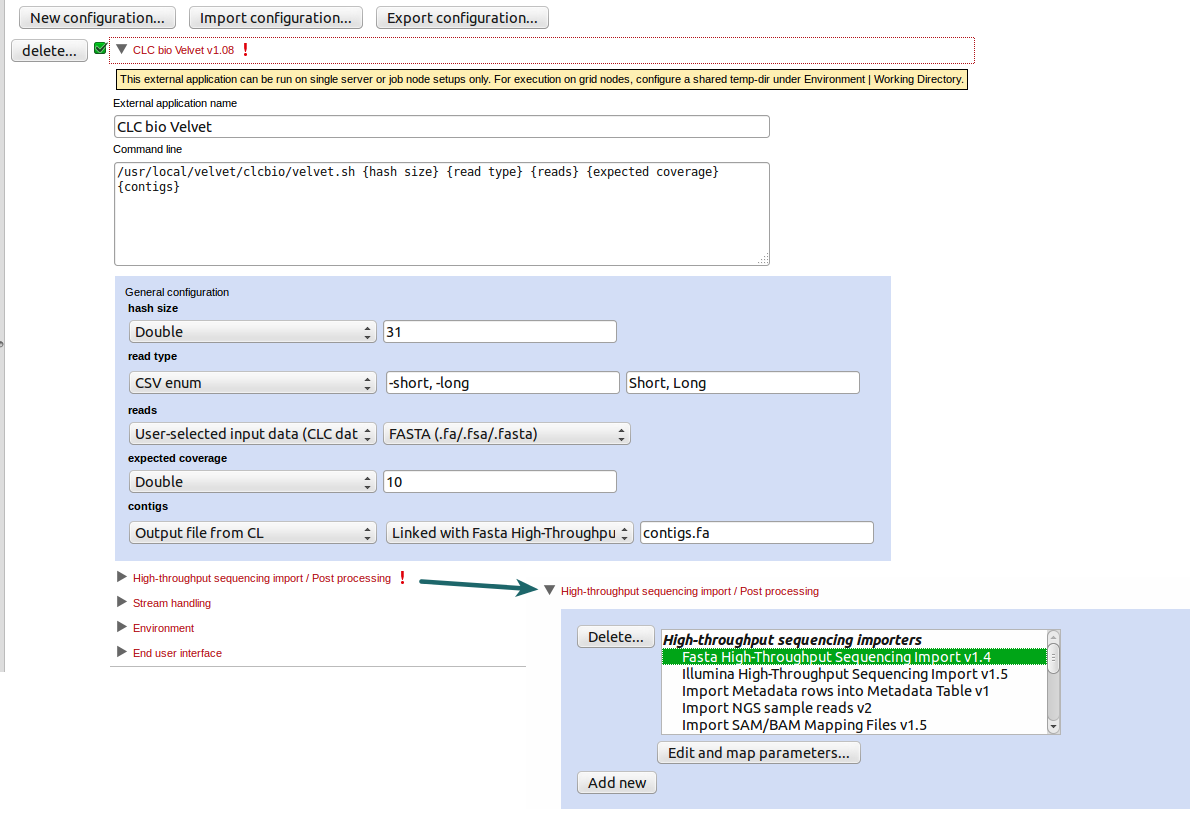
If you see a small red exclamation point beside the external application name, then something is wrong and needs to be attended to. The specific area where there is a problem should also be identified by a red exclamation mark.
This is seen, for example, when the versions of a High-throughput sequencing import or Post-processing step specified in the configuration file is different to the version on the CLC Server. This can occur when the configuration was set up on an older version of the CLC Server than the one running. This situation is shown in figure 12.9. It is easily resolved by expanding the High-throughput sequencing import / Post-processing section, selecting the relevant tool and then saving the configuration.

Figure 12.9: Problems with the configuration are indicated by red exclamation marks, as can be seen here by the external application name and by the area with the problem, the High-throughput sequencing import/ Post-processing section. Expanding this section, the problem can be resolved by selecting the relevant tool.
