File system locations
Data storage configuration is done via the administrative web interface. When logged in as a user with administrative privileges, navigate to the Admin tab, click on the Main configuration tab, and then click on the File system locations heading to expand that section. See figure 3.1.
The options available when configuring a file system location are described below. After making any changes, click on the Save Configuration button at the bottom of this area. Any file system locations that have been added should then appear in the list at the left hand side of the web client.
- Add a new file system location
- Click on the Add New File Location button and then specify the path to the folder where data imported into or created by the CLC Server will be stored. The path provided should point to an existing folder on the server machine that the user running the server process has read and write access to.
If a file system location with the name CLC_References is configured, users logged into a CLC Server from a CLC Genomics Workbench will be able to download data directly to this server area using the Workbench's Reference Data Manager tool. Special conditions apply to this file system location. These are outlined in the section on Reference data management.
- Enable or disable access for all users
- The checkbox to the left of each file system location is used to control whether or not it should be available to users. Access is enabled by default. For example, in a CLC Workbench connected to the CLC Server, each enabled location is visible in the Navigation Area. Unchecking this box and saving the configuration makes the location unavailable for use. Disabled locations are not be visible in a CLC Workbench Navigation Area.
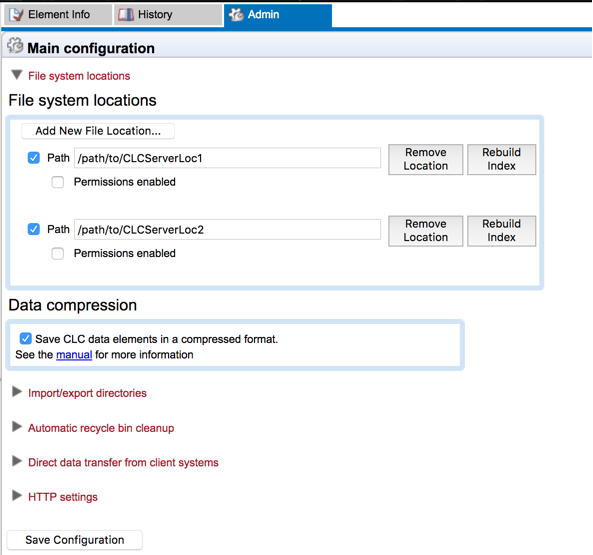
Figure 3.1: File system location settings. The checkmark to the left of a configured location indicates it is available for use by those logged into the server. Internal data compression is enabled by default. This setting applies to all configured file system locations. - Remove a file system location
- Clicking on the Remove Location button beside a particular file system location removes it from the CLC Server. The underlying folder and its contents are not deleted. To re-enable access via the CLC Server, simply configure the same folder as a file system location again.
- Rebuild the index
- The CLC Server maintains an index of all the elements in a data location. This is used when searching for data. There is no need to re-index when adding a new area as a file system location.
Rebuilding the index is described in more detail in rebuilding the index.
- Enable permissions
- Permissions can be configured for all file system locations, except if they are named CLC_References. The first step in doing this for a location is to check the Permissions enabled box just underneath it. After saving this change, that file system location and its contents will initially be available only to admin users. Read and write permissions can then be enabled for each group using a CLC Workbench client, as described in Controlling access to data.