User interface
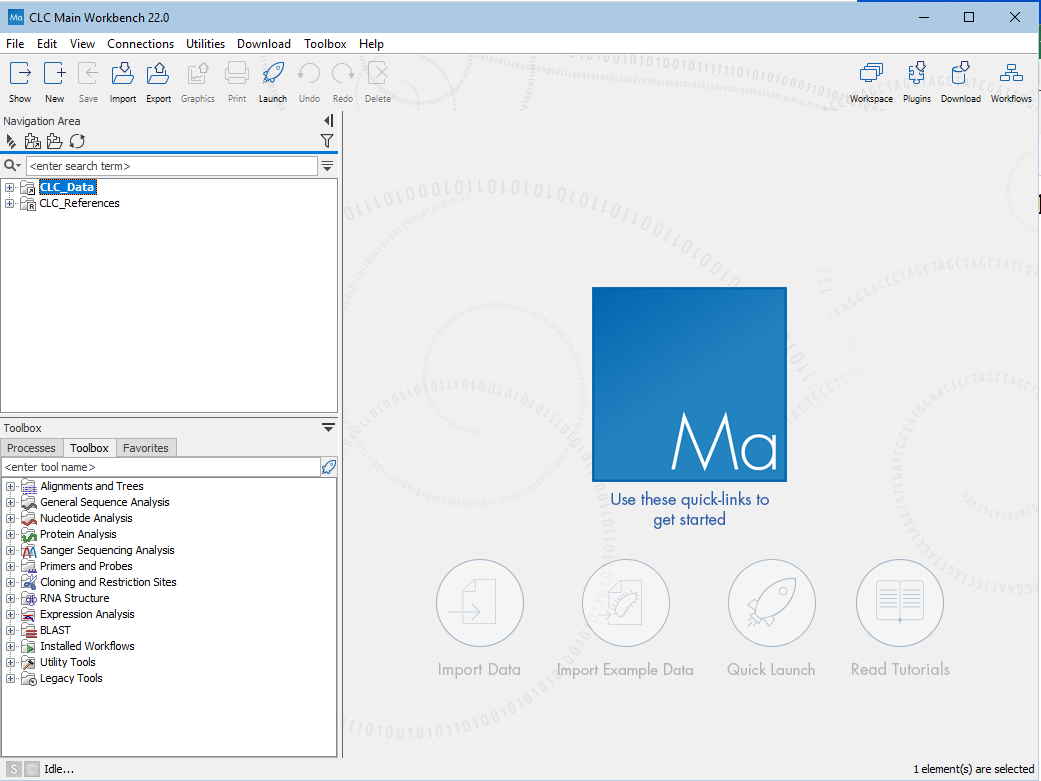
The user interface of the CLC Main Workbench when it is first opened looks like that shown in figure 2.1.
Key areas are listed below with a brief description and links to further information.
- Navigation Area Data elements stored in File Locations are listed in the Navigation Area. (Navigation Area).
- Toolbox Area This area contains 3 tabs:
- Processes Running and finished processes are listed under this tab. (Processes)
- Toolbox Analysis tools and installed workflows are listed and can be launched from under this tab. (Toolbox tab and Quick Launch)
- Favorites Tools you use most often are listed here, and you can add tools you want, for quick access. (Favorites)
- View Area Data and workflow designs can be opened in this area for viewing and editing. (View Area) When elements are open in the View Area, a Side Panel with configuration options will be present on the right hand side. (Side Panel view settings)
- Menu bar and Tool bar Many tools and associated actions can be launched using buttons and options in these areas.
- Status Bar The Workbench status and its connections to other systems is presented in this area. (Processes tab and Status bar)

Figure 2.1: The CLC Workbench interface includes the Navigation Area in the top left, several tabs in the Toolbox area at the bottom left, a large viewing area on the right, menus and toolbars at the top, and a status bar at the bottom.
Different areas of the interface can be hidden or made visible, as desired. Options controlling this are available under the View menu at the top. For example, what is shown in the Toolbox area can be configured using the menu options found under:
View | Show/Hide Toolbox
You can also collapse the various areas by clicking on buttons like (![]() ) or (
) or (![]() ), where they appear. Similar buttons are presented for revealing areas if they are hidden.
), where they appear. Similar buttons are presented for revealing areas if they are hidden.
Subsections
- View Area
- Zoom functionality in the View Area
- Toolbox and Favorites tabs
- Processes tab and Status bar
- History and Element Info views
- Workspace
- List of shortcuts
