Batching workflows
Batch processing refers to running an analysis multiple times, using different inputs for each analysis run. For example, if you have 10 sequence lists and wish to run 10 mapping analyses, one per sequence list, then these 10 analyses could be launched by setting up one batch job. When a job is run in batch mode, parameter settings stay the same for each run. It is just the inputs that are changed.
Ready-to-use workflows with more than one input in the Biomedical Genomics Analysis plugin fall within two categories; 1) the Somatic Cancer workflow that compares tumor and normal samples, and 2) the Hereditary Disease workflows where a trio or a family of four is analyzed in one workflow.
(Figure 17.1) shows an example of the spreadsheet used in the Somatic Cancer workflows.
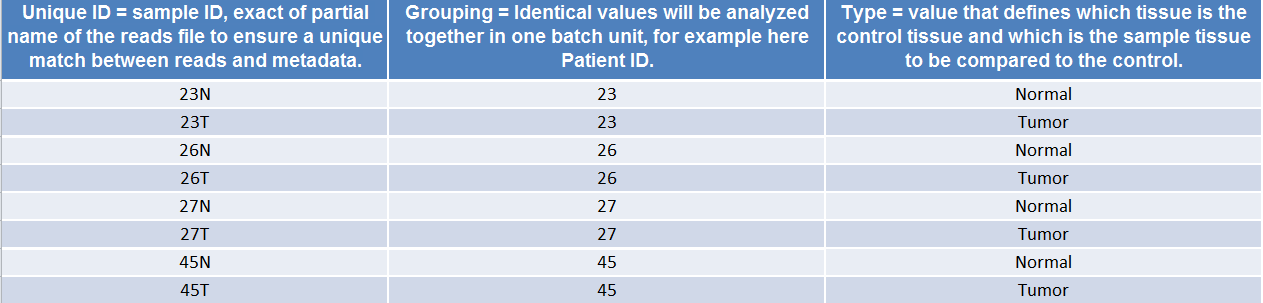
Figure 17.1: Example of a spreadhseet necessary to run a workflow in batch, where the workflow intend to compare two samples.
To launch a workflow with multiple input elements in batch mode, right-click on the name of the workflow in the Toolbox and select the option "Run in Batch Mode..." (figure 17.2).
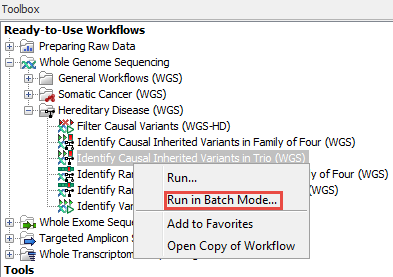
Figure 17.2: The option to "Run in Batch Mode..." appears in the context menu when you right click on the name of an installed workflow that has multiple input elements in the Toolbox panel.
In the first dialog (figure 17.3) select the Excel file containing the information about the data to be analyzed should appear.
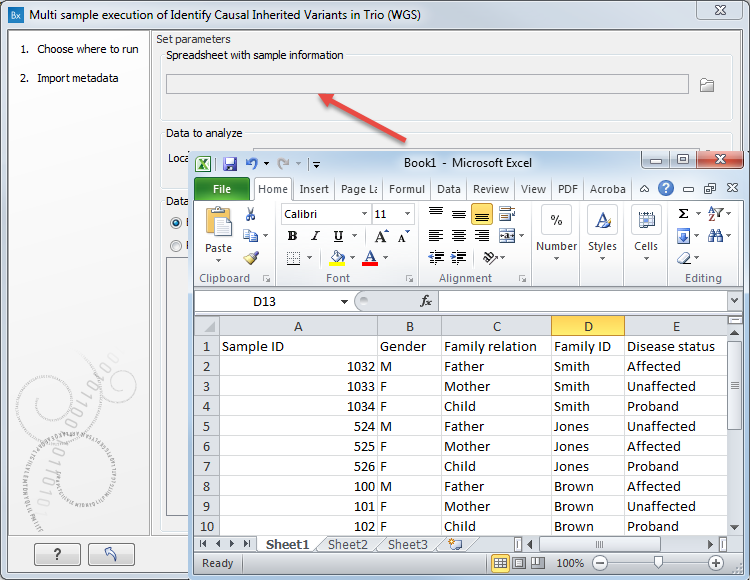
Figure 17.3: Select the information about the data to be analyzed. An example of an Excel sheet with the relevant information is shown.
The data association table fills in with the data that is in the spreadsheet (figure 17.4).
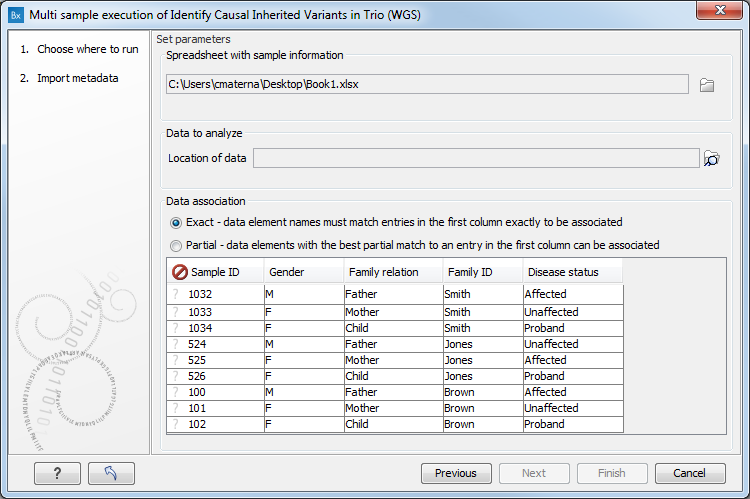
Figure 17.4: When the Excel sheet has been selected, the table found in the lower part of the wizard will show the content of the Excel sheet. The location of the data for this analysis is not yet specified, so a red, no-entry sign is visible in the header of the first column.
Then specify the folder with the data, as shown in figure 17.5: click on the folder icon to the right and select the folder containing the data elements of interest. Subfolders and their contents are not considered unless the subfolder is also selected. Individual data elements cannot be selected.
Then select the appropriate matching scheme - exact or partial. The matching rules applied are the same as those used for metadata association. Exact means that data element names must exactly match an entry in the first column of the Excel file. Partial matching allows for data elements names to be only a part of an entry in the first column (but not the other way around). Partial matching rules are described in detail here: http://resources.qiagenbioinformatics.com/manuals/clcgenomicsworkbench/current/index.php?manual=Associate_Data_Automatically.html.
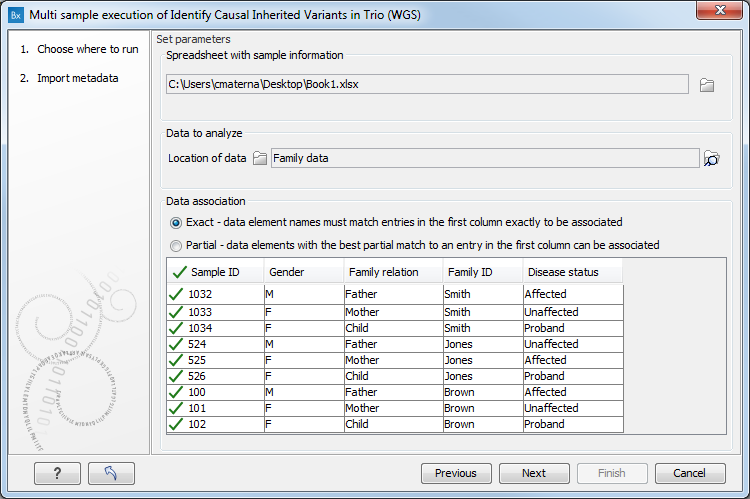
Figure 17.5: Click on a folder or folders that contain the data to be analyzed. Here, the green check mark symbol in the header of the first column in the preview pane indicates that data elements were identified for each of the rows in the Excel sheet.
An icon with a green check mark (![]() ) appears in the table preview next to rows where a data element corresponding to a row of the Excel sheet was uniquely identified. If no match can be made to a given row of the Excel sheet, a question mark (
) appears in the table preview next to rows where a data element corresponding to a row of the Excel sheet was uniquely identified. If no match can be made to a given row of the Excel sheet, a question mark (![]() ) is displayed.
) is displayed.
Graphical symbols are also presented in the header of the first column of the preview pane to give information about the overall status of the matching of rows in the Excel sheet with data elements in the Workbench:
- When no data elements match information in the Excel sheet, a red, no entry symbol (
 ) is displayed. In this situation, the button Next is not enabled. This is the expected state before any data elements have been selected.
- A yellow exclamation mark (
 ) indicates that some, but not all rows in the Excel sheet have been matched to a data element in the selected folder(s).
- A green checkmark (
 ) indicates that all rows in the Excel sheet have been matched to a data element in the selected folder(s).
In the next dialog (figure 17.6), define the following:
- In the Group by drop down menu, select the name of the column containing information that specifies which samples should be analyzed together. In the example, Group by is set to a column specifying family names, because each workflow run will analyze a particular family.
- In the Type drop down menu, select the name of the column containing information that can be mapped to the workflow input type of each data element. In the example, Type is set to the Disease status column, because the workflow inputs are an unaffected parent, an affected parent and a proband, and the Disease status column holds entries that can be mapped to these input types.
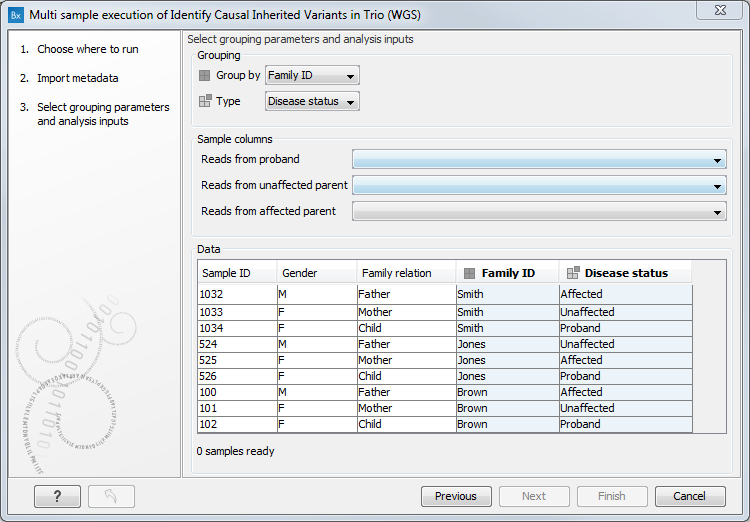
Figure 17.6: A hereditary workflow is being lauched in batch mode. A given workflow run should analyze a family group, so the Group by entry is set to the column Family ID, where family groupings are specified. The workflow input types here are an unaffected parent, an affected parent and a proband. Information that can be mapped to these input types is held in the Disease status column, so this is selected in the Type drop down menu.
Further details about the information in the Type column is now entered in the Sample columns area of the Wizard. For each input type for the workflow being launched, a drop down menu is provided containing the column entries from the column specified as containing the Type information.
Then, for each workflow input type listed, click on the drop down menu and select the term used to identify that particular input type (figure 17.7).
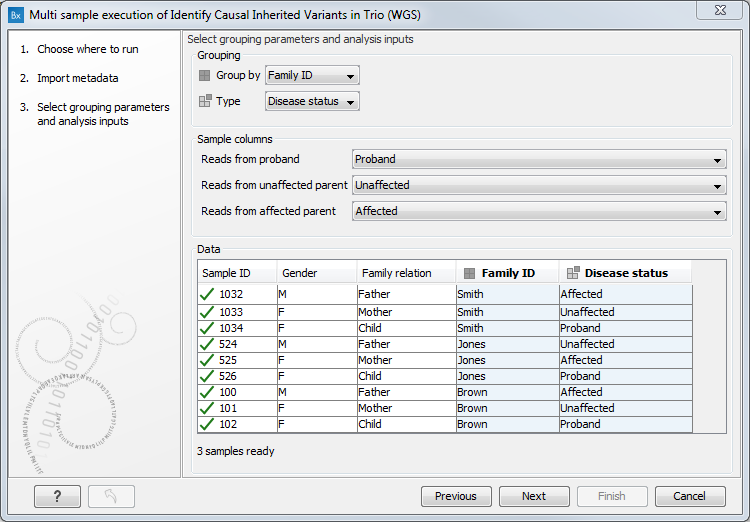
Figure 17.7: The selections shown here indicate that data elements identified as matching rows from the Excel sheet containing "Proband" in the Disease status column should be used as the workflow input type "proband", data elements identified as matching rows containing "Unaffected" should be used as the workflow input type "unaffected parent", and data elements identified as matching rows containing "Affected" should be used as the workflow input type "affected parent".
Click on the button labeled Next and work through any remaining Wizard steps where analysis details are presented and configure any unlocked parameters. Choose where to save the outputs of the analysis and click Finish to start the tool run in batches.
Important note: When running the Identify Rare Disease Causing Mutations ready-to-use workflows in batch mode, the gender of all proband samples in a given batch run must be the same. In other words, if multiple families are analyzed in a batch run, the probands must all be female or they must all be male. This is because proband gender is specified as a parameter, and the parameter values provided when setting up a workflow are then used for each analysis in the batch. The same condition applies when running a workflow in batch mode that includes a Trio Analysis. The gender of all child samples being analyzed in a given batch run must be the same.
#29617#>