How to run the Identify Known Variants in One Sample (WGS) workflow
- Go to the toolbox and double-click on
Toolbox | Ready-to-Use Workflows | Whole Genome Sequencing (
 ) | General Workflows (WGS) | Identify Known Variants from
One Sample (WGS) (
) | General Workflows (WGS) | Identify Known Variants from
One Sample (WGS) ( )
)
- This will open the wizard step shown in
figure 13.8 where you can
select the reads of the sample that should be tested for presence or absence
of your known variants.

Figure 13.8: Select the sequencing reads from the sample you would like to test for your known variants.If several samples from different folders should be analyzed, the tool has to be run in batch mode. This is done by selecting "Batch" and specifying the folders that hold the data you wish to analyse.
Click on the button labeled Next.
- In the next wizard step, select the file containing the known variants you want to identify in the read mapping (figure 13.9).
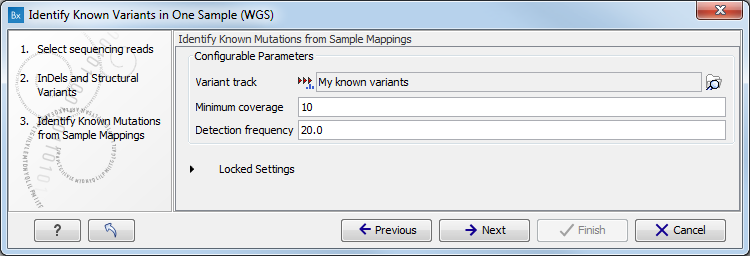
Figure 13.9: Specify the track with the known variants that should be identified.The parameters that can be set are:
- Minimum coverage The minimum number of reads that covers the position of the variant, which is required to set "Sufficient Coverage" to YES.
- Detection frequency The minimum allele frequency that is required to annotate a variant as being present in the sample. The same threshold will also be used to determine if a variant is homozygous or heterozygous. In case the most frequent alternative allele at the position of the considered variant has a frequency of less than this value, the zygosity of the considered variant will be reported as being homozygous.
The parameter "Detection Frequency" will be used in the calculation twice. First, it will report in the result if a variant has been detected (observed frequency > specified frequency) or not (observed frequency <= specified frequency). Moreover, it will determine if a variant should be labeled as heterozygous (frequency of another allele identified at a position of a variant in the alignment > specified frequency) or homozygous (frequency of all other alleles identified at a position of a variant in the alignment < specified frequency).
Click on the button labeled Next.
- In the last wizard step (figure 13.10) you can check the selected settings by clicking on the button labeled Preview All Parameters.
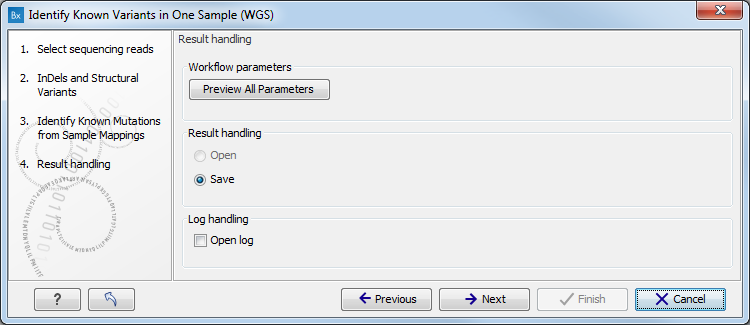
Figure 13.10: Check the settings and save your results.At the bottom of this wizard there are two buttons regarding export functions: one button allows specification of the export format, and the other button (the one labeled "Export Parameters") allows specification of the export destination. When selecting an export location, you will export the analysis parameter settings that were specified for this specific experiment.
- Click on the button labeled OK to go back to the previous dialog box and choose Save.
Note! If you choose to open the results, the results will not be saved automatically. You can always save the results at a later point.