Hereditary Disease
The third category found under each of the three applications WGS, WES, and TAS are the Hereditary Disease workflows that have been developed to support identification of disease causing mutations in families.
Hereditary diseases can be non-cancer related diseases, such as inherited heart diseases or familial hypercholesterolemia, or it can be inherited cancers such as hereditary colorectal cancer or hereditary breast cancer. In addition to the hereditary diseases, family analysis can help researchers identify rare disease causing mutations that can be:
- a new mutation, also known as a de novo mutation, that is only present in a child and not in any of the parents
- a combination of events that occur in the same gene but at different positions in each of the parents, which is not disease causing by itself in either of the parents, but when both variants are found in a child, it becomes disease causing; this type of variant is known as a compound heterozygous variant.
A range of different workflows exist in this category that have been optimized for different purposes. In the current version of the Biomedical Genomics Workbench we offer workflows tailored to two family sizes, 1) a classical "Trio", consisting of a mother, father, and an affected child (the proband), and 2) a "Family of Four", which is mother, father, affected child, and either a sibling (in the workflows that detects rare diseases) or another affected family member (in the workflows that detect inherited diseases), that can be any affected relative such as a sibling, grand parent or the like. The workflows use the "Fixed Ploidy Variant Detection" tool, which is a variant caller that has been designed to call variants in samples with known ploidy from read mapping data. Workflows designed to detect rare variants can both pick up de novo variants as well as compound heterozygous variants. In addition to the Trio and Family of Four workflows, additional workflows exist that have been designed to pick up variants that are inherited from either the mother or the father.
The available workflows in this category are:
- Filter Causal Variants: Removes variants outside the target region (only targeted experiments) and common variants present in publicly available databases. Annotates with gene names, conservation scores, and information from clinically relevant databases.
- Identify Causal Inherited Variants in a Family of Four: Identifies putative disease causing inherited variants by creating a list of variants present in all three affected individuals and subtracting all variants in the unaffected individual. The workflow includes a back-check for all family members.
- Identify Causal Inherited Variants in a Trio: Identifies putative disease causing inherited variants by creating a list of variants present in both affected individuals and subtracting all variants in the unaffected individual. The workflow includes a back-check for all family members
- Identify Rare Disease Causing Mutations in a Family of Four: Identifies de novo and compound heterozygous variants from an extended family of four, where the fourth individual is not affected.
- Identify Rare Disease Causing Mutations in a Trio: Identifies de novo and compound heterozygous variants from a Trio. The workflow includes a back-check for all family members.
- Identify Variants (HD): Calls variants in the mapped and locally realigned reads, removes false positives and, in case of a targeted experiment, removes variants outside the targeted region. Variant calling is performed with the Fixed Ploidy Variant Detection tool.
Although each workflow design to analyze Hereditary Diseases is specific to the data used or the type of analysis, they share several tools and steps:
Below you can find a general description for how to run a workflow in the category "Hereditary diseases". In some workflows, such as the "Filter Causal Variants" workflows you will be asked about a variant track as input. Other workflows start with specifying a reads track. This is the case for all workflows that starts with "Identify Variants.." in the name.
Note that in case of workflows annotating variants using databases available for more than one population, you can select the population that matches best the population your samples are derived from. This will be done in the wizard for populations from the 1000 Genomes Project, while Hapmap populations are specified with the Data Management (![]() ) function before starting the workflows (see Download and configure reference data).
) function before starting the workflows (see Download and configure reference data).
- Select the variant track (figure 11.1)
The panel in the left side of the wizard shows the kind of input that should be provided. Select by double-clicking on the variant track name or click once on the file and then click on the arrow pointing to the right side in the middle of the wizard.

Figure 11.1: Select the variant track from which you would like to filter somatic variants. - Specify the sequencing reads for each family member (figure 11.2).
The sequencing reads from the different family members are specified one at a time in the appropriate window. The panel in the left side of the wizard shows the kind of input that should be provided. Select by double-clicking on the reads file name or click once on the file and then on the arrow pointing to the right side in the middle of the wizard.
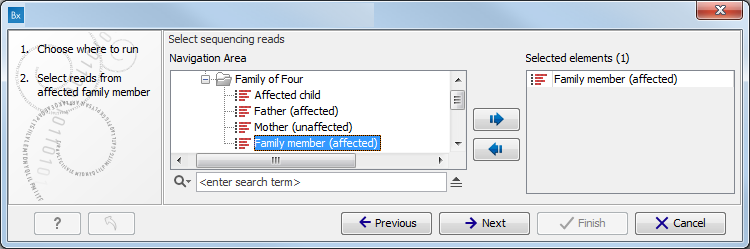
Figure 11.2: Specify the sequencing reads for the appropriate family member. - Specify the targeted region file (figure 11.3).
The targeted region file is a file that specifies which regions have been sequenced, when working with whole exome sequencing or targeted amplicon sequencing data. This file is something that you must provide yourself, as this file depends on the technology used for sequencing. You can obtain the targeted regions file from the vendor of your targeted sequencing reagents.
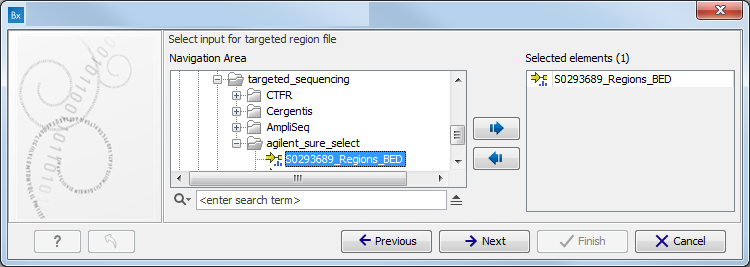
Figure 11.3: Select the targeted region file you used for sequencing. - Specify the affected child's gender for the Trio analysis (figure 11.4).
Some workflows contains a Trio Analysis and thus take the gender of the proband into account.
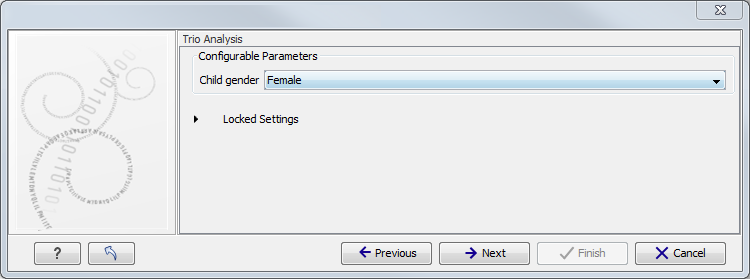
Figure 11.4: Specify the proband's gender. - Specify the parameters for the Fixed Ploidy Variant Detection tool (figure 11.5).
The parameters used by the Fixed Ploidy Variant Detection tool can be adjusted. We have optimized the parameters to the individual analyses, but you may want to tweak some of the parameters to fit your particular sequencing data. A good starting point could be to run an analysis with the default settings.
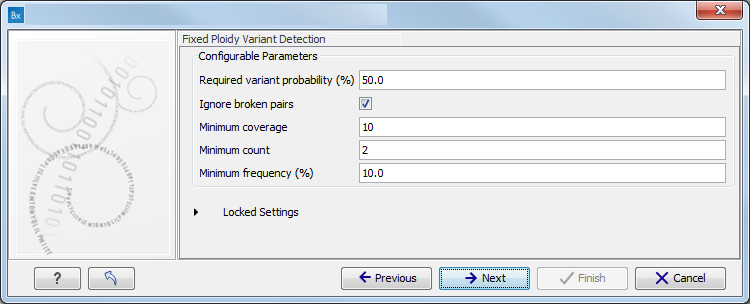
Figure 11.5: Specify the parameters for the Fixed Ploidy Variant Detection tool.The parameters that can be set are:
- Required variant probability is the minimum probability value of the 'variant site' required for the variant to be called. Note that it is not the minimum value of the probability of the individual variant. For the Fixed Ploidy Variant detector, if a variant site - and not the variant itself - passes the variant probability threshold, then the variant with the highest probability at that site will be reported even if the probability of that particular variant might be less than the threshold. For example if the required variant probability is set to 0.9 then the individual probability of the variant called might be less than 0.9 as long as the probability of the entire variant site is greater than 0.9.
- Ignore broken pairs: When ticked, reads from broken pairs are ignored. Broken pairs may arise for a number of reasons, one being erroneous mapping of the reads. In general, variants based on broken pair reads are likely to be less reliable, so ignoring them may reduce the number of spurious variants called. However, broken pairs may also arise for biological reasons (e.g. due to structural variants) and if they are ignored some true variants may go undetected. Please note that ignored broken pair reads will not be considered for any non-specific match filters.
- Minimum coverage: Only variants in regions covered by at least this many reads are called.
- Minimum count: Only variants that are present in at least this many reads are called.
- Minimum frequency: Only variants that are present at least at the specified frequency (calculated as 'count'/'coverage') are called.
For more information about the tool, see http://clcsupport.com/biomedicalgenomicsworkbench/current/index.php?manual=Fixed_Ploidy_Variant_Detection.html.
- Specify the parameters for the QC for Target Sequencing tool (figure 11.6).
When working with targeted data (WES or TAS data), quality checks for the targeted sequencing is included in the workflows. Again, you can choose to use the default settings, or you can choose to adjust the parameters.
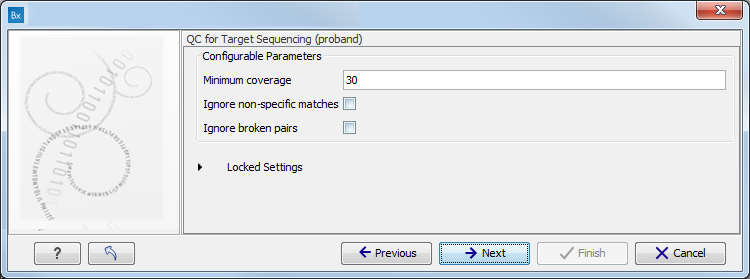
Figure 11.6: Specify the parameters for the QC for Target Sequencing tool.The parameters that can be set are:
- Minimum coverage provides the length of each target region that has at least this coverage.
- Ignore non-specific matches: reads that are non-specifically mapped will be ignored.
- Ignore broken pairs: reads that belong to broken pairs will be ignored.
When asked for it, specify the targeted regions track (figure 11.7).

Figure 11.7: Specify the parameters for the QC for Target Sequencing tool.For more information about the tool, see http://clcsupport.com/biomedicalgenomicsworkbench/current/index.php?manual=QC_Target_Sequencing.html.
- Map Reads to a reference (figure 11.8).
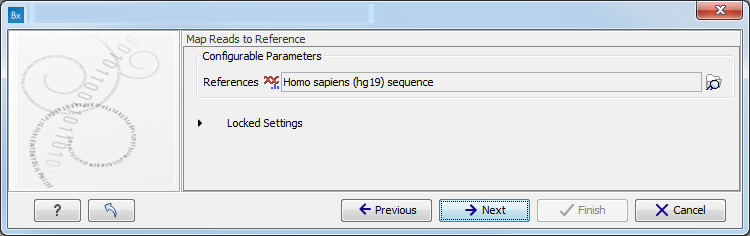
Figure 11.8: Specify the parameters for the QC for Target Sequencing tool.For this tool, the Autodetect paired distances settings is switched off in all Targeted Amplicon Sequencing workflows.
- Specify the target region for the Indels and Structural Variants tool (figure 11.9).
The targeted region file is a file that specifies which regions have been sequenced when working with whole exome sequencing or targeted amplicon sequencing data. This file is something that you must provide yourself, as this file depends on the technology used for sequencing. You can obtain the targeted regions file from the vendor of your targeted sequencing reagents.
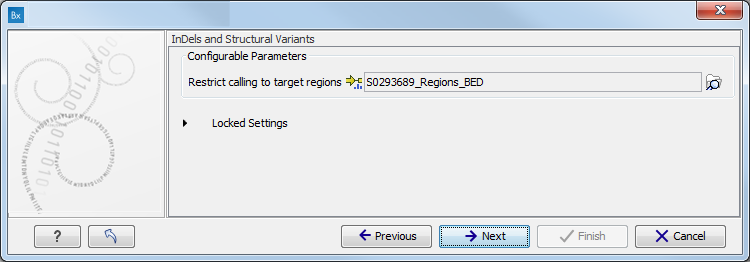
Figure 11.9: Specify the parameters for the Indels and Structural Variants tool. - Specify the relevant 1000 Genomes populations (figure 11.10)
Note: this window will appear in workflows that annotate variants with information from the 1000 Genomes project, unless you have already selected the relevant populations of interest in your reference data management prior to running the workflow.
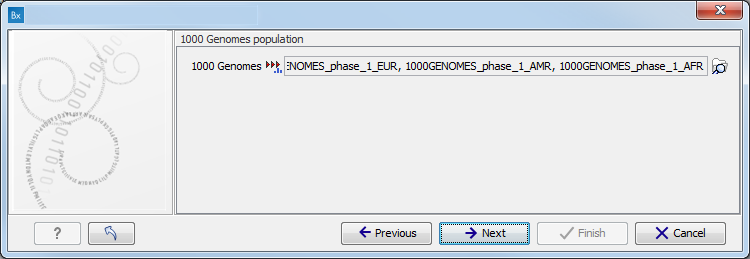
Figure 11.10: Select the relevant 1000 Genomes population(s).Some wizard window will be called Add Information from 1000 Genomes Project or Remove Variants found in the 1000 Genomes Project. Specify the 1000 Genomes population that should be used to add or filter out variants found in the 1000 Genomes project. This can be done using the drop-down list found in this wizard step. Please note that the populations available from the drop-down list can be specified with the Data Management (
 ) function found in the top right corner of the Workbench (see Download and configure reference data).
- Specify the relevant Hapmap populations (figure 11.11)
Note: this window will appear in workflows that annotate variants with information from the Hapmap project, unless you have already selected the relevant populations of interest in your reference data management prior to running the workflow.
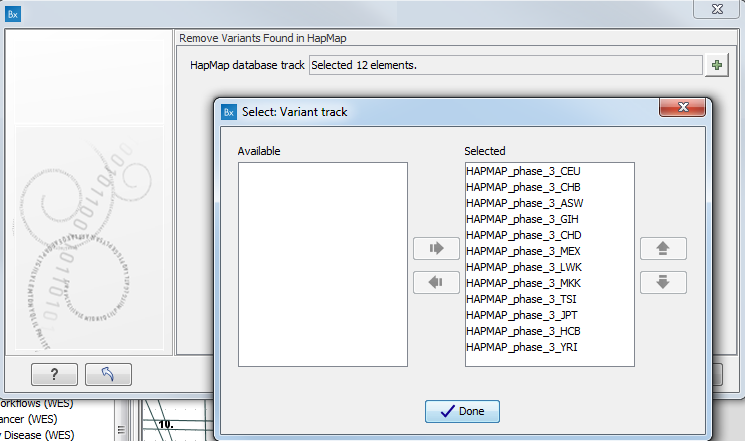
Figure 11.11: Select the relevant Hapmap population(s).Some wizard window will be called Add Information from the Hapmap project or Remove Variants found in Hapmap. Specify the Hapmap population that should be used to add or filter out variants found in the Hapmap project. This can be done using the drop-down list found in this wizard step. Please note that the populations available from the drop-down list can be specified with the Data Management (
) function found in the top right corner of the Workbench (see Download and configure reference data).