Importing metadata rows
Metadata rows may be imported from an external file by clicking the Import Rows button at the bottom of the Metadata Table view. Doing so brings up the dialog shown in figure 3.14.
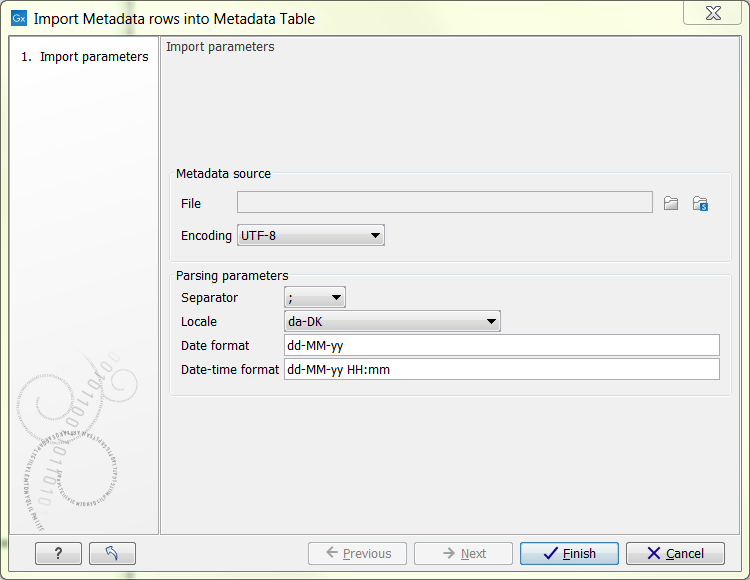
Figure 3.14: Dialog used to import rows into a Metadata Table.
Row import is parameterized as follows:
- File. The file from which to import metadata. Common spreadsheet formats are supported, including .csv, .txt, .xslx, and .xls.
- Encoding. The text encoding of the selected file. Specifying the correct encoding is important to ensure that the character data of the file is correctly interpreted by the Workbench.
- Separator. Select the character used to separate two values in the file.
- Locale. Select the locale used to format numbers and dates within the file.
- Date format. Specifies the date format used in the imported file.
- Date-time format. Specifies the date-time format used in the imported file.
The date and date-time templates uses the Java patterns for date and time formatting.
Meaning of some of the symbols:
Symbol Meaning Example y Year 2004; 04 d Day 10 M/L Month 7; 07; Jul; July; J a am-pm PM h Hour (0-12 am pm) 12 H Hour (0-23) 0 m Minute 30 s Second 55 Examples of using this:
Format Meaning Example dd-MM-yy Short date 31-12-15 yyyy-MM-dd HH:mm Date and Time 2015-11-23 23:35 yyyy-MM-dd'T'HH:mm ISO 8601 (standard) format 2015-11-23T23:35
The imported rows will appear in the Metadata Table view. The Metadata Table may now be saved.
Importing rows may be done also on a Metadata Table that already contains rows. If a key column is present, the import will overwrite values in rows where the key value matches incoming data. If no existing row matches incoming data in the key column, or if no key column has been specified, incoming data will just be appended to the Metadata Table.
Please note: As importing data can potentially result in a lot of rows being added, a separate process for importing is started. You can see the progress and finally the status of this process in the Process tab of the Toolbox. Any errors resulting from an import that failed can also be seen here, or you may have to consult the 'Advanced' tab in the error dialog shown. Typical examples of errors could be selecting the wrong separator or encoding, or wrong date/time formats.