View and edit read mappings
The result of the mapping process is one or more read mappings where the
sequence reads have been aligned (see figure 31.12). If multiple reference sequences were used, this information will be in a table where the actual visual mapping can be opened by double-clicking.
The
result of the assembly process is one or more contigs where the
sequence reads have been aligned (see figure 31.12).
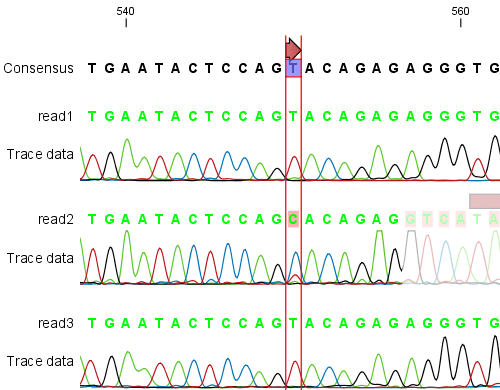
Figure 31.12: The view of a read mapping. Notice that you can zoom to a very detailed level in read mappings.
You can see that color of the residues and trace at the end of one of the reads has been faded. This indicates, that this region has not contributed to the mapping. This may be due to trimming before or during the assembly or due to misalignment to the other reads.
You can easily adjust the trimmed area to include more of the read in the mapping: simply drag the edge of the faded area as shown in figure 31.13.
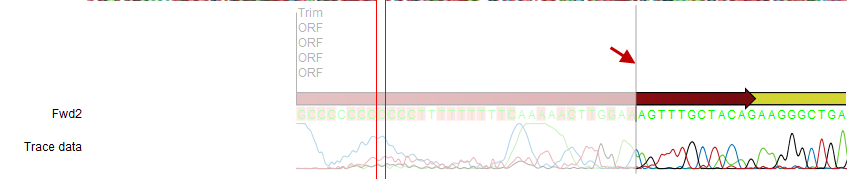
Figure 31.13: Dragging the edge of the faded area.
Note! This is only possible when you can see the residues on the reads. This means that you need to have zoomed in to 100% or more and chosen Compactness levels "Not compact", "Low" or "Packed". Otherwise the handles for dragging are not available (this is done in order to make the visual overview more simple).
If reads have been reversed, this is indicated by red. Otherwise, the residues are colored green. The colors can be changed in the Side Panel as described in View settings in the Side Panel
If you find out that the reversed reads should have been the forward reads and vice versa, you can reverse complement the whole mapping (imagine flipping the whole mapping):
right-click in the empty white area of the mapping | Reverse Complement Sequence
Subsections
- View settings in the Side Panel
- Editing the read mapping
- Sorting reads
- Read conflicts
- Extract parts of a mapping
- Variance table