Editing metadata rows
Metadata rows may be edited by clicking the Manage Data button at the bottom of the Metadata Table view. Starting from a table with no rows, a dialog appears as shown in figure 3.12.
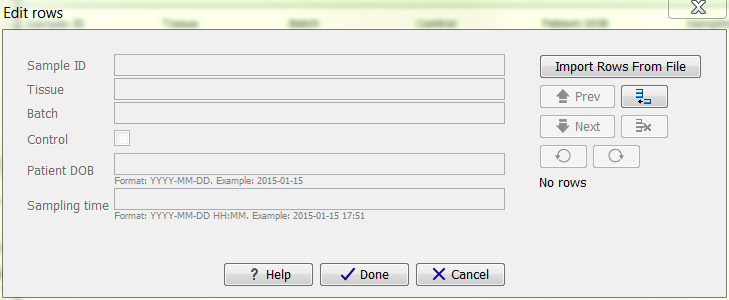
Figure 3.12: Dialog used to add rows to an empty Metadata Table.
You add a new row by clicking the (![]() ) button,
or add them in bulk by clicking the Import Rows from File button (see
section Importing
Metadata Rows).
After adding a new row, you can enter values for each of the columns of
your Metadata Table.
Once rows exist, the dialog appears as shown in figure 3.13.
) button,
or add them in bulk by clicking the Import Rows from File button (see
section Importing
Metadata Rows).
After adding a new row, you can enter values for each of the columns of
your Metadata Table.
Once rows exist, the dialog appears as shown in figure 3.13.
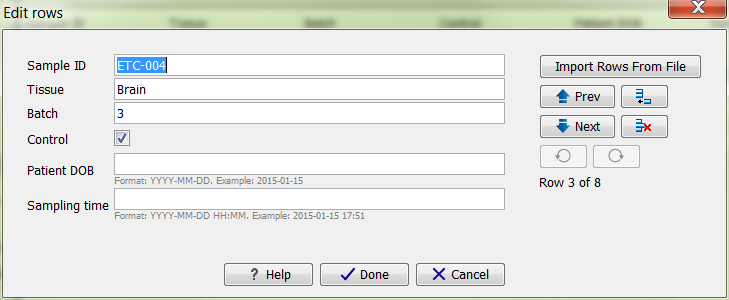
Figure 3.13: Dialog used to edit rows of a Metadata Table.
You navigate between rows by using the (![]() )
Prev and (
)
Prev and (![]() ) Next buttons, or by using the
keyboard arrow keys or Page Up/Page Down/Home/End keys while holding down the Alt key. (The use of the Alt key is necessary only in circumstances where the key being pressed would otherwise have a different effect, say within
a text field, or within the scroll bar that will appear in the dialog if you have many columns). The Enter key navigates to
the next row. Row navigation is reflected in the tabular view underneath the edit dialog.
) Next buttons, or by using the
keyboard arrow keys or Page Up/Page Down/Home/End keys while holding down the Alt key. (The use of the Alt key is necessary only in circumstances where the key being pressed would otherwise have a different effect, say within
a text field, or within the scroll bar that will appear in the dialog if you have many columns). The Enter key navigates to
the next row. Row navigation is reflected in the tabular view underneath the edit dialog.
Modifications made to a particular row take effect as you navigate to another row, or if you close the dialog using Done.
Rows may be deleted using the (![]() ) button, and new rows may be added using
the (
) button, and new rows may be added using
the (![]() ) button. Deletions and additions are immediately visible in the tabular view.
) button. Deletions and additions are immediately visible in the tabular view.
The (![]() ) and (
) and (![]() ) buttons can be used to undo and redo changes, respectively.
) buttons can be used to undo and redo changes, respectively.