Genomics Analysis Portal
The Genomics Analysis Portal is a browser-based, graphical client for the CLC Server, offering a controlled environment for processing samples using workflows. Using the Genomics Analysis Portal, workflows can be launched using fastq format files as input, their progress can be monitored, and results can be accessed. Options in workflows run using Genomics Analysis Portal are locked. Users select input data and the workflow is run using the setting values configured in the installed workflow.
Workflows are made available via Genomics Analysis Portal by the administrator by installing them on the CLC Server and setting group-level permissions to enable access by relevant sets of users.
Configuring workflows and opening analysis results is done using a CLC Genomics Workbench compatible with the version of the CLC Server being used.
The Genomics Analysis Portal manual is available at
https://resources.qiagenbioinformatics.com/manuals/genomicsanalysisportal/current/index.php
The following sections focus on enabling and administering the Genomics Analysis Portal.
Enabling the Genomics Analysis Portal
Enabling the Genomics Analysis Portal is done under the Extensions tab of the web administrative interface, in the "Genomics Analysis Portal" area. By default, Genomics Analysis Portal is not available for use.
Clicking on the Configure button opens a dialog where there is an Enable option and fields for entering credentials for a service user (figure 14.1). This user is used for running the workflows launched using the Genomics Analysis Portal. Service user details must be provided before the Genomics Analysis Portal will be available for users.
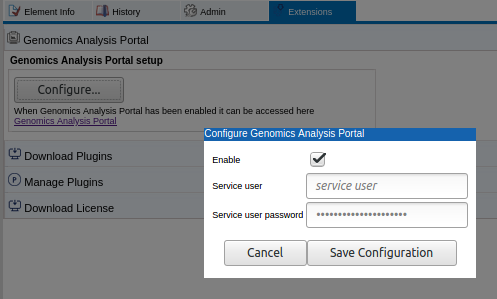
Figure 14.1: Clicking on the Configure button opens a dialog for enabling the Genomics Analysis Portal and entering service user credentials.
Note that the user name and password for the service user can be changed in two places:
- From the location described here, i.e. Genomics Analysis Portal tab under the Extensions tab of the server web administrative interface.
- From the Service user item in the Configuration tile of the Genomics Analysis Portal Administration page, visible when you are logged in as root.
After making changes, the CLC Server needs to be restarted. This can be done using functionality offered in the Status and Management area under the Admin tab, as described in Status and management.
Accessing the Genomics Analysis Portal
The URL to the Genomics Analysis Portal interface is provided just under the Configure button. It takes the form http://serverURL:7777/gap/.
Users enter that URL into a web browser and then log into Genomics Analysis Portal with their CLC Server credentials (figure 14.2).
All CLC Server users are able to log into the Genomics Analysis Portal once it is enabled, but in the Start analysis workflow drop-down menu, they only see workflows they have been authorized to use.
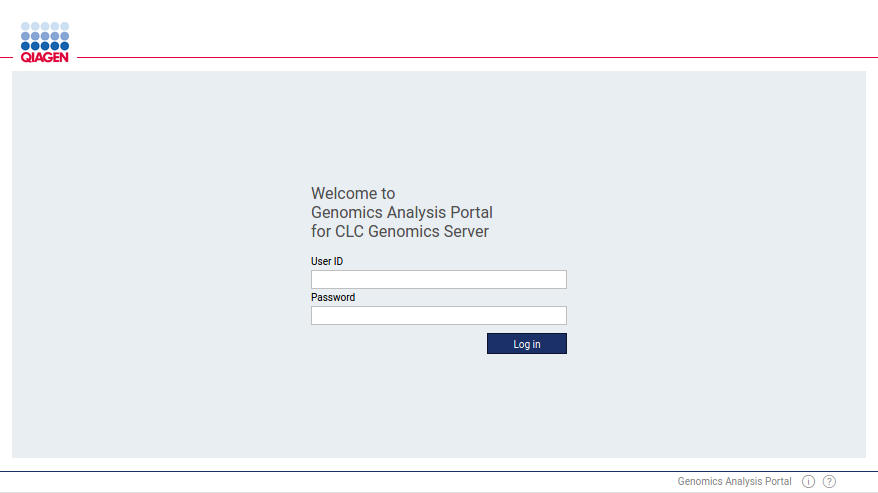
Figure 14.2: Users log into the Genomics Analysis Portal using their CLC Server credentials.
Authorizing access to workflows via the Genomics Analysis Portal
For a workflow to be available via the Genomics Analysis Portal, permissions must be set giving access to it. To do this:
- Go to Admin (
 ) | Global permissions | Workflows
- Locate the relevant installed workflow and click on Edit permissions.
- Choose Only authorized users from selected groups and select the user group(s) who should have access to that workflow (figure 14.3).
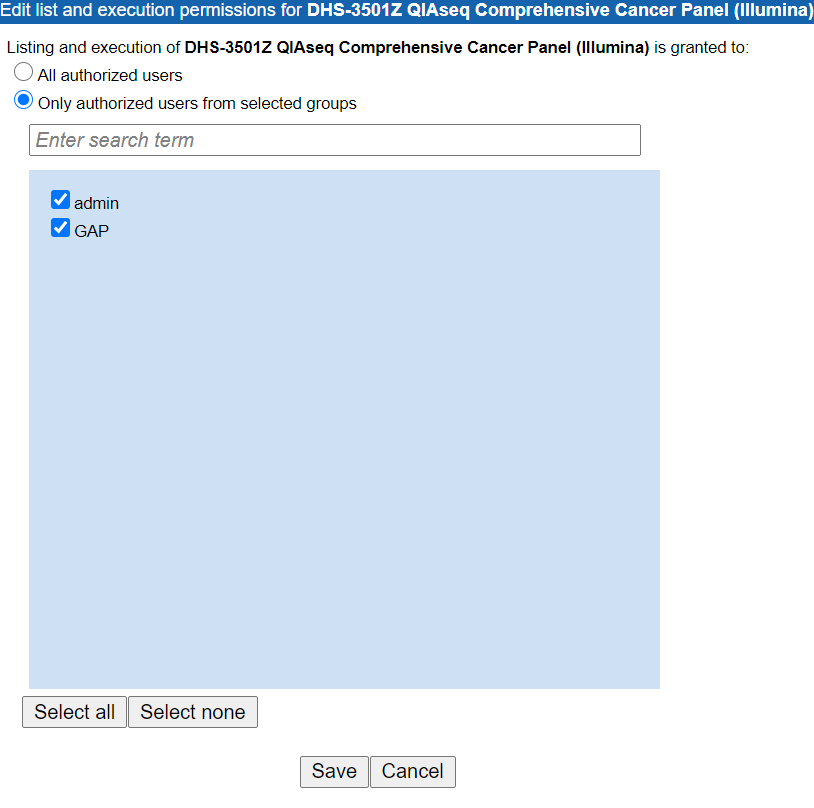
Figure 14.3: Installed workflows must be authorized for one or more groups to it be available via the Genomics Analysis Portal.