Database locations
Adding an SQL database location for use by the CLC Server is possible after the relavant add-on has been purchased and a license supporting it has been installed.
Before adding a database location, you need to set up the database itself. This is described in Database setup.
To set up a database location on the CLC Server,
- Open a web browser and navigate to the web administrative interface.
- Go to the Admin tab and open the Main configuration section.
- Under the Database locations heading, click the Add New Database Location button. This pops a window like that shown in figure 3.2.
- To configure the database location, enter the host and port information and select the database type. The Database type drop down list contains the types for which drivers are available. A connection string is generated from this. A custom connection string can be entered instead. Add the user name and password information for the user role on your Database Management System (DBMS), see Database set-up.
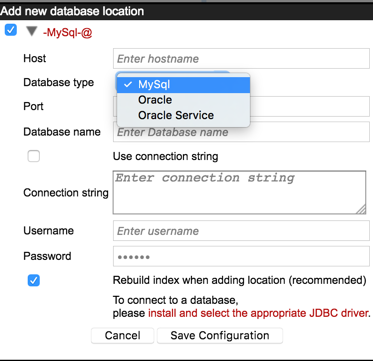
Figure 3.2: Adding a new database location. Here, two drivers are available to the CLC Server, a MySQL driver and an Oracle driver.If an Oracle database driver is available to the CLC Server, two items will be presented in the Database type drop down list, as shown in figure 3.2. The one shown as "Oracle" is the traditional one, which uses the SID style (e.g.
jdbc:oracle:thin:@[HOST][:PORT]:SID). The other, "Oracle Service", uses the thin-style service name
(e.g.jdbc:oracle:thin:@//[HOST][:PORT]/SERVICE). - Click the Save Configuration button to save the configuration.
The newly added database location should now appear in the Navigation Area in the left hand side of the window.